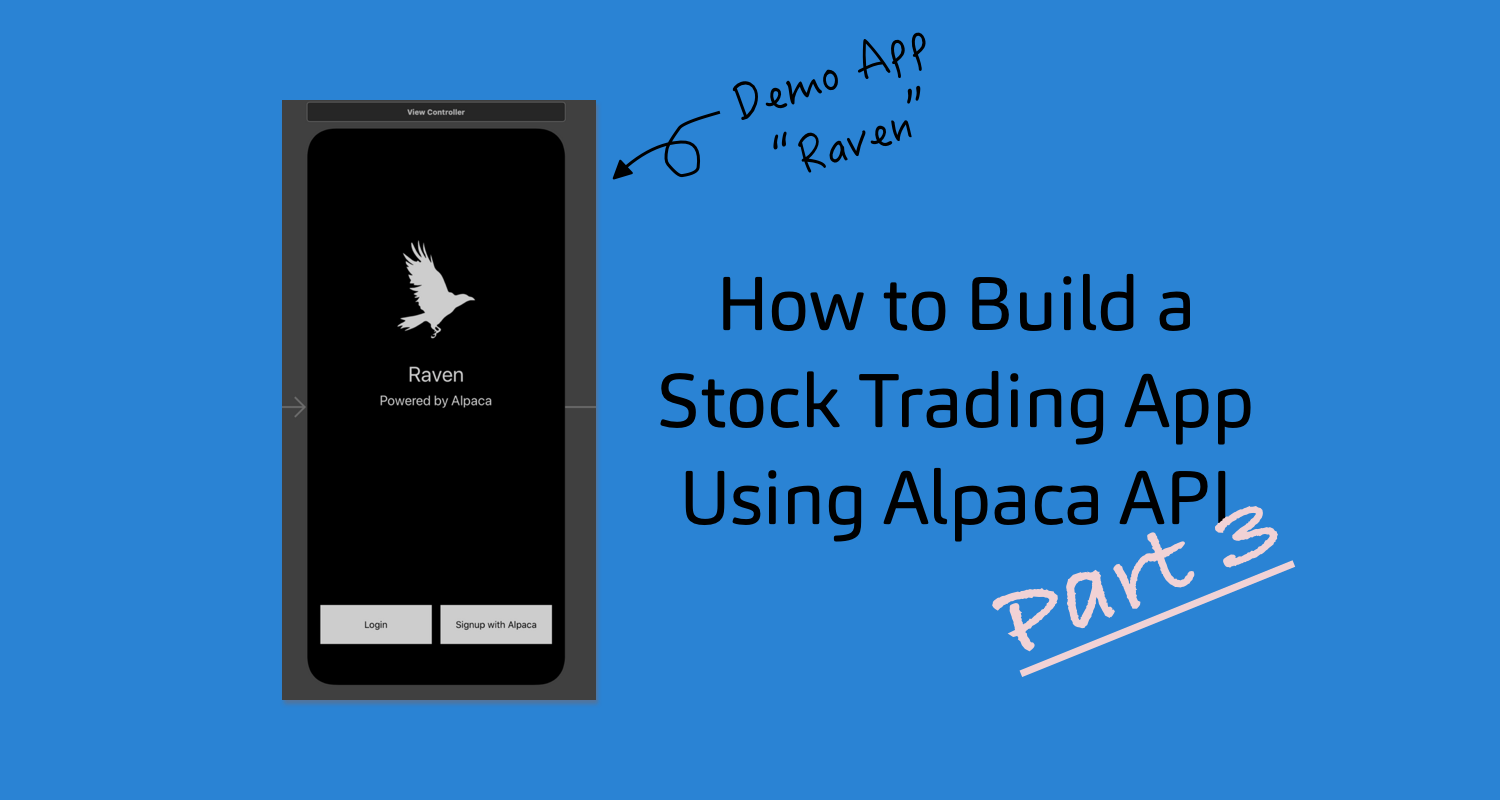
How to Build a Fintech Investing App w/ Alpaca API (Raven - Part 3)

Welcome back, let's recap!
This is the third article in the series where we are developing a demo iPhone app - Raven, utilizing the Alpaca API.
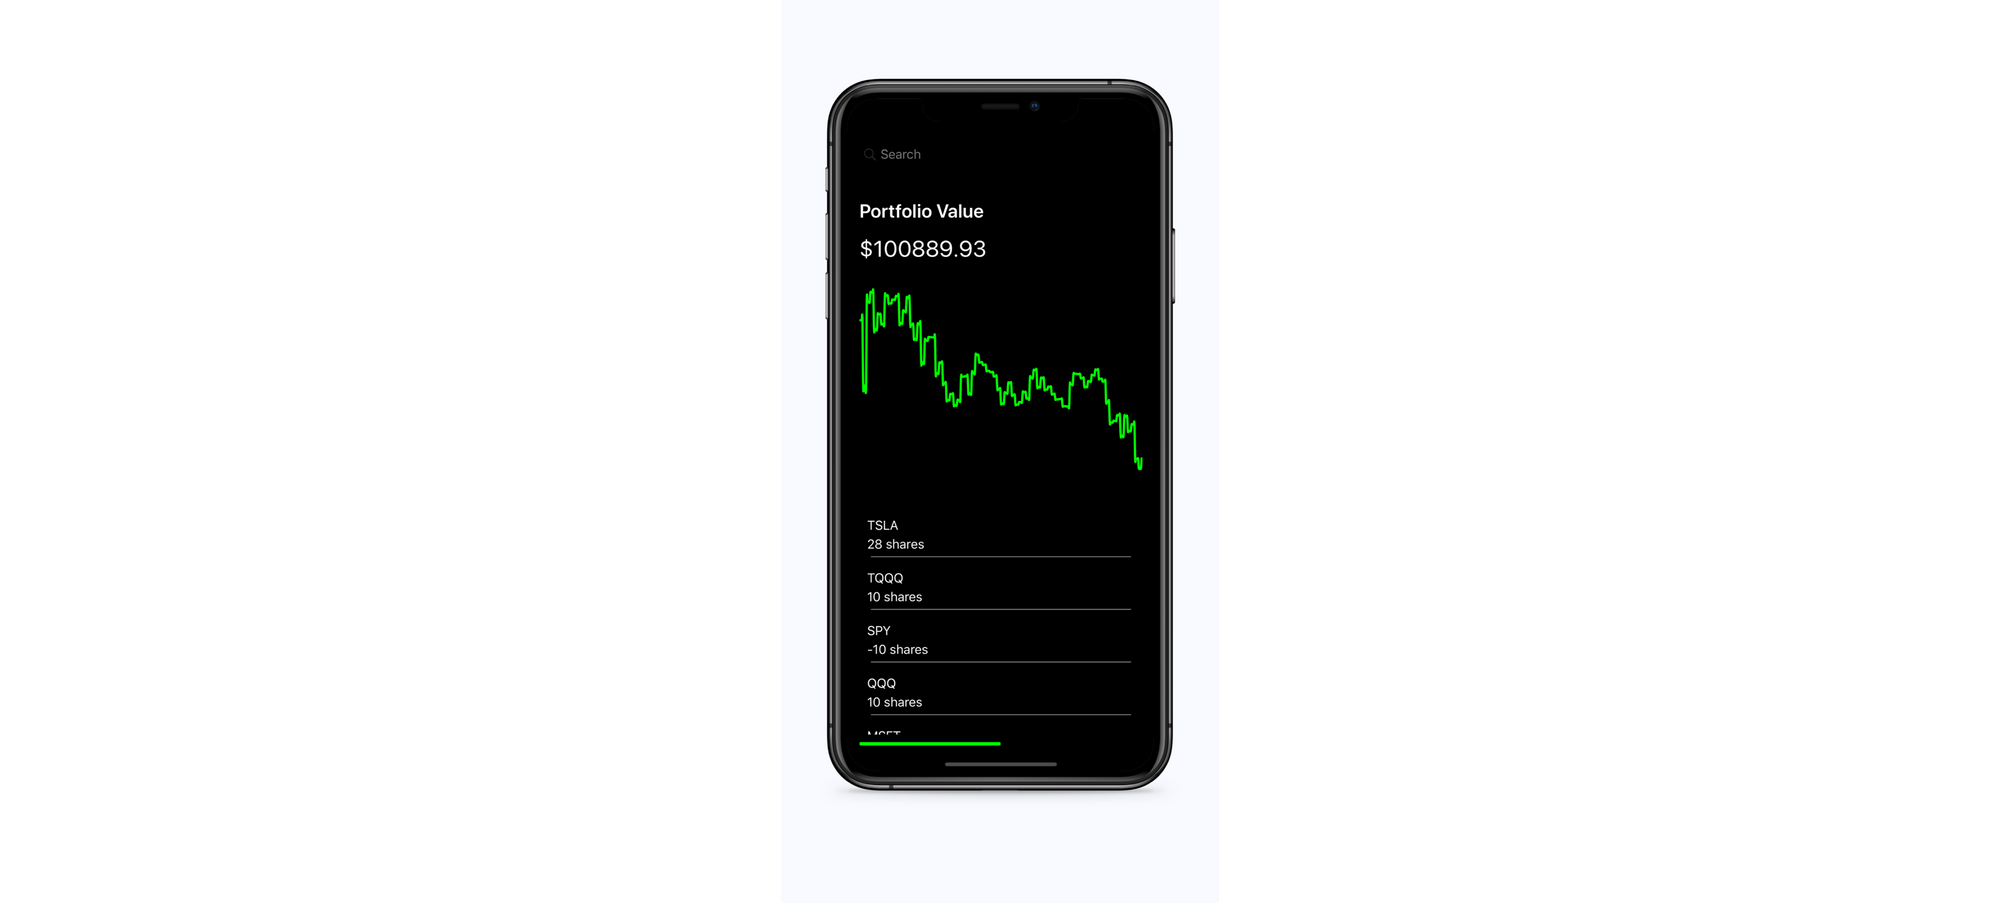
In the previous articles, we talked about building out the landing page that a registered user will see when they log onto the app. This mainly included showing a graph of their portfolio performance, which we updated every minute, and a list showcasing their positions, shown below.
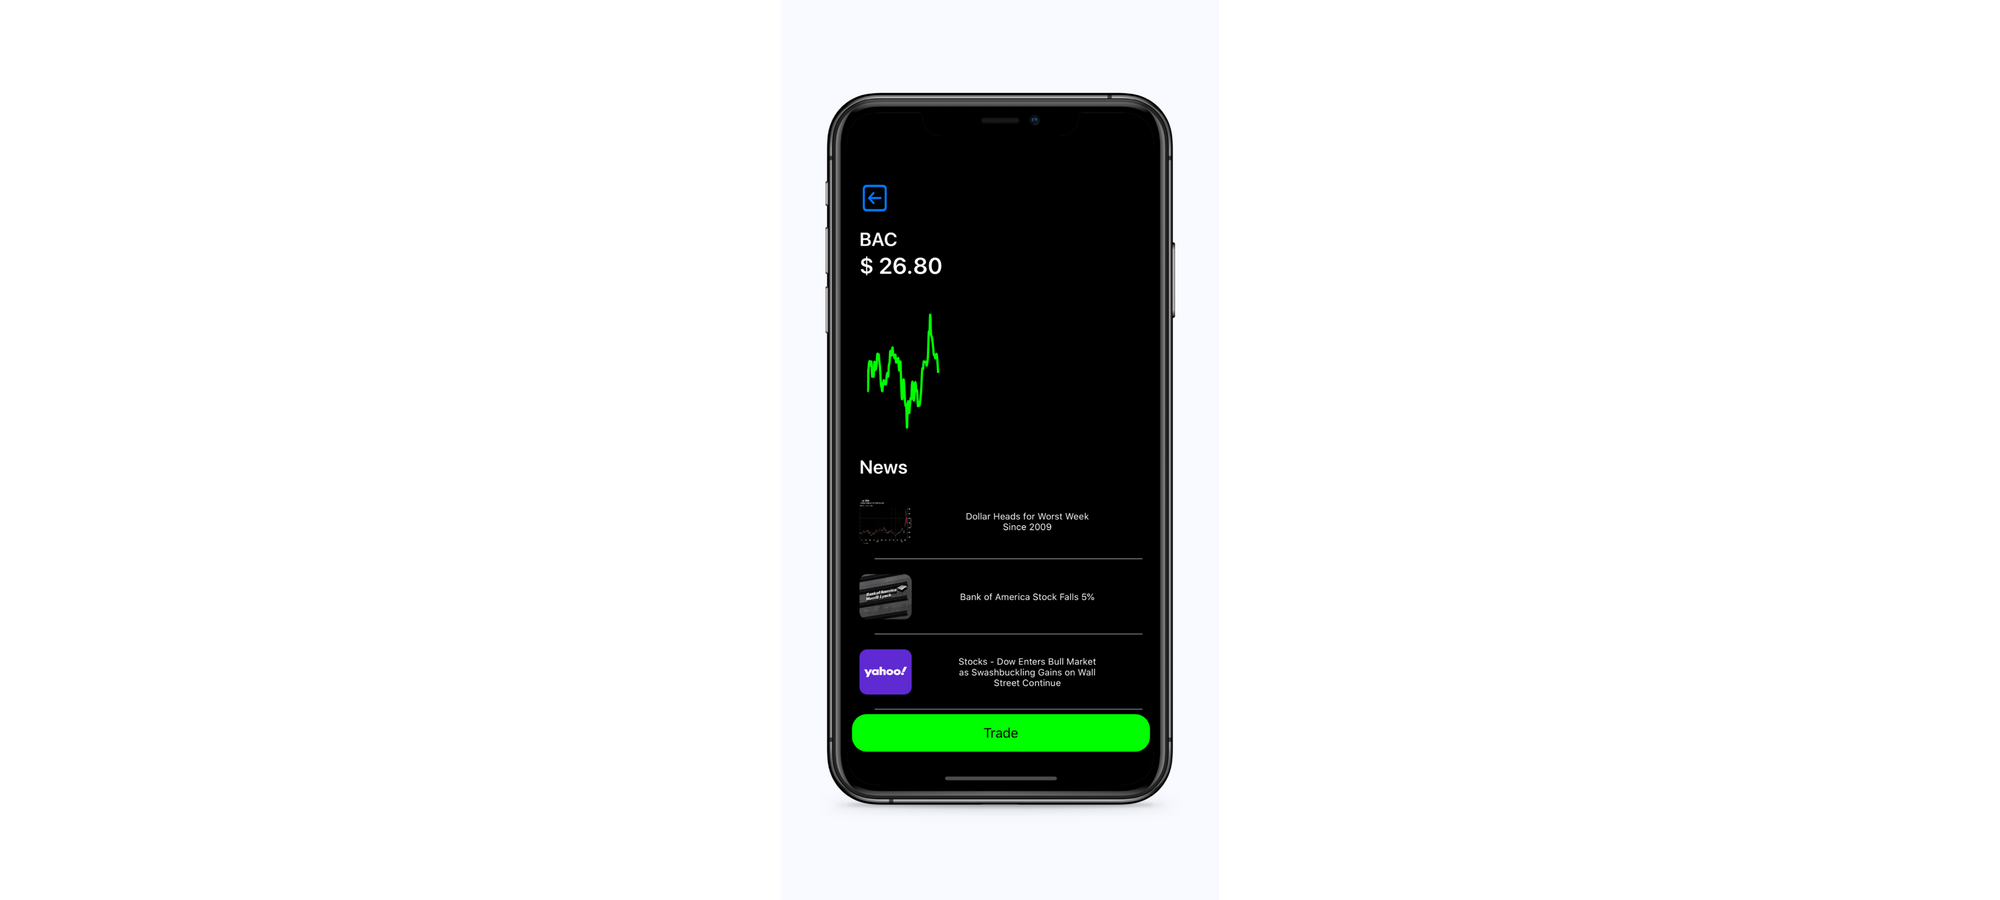
Now, we need to be able to look up new stocks to invest in. This means that we need to create a new page that will allow users to see the daily performance of a stock, as well as allow them to buy/sell these assets.
StockView
First off, start by creating a new file in your Views folder (in XCode) called StockView. This will house all the front-end code for this component. In this, we will need, at a minimum, a graph and trading functionality. We will add other components to this page once we have set up the basics. The starter code looks like:
import UIKit
import Charts

class StockView: UIView {
  var ticker: String!
  var price: UILabel!
  var timed_task: Timer!
  var news: [NewsView] = []
  var scrollView: UIScrollView!
  var graph: LineChartView!
  var graph_data: [ChartDataEntry] = []

  struct StockInfo: Codable {
      var news_images: [String]
      var news_titles: [String]
      var news_urls: [String]
      var equity: [Double]
  }

  init(frame: CGRect, ticker:String) {
      super.init(frame: frame)

      backgroundColor = UIColor.black

      self.scrollView = UIScrollView(frame: CGRect(x:0, y: 0, width: self.frame.width, height: self.frame.height-100))
      scrollView.contentSize = CGSize(width: self.frame.width, height:self.frame.height + 550)
      scrollView.tag = 0

      let tickerLabel = UILabel(frame: CGRect(x:20, y: 100, width: frame.width, height: 50))
      tickerLabel.font = UIFont.boldSystemFont(ofSize: 25)
      self.ticker = ticker
      tickerLabel.text = self.ticker
      tickerLabel.textColor = UIColor.white

      price = UILabel(frame: CGRect(x:20, y:135, width: frame.width, height:50))
      price.font = UIFont.boldSystemFont(ofSize: 30)
      price.text = "Price"
      price.textColor = UIColor.white

      graph = LineChartView(frame: CGRect(x: 20, y: 200, width: self.frame.width-20, height: 200))
      graph.leftAxis.enabled = false
      graph.rightAxis.enabled = false
      graph.xAxis.enabled = false
      graph.legend.enabled = false
      graph.xAxis.axisMaximum = 390
      graph.animate(xAxisDuration: 1)

      let date = Date().addingTimeInterval(0)
      timed_task = Timer(fireAt: date, interval: 60, target: self, selector: #selector(updatePrice), userInfo: nil, repeats: true)
      RunLoop.main.add(timed_task, forMode: .common)

      let back = UIButton(frame: CGRect(x:20, y:50, width: 40, height: 40))
      back.setImage(UIImage(systemName: "arrow.left.square"), for: .normal)
      back.contentVerticalAlignment = .fill
      back.contentHorizontalAlignment = .fill
      back.addTarget(self, action: #selector(self.backPressed), for: .touchUpInside)

      let trade_button = UIButton(frame: CGRect(x:10, y: 800, width: frame.width - 20, height: 50))
      trade_button.layer.cornerRadius = 20
      trade_button.backgroundColor = UIColor.green
      trade_button.setTitle("Trade", for: .normal)
      trade_button.setTitleColor(UIColor.black, for: .normal)
      trade_button.addTarget(self, action: #selector(self.trade), for: .touchUpInside)

      let newsLabel = UILabel(frame: CGRect(x:20, y:415, width: self.frame.width, height: 25))
      newsLabel.text = "News"
      newsLabel.textColor = UIColor.white
      newsLabel.font = UIFont.boldSystemFont(ofSize: 25)

      scrollView.addSubview(tickerLabel)
      scrollView.addSubview(price)
      scrollView.addSubview(newsLabel)
      scrollView.addSubview(back)

      scrollView.addSubview(graph)

      addSubview(trade_button)
      addSubview(scrollView)
  }
This is simply just initializing the components that we will use to show the user information about the stock they request. Some functions have been defined in the init function that we have not declared yet. Let's start with backPressed which simply animates out the current page to allow us to return to the home page.
@objc func backPressed() {
    UIView.animate(withDuration: 0.301, delay: 0.0, options: .curveEaseInOut, animations: {
        self.center.x += self.frame.width
    }) {(true) in
        self.timed_task.invalidate()
        self.timed_task = nil
        self.removeFromSuperview()}

}
Another function we have not defined yet is updatePrice. This function is going to call our backend server and get the most recent price for the stock so that the user has updated information. This function will look like:
@objc func updatePrice() {
    let polygonToken = UserDefaults.standard.object(forKey: "polygonToken") as? String
    let url = URL(string: "http://127.0.0.1:5000/getPrice?token=" + polygonToken! + "&ticker=" + self.ticker!)!
    let defaultSessionConfiguration = URLSessionConfiguration.default
    let defaultSession = URLSession(configuration: defaultSessionConfiguration)
    var urlRequest = URLRequest(url: url)
    urlRequest.httpMethod = "GET"
    let dataTask = defaultSession.dataTask(with: urlRequest) { (data, response, error) in
        guard let data = data else { return }
        let response = String(data: data, encoding: .utf8)
        DispatchQueue.main.async {
            self.price.text = "$ " + response!
        }
    }
    dataTask.resume()
}
In this code snippet, we're calling the getPrice endpoint. We can define that as:
@app.route('/getPrice')
def price():
    ticker = request.args.get('ticker')
    token = request.args.get('token')
    response = json.loads((requests.get("https://api.polygon.io/v1/last/stocks/"+ticker, params= {"apiKey": token})).text)
    return "{:.2f}".format(response["last"]["price"])
All together it can look something like this:
TradeView
The other function we have yet to define is the trade function, which is important. When the user clicks this button, we want to show them a view that will allow them to specify the number of shares, and then click buy or sell. So, let's define this view as TradeView in our components folder.
import UIKit

class TradeView: UIView {
    var qty: UITextField!
    var sell_btn: UIButton!
    var buy_btn: UIButton!

    override init(frame: CGRect) {
        super.init(frame: frame)
        self.backgroundColor = UIColor.white
        self.layer.cornerRadius = 40
        qty = UITextField(frame: CGRect(x:20, y: self.frame.height/2-50, width: self.frame.width/2 - 20, height: 100))
        qty.backgroundColor = UIColor.white
        qty.placeholder = "Qty"
        qty.textAlignment = .center
        qty.textColor = UIColor.black
        qty.font = UIFont.boldSystemFont(ofSize: 75)

        sell_btn = UIButton(frame: CGRect(x:self.frame.width/2 + 30, y:self.frame.height/2 - 110, width: 125, height: 100))
        sell_btn.backgroundColor = UIColor.red
        sell_btn.setTitle("Sell", for: .normal)
        sell_btn.layer.cornerRadius = 10

        buy_btn = UIButton(frame: CGRect(x:self.frame.width/2 + 30, y:self.frame.height/2 + 10, width: 125, height: 100))
        buy_btn.backgroundColor = UIColor.green
        buy_btn.setTitle("Buy", for: .normal)
        buy_btn.layer.cornerRadius = 10

        addSubview(qty)
        addSubview(sell_btn)
        addSubview(buy_btn)
    }

    required init?(coder: NSCoder) {
           fatalError("not working")
    }
}
Now, all we need to do is create a TradeView object in our StockView and show it when the trade_button is clicked. We need to define some other functions for the tradeView in our init function so that we can buy/sell the requested equity.
var tradeView: TradeView!
...
tradeView = TradeView(frame: CGRect(x:0, y:-300, width:self.frame.width, height:300))
tradeView.buy_btn.addTarget(self, action: #selector(self.buy), for: .touchUpInside)
tradeView.sell_btn.addTarget(self, action: #selector(self.sell), for: .touchUpInside)
let swipeUp = UISwipeGestureRecognizer(target: self, action: #selector(hideTradeView))
swipeUp.direction = .up
self.tradeView.addGestureRecognizer(swipeUp)
The trade and hideTradeView function, as mentioned above, should be defined as:
@objc func hideTradeView() {
    UIView.animate(withDuration: 0.301, delay: 0.0, options: .curveEaseInOut, animations: {
        self.tradeView.center.y -= self.tradeView.frame.height
    }) {(true) in}
}

@objc func trade() {
    UIView.animate(withDuration: 0.301, delay: 0.0, options: .curveEaseInOut, animations: {
        self.tradeView.center.y += self.tradeView.frame.height
    }) {(true) in}
    bringSubviewToFront(self.tradeView)
}
Additionally, our buy/sell functions should be defined as:
@objc func buy() {
    executeOrder(side: "buy")
    hideTradeView()
}

@objc func sell() {
    executeOrder(side: "sell")
    hideTradeView()
}

func executeOrder(side: String) {
    let token = UserDefaults.standard.object(forKey: "token") as? String
    let url = URL(string: "http://127.0.0.1:5000/" + side + "?token=" + token! + "&qty=" + self.tradeView.qty.text! + "&ticker=" + self.ticker!)!
    let defaultSessionConfiguration = URLSessionConfiguration.default
    let defaultSession = URLSession(configuration: defaultSessionConfiguration)
    var urlRequest = URLRequest(url: url)
    urlRequest.httpMethod = "GET"
    let dataTask = defaultSession.dataTask(with: urlRequest)
    dataTask.resume()
    self.tradeView.isHidden = true
}
We're calling two new endpoints here! These endpoints reside in our Flask server and will handle the actual order sending functionality for the equity that was requested. They look something like:
@app.route('/buy')
def buy():
token = request.args.get('token')
ticker = request.args.get('ticker')
qty = int(request.args.get('qty'))
params = {
"symbol": ticker,
"qty":qty,
"side":"buy",
"type":"market",
"time_in_force":"day"
}
head = {"Content-Type": "application/x-www-form-urlencoded", "Authorization" : "Bearer " + token}
response = requests.post("https://paper-api.alpaca.markets/v2/orders", headers = head, json= params)
return "Done"
@app.route('/sell')
def sell():
token = request.args.get('token')
ticker = request.args.get('ticker')
qty = int(request.args.get('qty'))
params = {
"symbol": ticker,
"qty":qty,
"side":"sell",
"type":"market",
"time_in_force":"day"
}
head = {"Content-Type": "application/x-www-form-urlencoded", "Authorization" : "Bearer " + token}
response = requests.post("https://paper-api.alpaca.markets/v2/orders", headers = head, json= params)
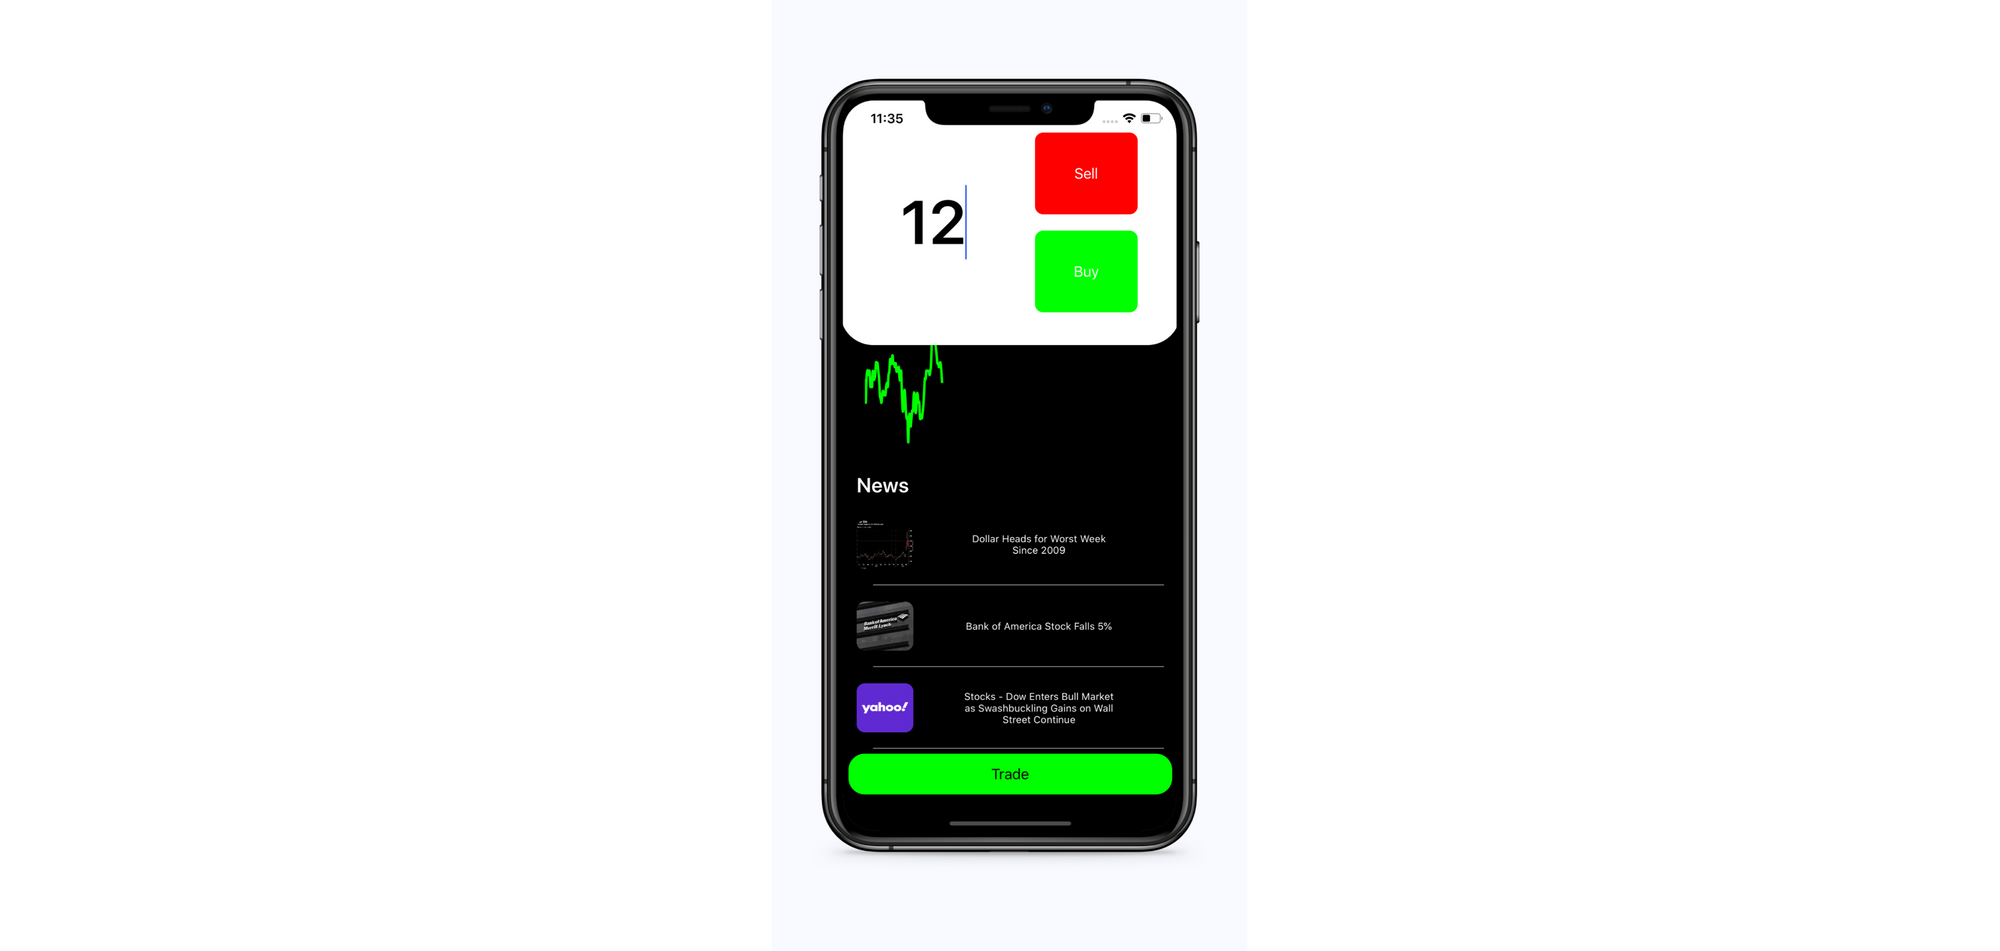
return "Done"All said and done your trade feature should look something like this:
Price Graph and News
Now, let's focus on the graph. We can code this up similarly to how we approached the graph on the home page. Just like before, we will need to first pull the historical pricing data for the current trading day, and then we can update the chart every few seconds. Since we have already defined our graph in the init function, let's create another function that handles setting the initial price data into the graph
func initializePageValues() {
    let polygonToken = UserDefaults.standard.object(forKey: "polygonToken") as? String
    let url = URL(string: "http://127.0.0.1:5000/dailyTickerData?token=" + polygonToken! + "&ticker=" + self.ticker!)!
    let defaultSession = URLSession(configuration: URLSessionConfiguration.default)
    var urlRequest = URLRequest(url: url)
    urlRequest.httpMethod = "GET"
    let dataTask = defaultSession.dataTask(with: urlRequest) { (data, response, error) in
        guard let data = data else { return }
        do {
            let vals = try JSONDecoder().decode(StockInfo.self, from: data)
            DispatchQueue.main.async {
                for i in 0...vals.equity.count-1 {
                    self.updateChart(value: vals.equity[i])
                }

                for i in 0...vals.news_urls.count - 1 {
                    let frame = CGRect(x:10, y: self.news.count * 100+450, width: Int(self.frame.width), height: 100)
                    let newsView = NewsView(frame: frame, url: vals.news_urls[i], imageURL: vals.news_images[i], title: vals.news_titles[i])
                    self.news.append(newsView)
                    self.scrollView.addSubview(newsView)
                }
                self.graph.animate(xAxisDuration: 1)
            }
        } catch let error {
            print(error)
        }
    }
    dataTask.resume()
}
Notice that we are calling updateChart in this method. Similar to before, our updateChart function will look something like:
func updateChart(value: Double) {
let dataEntry = ChartDataEntry(x:Double(self.graph_data.count), y: value)
self.graph_data.append(dataEntry)
let line = LineChartDataSet(entries:self.graph_data)
line.mode = .cubicBezier
line.drawCirclesEnabled = false
line.lineWidth = 3
line.colors = [NSUIColor.green]
let data = LineChartData()
data.removeDataSetByIndex(0)
data.addDataSet(line)
data.setDrawValues(false)
self.graph.data = data
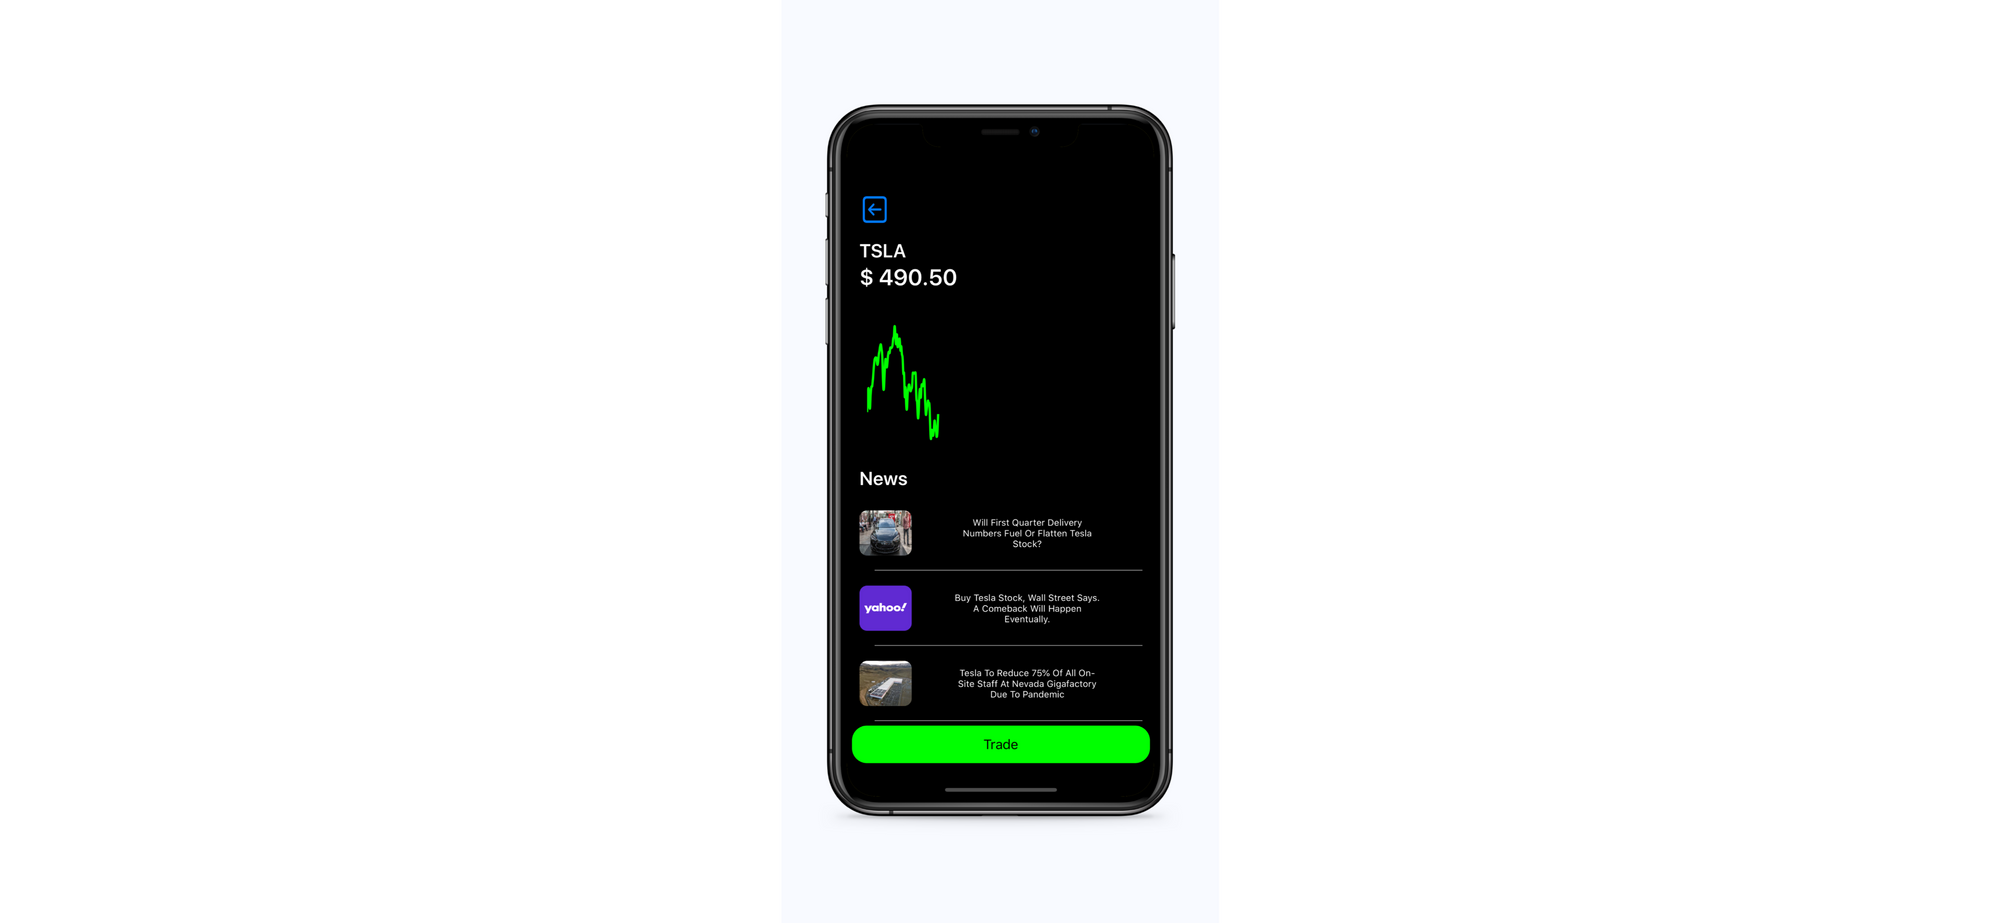
}The updated chart for each equity might look something like this:
Additionally, notice that we are working with some news elements. Having a funded account with Alpaca means that you have access to Polygon and all of its resources. Among other information such as company financials and fundamental ratios, developers can use the Polygon API to get the latest news on a stock. To demonstrate how this functionality works, we will incorporate it into our StockView. Notice how earlier we created an array of NewsViews. Well, let's define what that actually is:
import UIKit
import SafariServices

class NewsView: UIView, SFSafariViewControllerDelegate {
    var url: String!
    var image: UIImageView!
    var button: UIButton!

    init(frame: CGRect, url: String, imageURL: String, title: String) {
        super.init(frame: frame)

        button = UIButton(frame: CGRect(x:0, y:0, width: self.frame.width, height: self.frame.height))
        button.addTarget(self, action: #selector(showNews), for: .touchUpInside)
        button.backgroundColor = UIColor.clear

        self.url = url
        self.image = UIImageView(frame: CGRect(x:10, y:20, width: self.frame.width/6, height: self.frame.height-40))
        self.image.downloaded(from: imageURL)
        self.image.contentMode = .scaleToFill
        self.image.layer.cornerRadius = 10
        self.image.layer.masksToBounds = true

        let titleLabel = UILabel(frame: CGRect(x: self.frame.width/4 + 30, y: 0, width: self.frame.width/2 - 10, height: self.frame.height))
        titleLabel.text = title
        titleLabel.textColor = UIColor.white
        titleLabel.textAlignment = .center
        titleLabel.lineBreakMode = .byWordWrapping
        titleLabel.font = UIFont.systemFont(ofSize: 12)
        titleLabel.numberOfLines = 3

        addSubview(image)
        addSubview(titleLabel)
        addSubview(button)

        let bottomLine = CALayer()
        bottomLine.frame = CGRect(x: 30, y: self.frame.height - 1, width: self.frame.width-60, height: 1.0)
        bottomLine.backgroundColor = UIColor.lightText.cgColor
        layer.addSublayer(bottomLine)
    }

    @objc func showNews() {
        guard let news_url = URL(string: self.url) else {return}
        let vc = SFSafariViewController(url: news_url, entersReaderIfAvailable: true)
        vc.modalPresentationStyle = .popover
        vc.delegate = self
        if var controller = UIApplication.shared.keyWindow?.rootViewController {
           while let presController = controller.presentedViewController {
               controller = presController
           }
           controller.present(vc, animated: true, completion: nil)
        }
    }

    required init?(coder: NSCoder) {
        fatalError("not working")
    }
}

extension UIImageView {
    func downloaded(from url: URL, contentMode mode: UIView.ContentMode = .scaleAspectFit) {
        contentMode = mode
        URLSession.shared.dataTask(with: url) { data, response, error in
            guard
                let httpURLResponse = response as? HTTPURLResponse, httpURLResponse.statusCode == 200,
                let mimeType = response?.mimeType, mimeType.hasPrefix("image"),
                let data = data, error == nil,
                let image = UIImage(data: data)
                else { return }
            DispatchQueue.main.async() { [weak self] in
                self?.image = image
            }
        }.resume()
    }
    func downloaded(from link: String, contentMode mode: UIView.ContentMode = .scaleAspectFit) {
        guard let url = URL(string: link) else { return }
        downloaded(from: url, contentMode: mode)
    }
}
// got this extension code from: https://stackoverflow.com/questions/24231680/loading-downloading-image-from-url-on-swift
At this point, whenever the user goes to a StockView, they will see the most recent trading day's performance as well as some news on the stock. They will also be able to send market orders straight from the app! One thing we need to go back and add is the call to updateChart in the updatePrice method. Recall that updatePrice gets called every 60 seconds, so whenever we update the price we should also update our graph. Simply add self.updateChart(value: Double(response!)!) where we are updating the price label.
Connecting It All Together
So now we have this fully functional StockView, but we're not actually instantiating it anywhere in the app. We want to show the user a StockView in two situations. One is where they interact with the searchBar that we created in the HomeView. The other is when they click on a PositionView from the HomeView. Let's start with the former. In our MainViewController add:
func searchBarSearchButtonClicked( _ searchBar: UISearchBar) {
    showStockView(ticker: homeView.search_bar.text!)
}

func showStockView(ticker: String) {
    let stockView = StockView(frame: CGRect(x:self.view.frame.width, y:0, width: self.view.frame.width, height: self.view.frame.height), ticker: ticker)
    self.view.addSubview(stockView)

    UIView.animate(withDuration: 0.301, delay: 0.0, options: .curveEaseInOut, animations: {
            stockView.center.x -= self.view.frame.width
    }) {(true) in}
}
Recall how in the previous article we set the HomeView searchBar's delegate to the MainViewController. That is what allows us to work with it in this fashion. Now, let's handle the PositionViews. We want our PositionView to communicate and call a method in our MainViewController. To do this, we will be using NSNotifications (a very handy Swift feature). You can read up more about it here.
In our PositionView, let's create a button that encompasses the entire view. Whenever clicked, we will send a notification out to our MainViewController.
var button: UIButton!
...
button = UIButton(frame: CGRect(x:0, y:0, width: self.frame.width, height: self.frame.height))
button.addTarget(self, action: #selector(showStockView), for: .touchUpInside)
button.backgroundColor = UIColor.clear
Now define showStockView in the same class as:
@objc func showStockView() {
	  NotificationCenter.default.post(name: NSNotification.Name(rawValue: "positionClick"), object: nil, userInfo: ["ticker": self.ticker.text!])
}
Finally, in our MainViewController, add:
@objc func showStockViewNotification(notification: NSNotification) {
    showStockView(ticker: notification.userInfo!["ticker"] as! String)
}

override func viewDidLoad() {
...
NotificationCenter.default.addObserver(self, selector: #selector(showStockViewNotification(notification:)), name:NSNotification.Name(rawValue:"positionClick"), object: nil)
...
}
This will listen for a notification with the key positionViewClick and will show a StockView with the corresponding ticker.
All Put Together
So now, we have connected our HomeView to our StockView. With this, we wrap up our basic brokerage functionality. Users can create an account, connect their Alpaca accounts securely, view their positions/performance, and trade any and all equities! This showcases just how powerful Alpaca's API really is. With just a few hours of work, we have built a brokerage app from start to finish. All in all, it looks like this now!
You can find both part 1 and 2 of How to Build a Fintech Investing App w/ Alpaca API below:
 Alpaca Team
 Alpaca Team
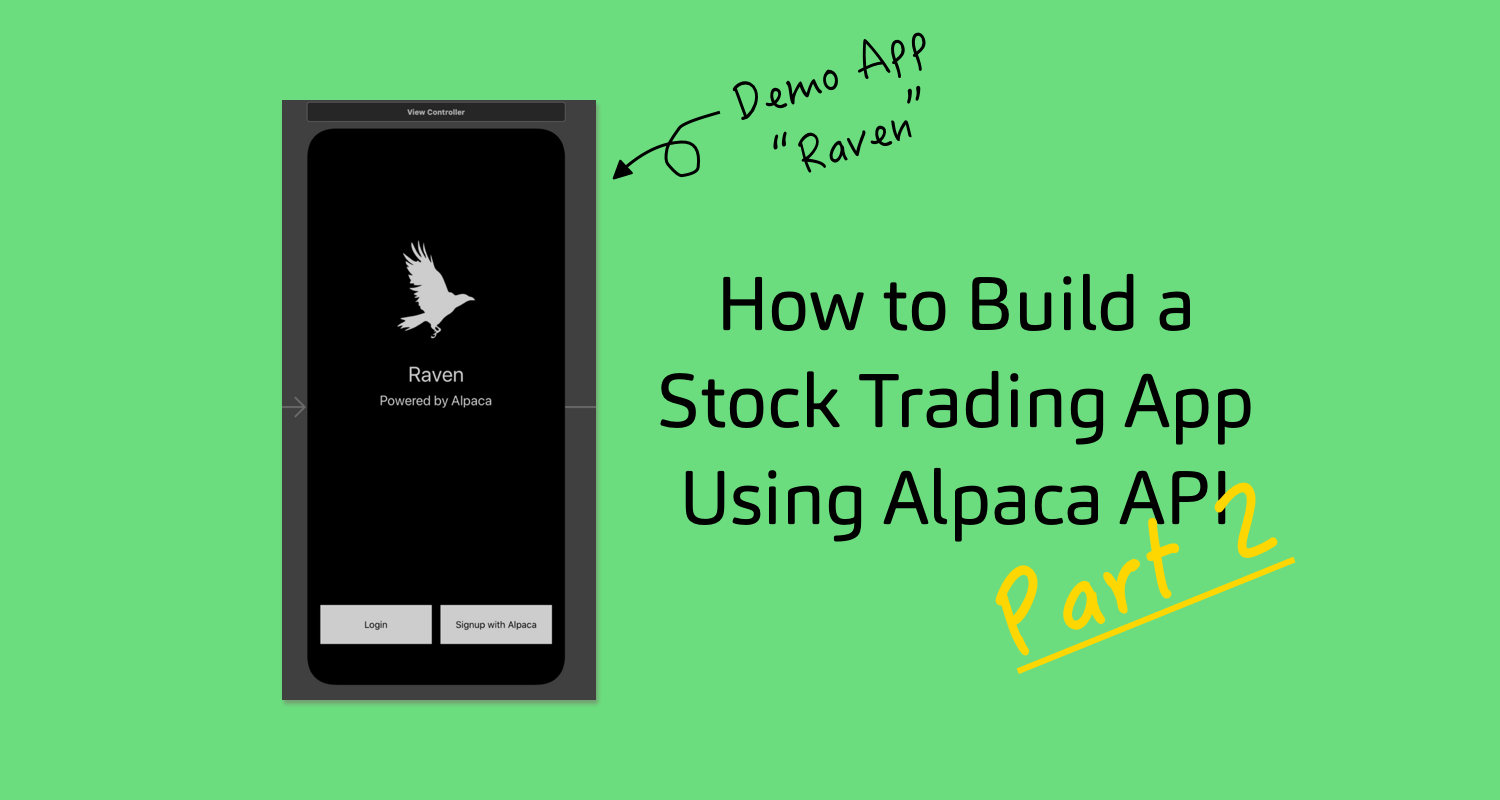
Until next time ✌️
Technology and services are offered by AlpacaDB, Inc. Brokerage services are provided by Alpaca Securities LLC (alpaca.markets), member FINRA/SIPC. Alpaca Securities LLC is a wholly-owned subsidiary of AlpacaDB, Inc.
You can find us @AlpacaHQ, if you use twitter.


)