How to Fund an Account via Broker API
In this tutorial, we provide a sample request and successful response object for funding an account via Broker API
This tutorial is a step-by-step demonstration of how to fund an account via the Broker API and is part of the Alpaca 101 Tutorial Series. We will move forward assuming that you’ve registered on the Alpaca website. If you haven’t please visit Alpaca and sign up. Feel free to check out the other tutorials in this series at Alpaca Resources.
Please note that this tutorial reflects a sandbox testing environment. If you decide to transition to a live production environment, features and entitlements may differ to ensure handling of clients’ live accounts are compliant with all applicable rules and regulations.
What is Broker API?
Alpaca is built for developers and traders. That being said we are incredibly excited to announce we have established our very own broker product that can evolve alongside the Alpaca platform. Alpaca users can develop in sandbox environments, allowing users to access all the functionality of an operational brokerage in parallel with becoming compliant with applicable rules and regulations should you decide to transition to a live production environment. We are releasing a series of tutorials to provide guidance on the core features of the Broker API, so make sure to check out Alpaca Resources. Let’s get started!
How to Fund an Account via Broker API
Step 1: Broker Dashboard
Similar to the Algo Dashboard, the Broker Dashboard displays all of the information relevant to one’s broker account. The main page, shown below, includes an overview of the number of active accounts, assets under management (AUM) along recent signups, transactions, and orders. When logging in for the first time, you will notice there is not any information present in the dashboard as below
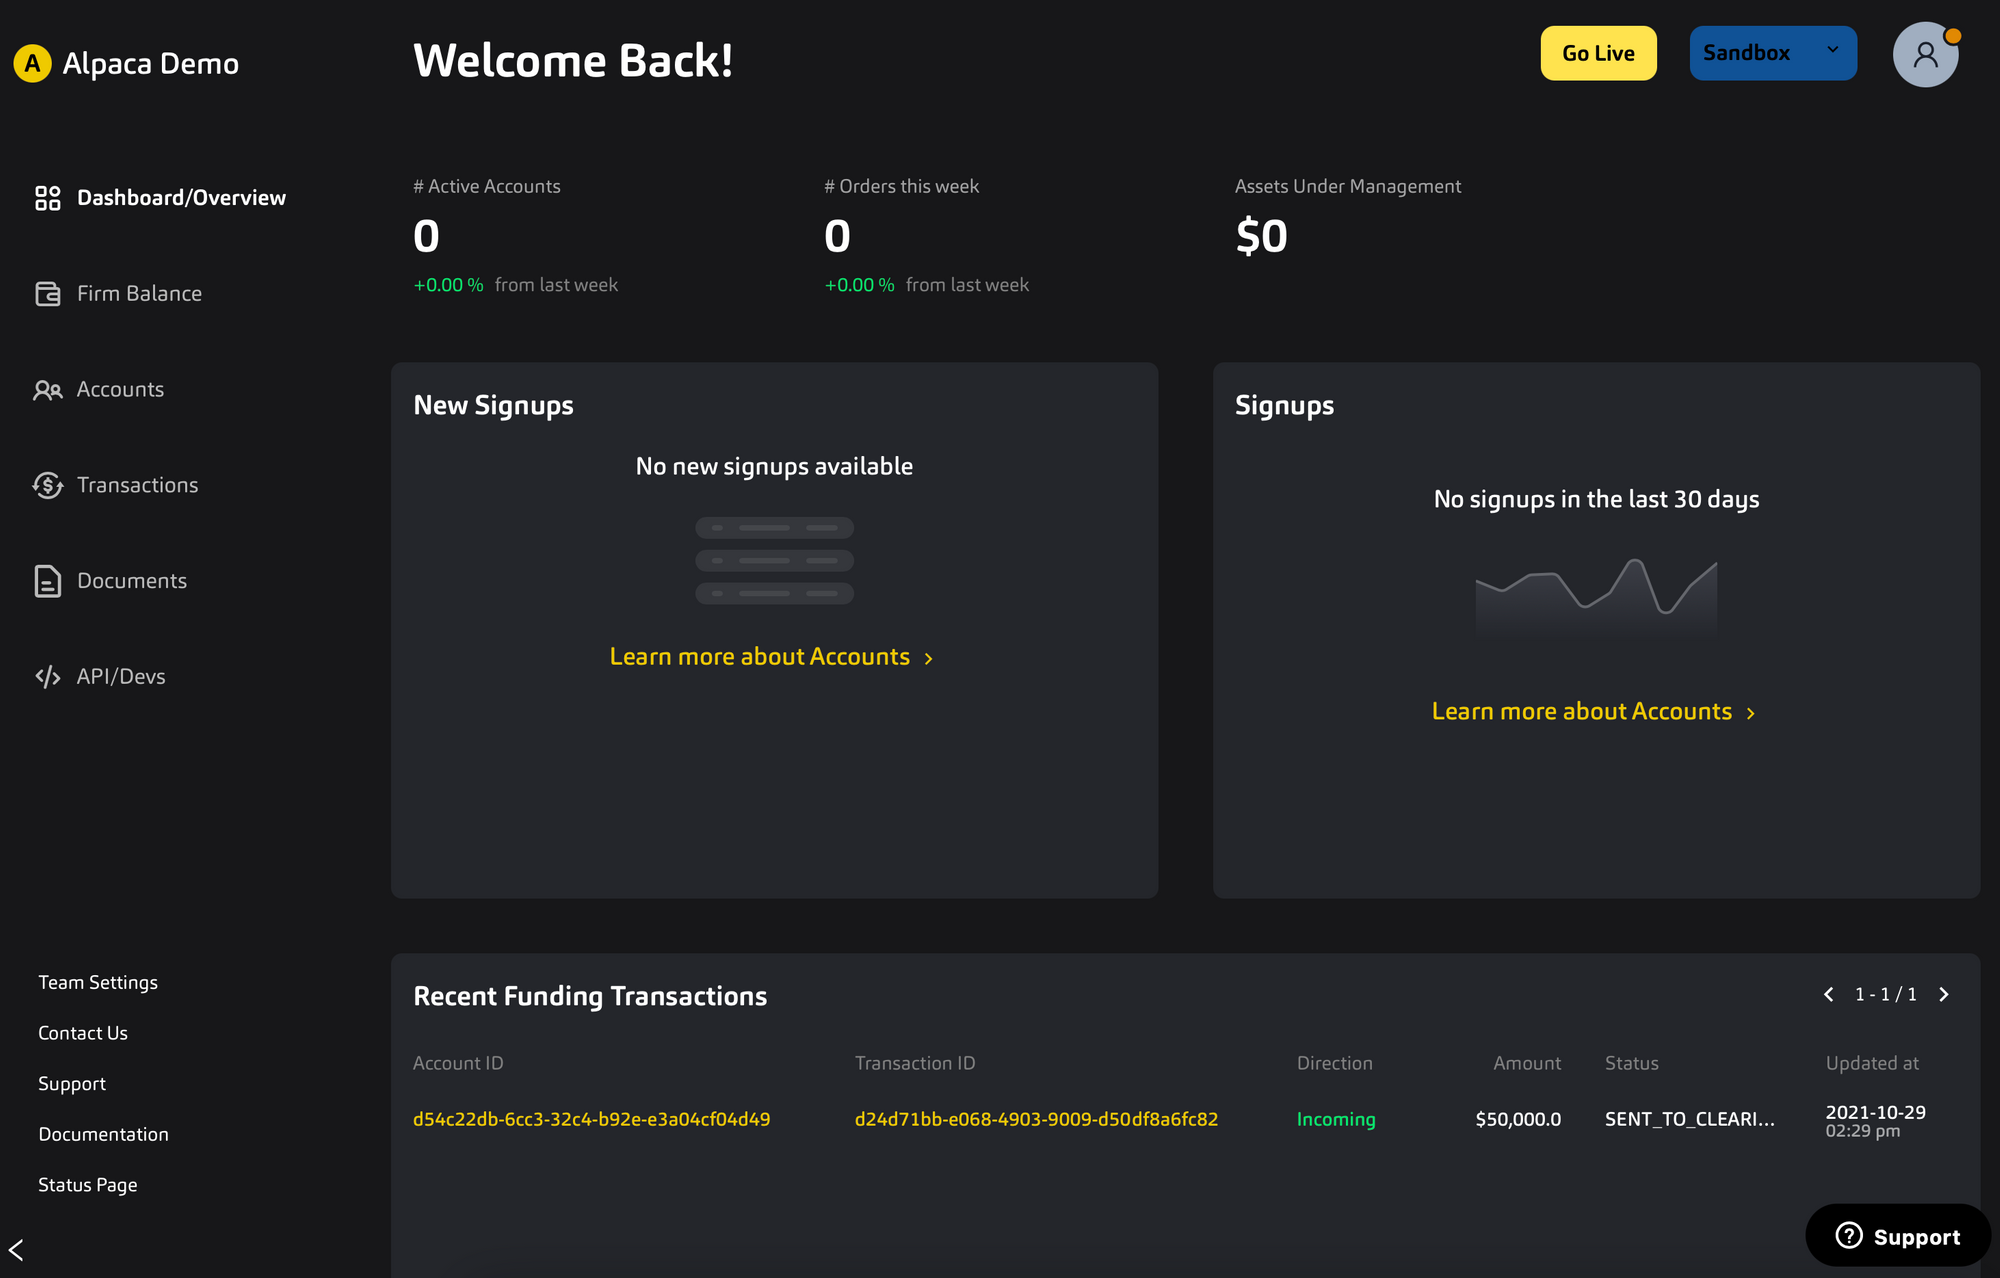
There are also subpages for the firm’s balance, active accounts, transactions (orders and ACH/Wire transfers), and documents.
Step 2: Live Testing
To set up your environment first navigate to the API/Devs page where there is a box in the right-hand corner called Seed Env. By clicking this, your environment will be populated with random test users. This allows you to start testing different API calls without needing to create user accounts in your environment. After this, your dashboard should contain randomly generated test signups and amounts under Assets Under Management (AUM).
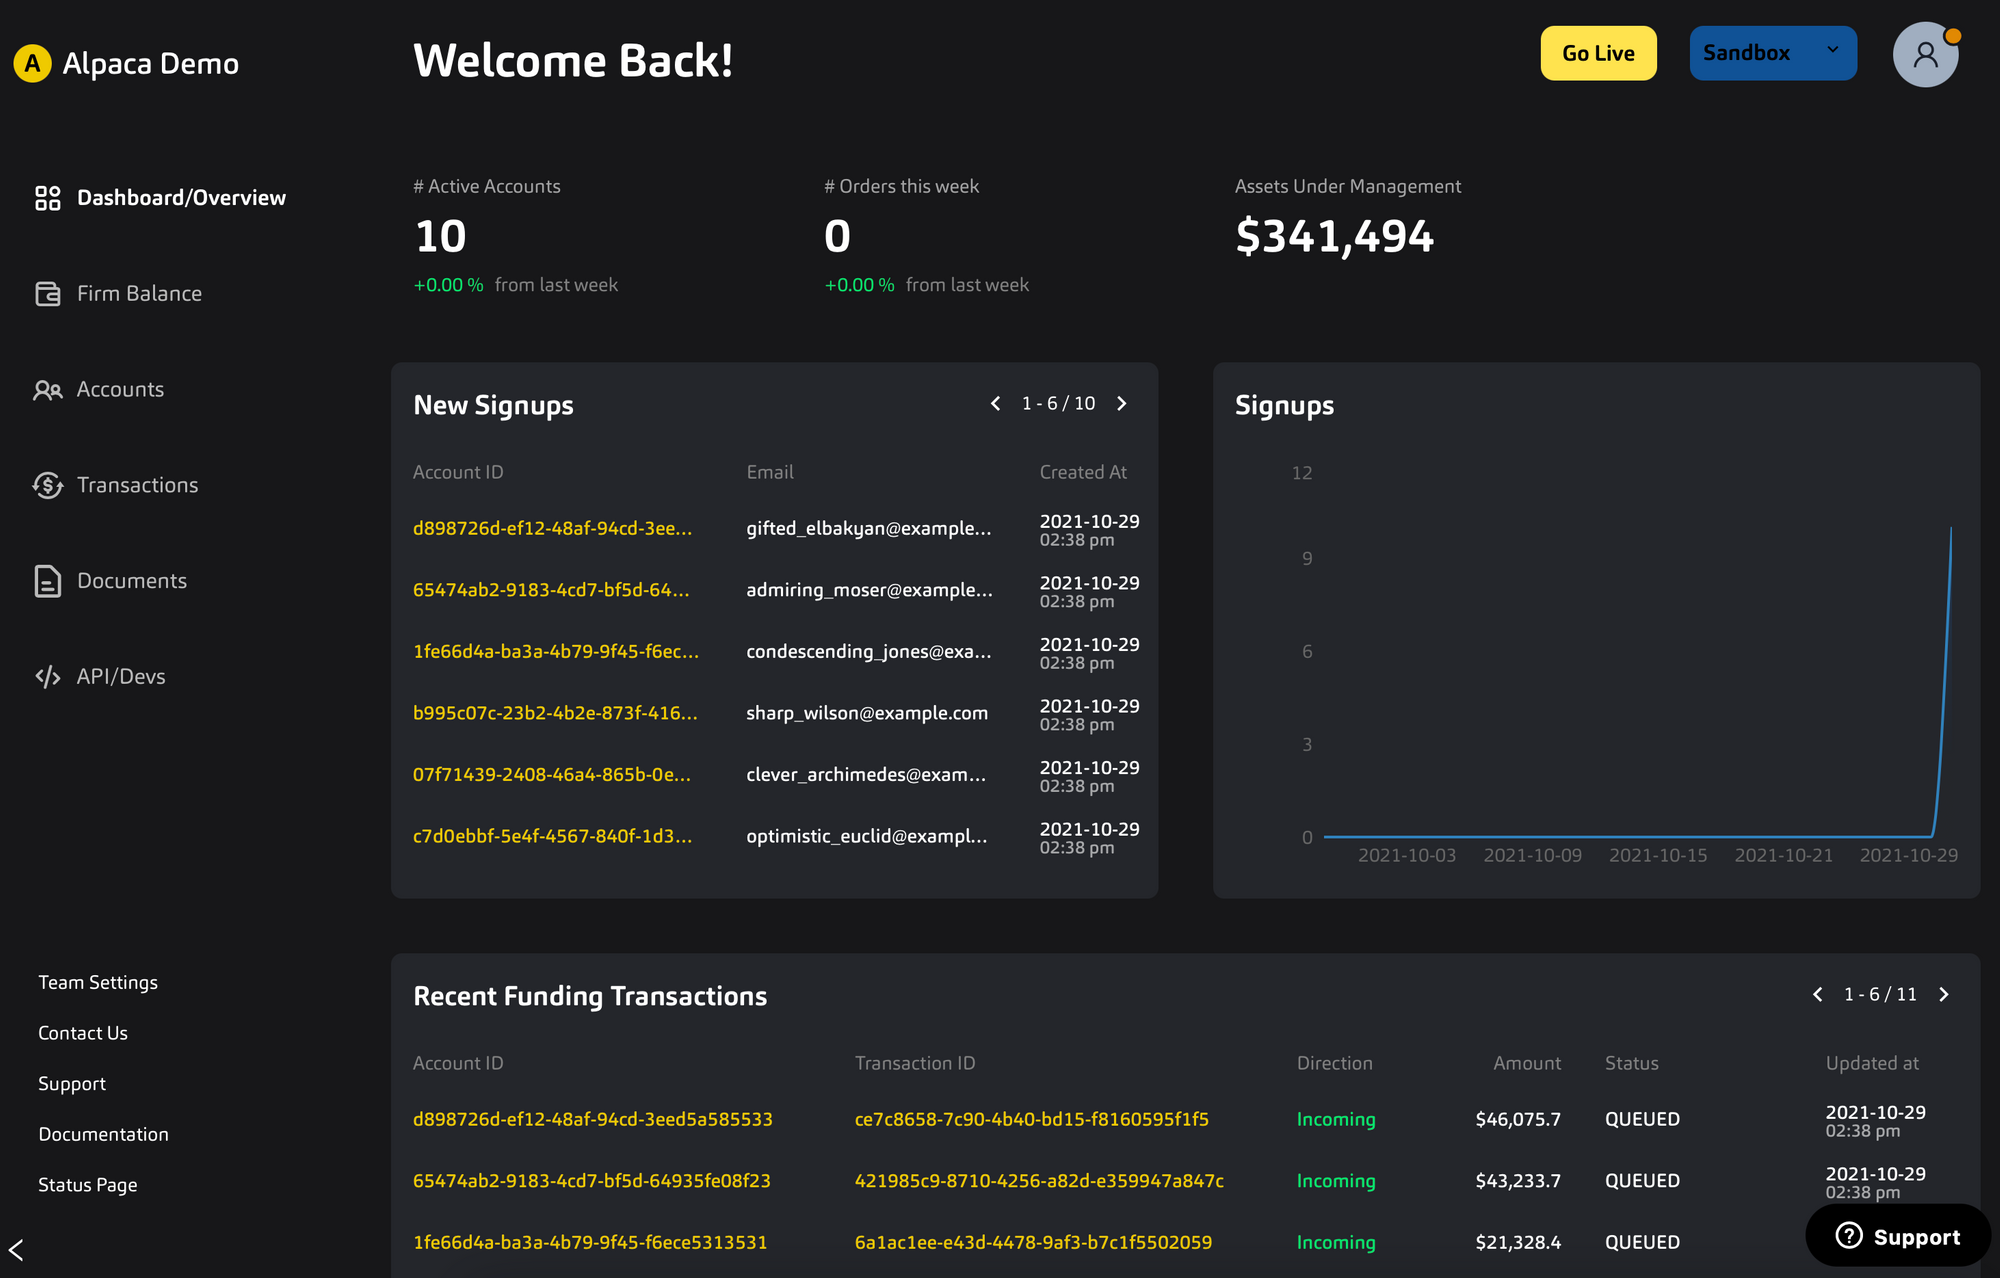
Now that the sandbox environment contains users, we can move on to testing out the API calls. Navigate first to the API/Devs page and then the Live Testing page which will look like this
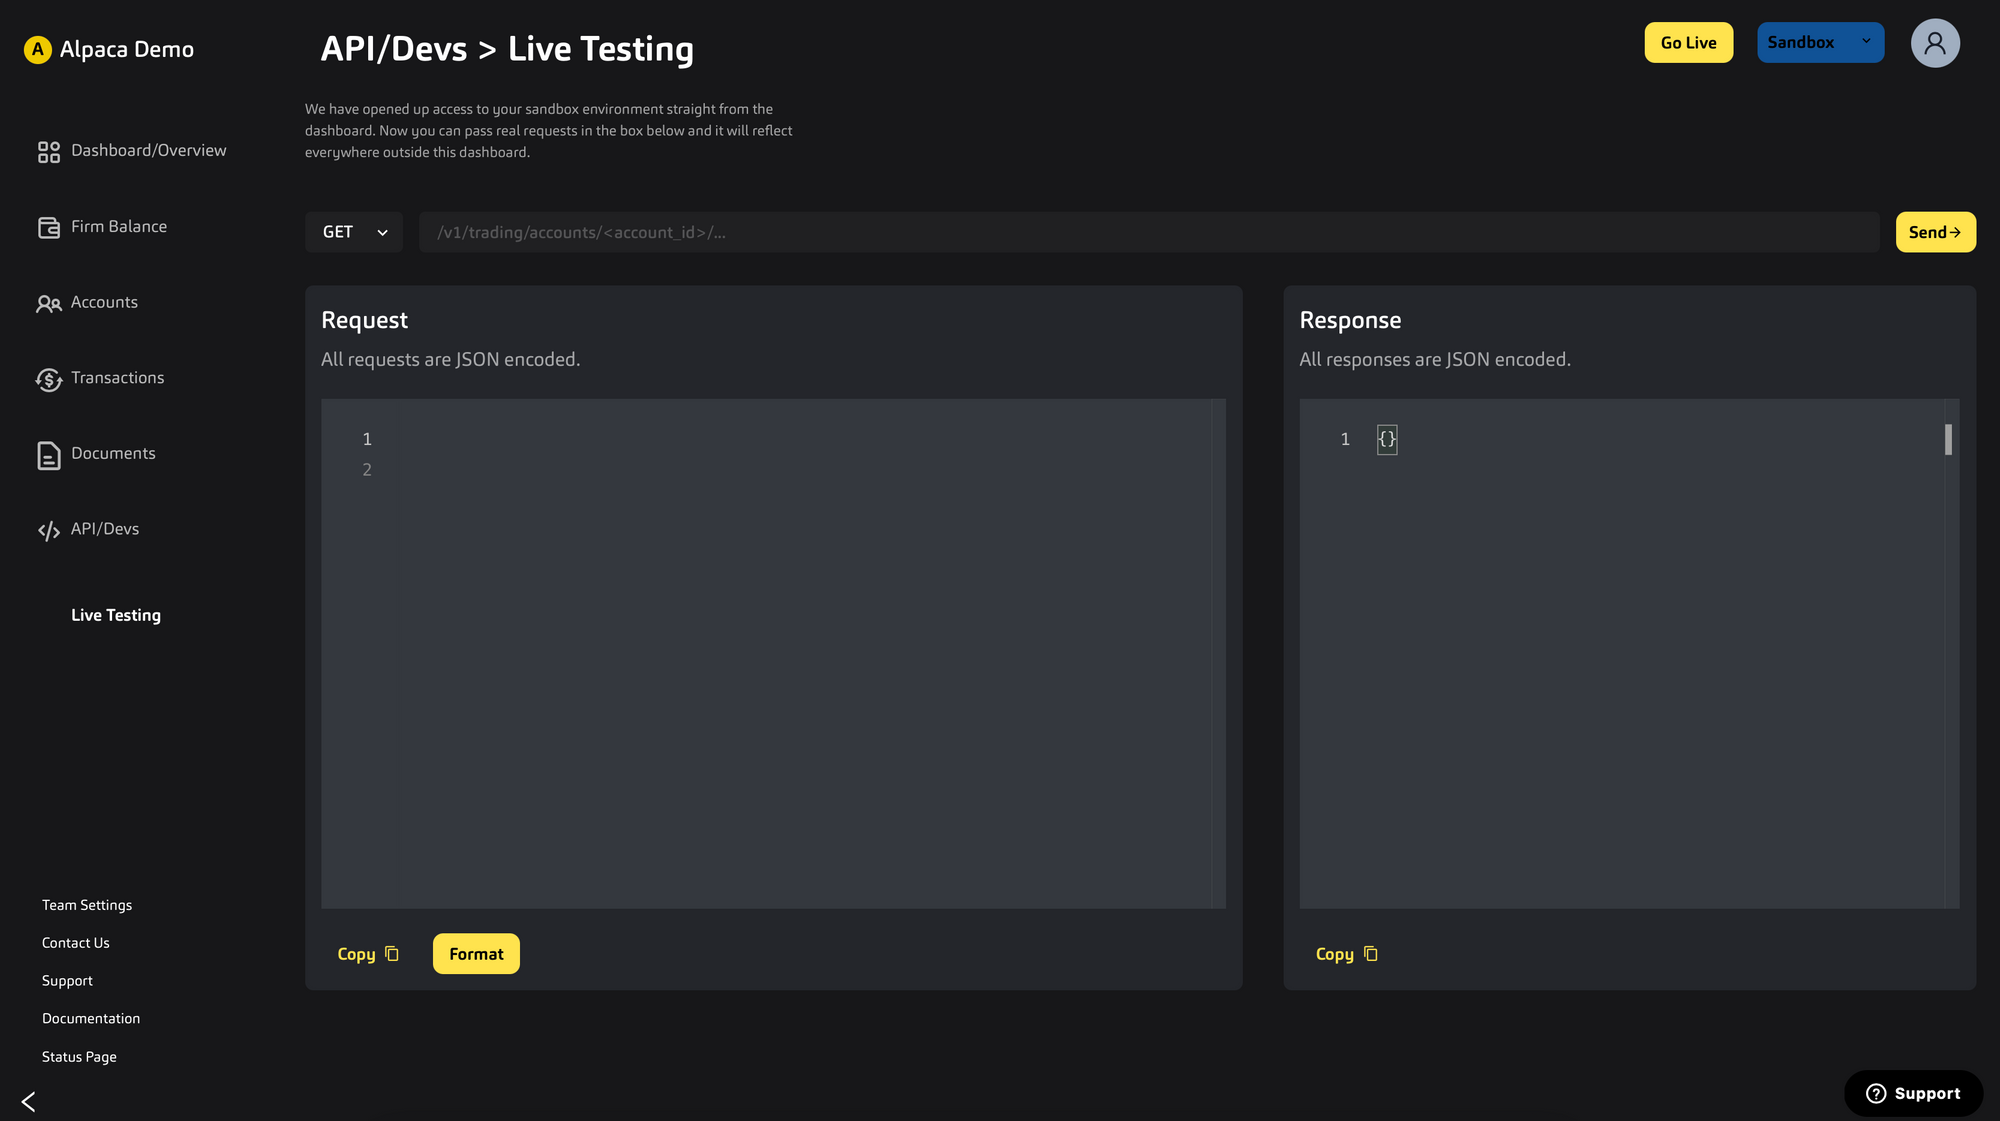
This will be the medium in which we test the API call in the next section.
Step 3: Create an ACH Relationship
In order to virtually fund an account via ACH we must first establish the ACH Relationship with the account. We will be using the following endpoint POST /v1/accounts/{account_id}/ach_relationships along with this request body:
{
  "account_owner_name": "John Doe",
  "bank_account_type": "CHECKING",
  "bank_account_number": "32131231abc",
  "bank_routing_number": "121000358",
  "nickname": "Bank of America Checking"
}
POST/ach_relationships request
Please make sure that the formatting for bank_account_number and bank_routing_number are in the correct format.
If successful you will receive an ach_relationship object like this
{
  "id": "794c3c51-71a8-4186-b5d0-247b6fb4045e",
  "account_id": "9d587d7a-7b2c-494f-8ad8-5796bfca0866",
  "created_at": "2021-04-08T23:01:53.35743328Z",
  "updated_at": "2021-04-08T23:01:53.35743328Z",
  "status": "QUEUED",
  "account_owner_name": "John Doe",
  "bank_account_type": "CHECKING",
  "bank_account_number": "123456789abc",
  "bank_routing_number": "121000358",
  "nickname": "Bank of America Checking"
}
An ACH relationship model
Initially you will receive a status = QUEUED. However, if you make a GET/v1/accounts/{account_id}/ach_relationships after ~1 minute you should see status = APPROVED
Step 4: Create an ACH Transfer
Now that you have an existing ACH relationship between the account and their bank, you can fund the account via ACH using the following endpoint POST/v1/accounts/{account_id}/transfers using the relationship_id we got in the response of the previous section
{
  "transfer_type": "ach",
  "relationship_id": "794c3c51-71a8-4186-b5d0-247b6fb4045e",
  "amount": "500",
  "direction": "INCOMING"
}
POST/transfers request
After around 10-30 minutes (to simulate ACH delay) the transfer should reflect on the user's balance via a cash deposit activity (CSD) viewed via this endpoint GET v1/accounts/activities/CSD\?account_id\={account_id}
Great! Now, moving forward here are some important points to remember:
- One can query a list of transfers for an account, specified by an
account_id, using the following API call:
GET /v1/accounts/{account_id}/transfers
Some Enums to be aware of:
- TransferDirection: INCOMING (Deposits) or OUTGOING (Withdrawals)
- TransferType: ach (ACH Transfer) or wire (Wire Transfers)
- TransferStatus: QUEUED, PENDING, REJECTED, and APPROVED with the respective qualifications of each status found here in the Broker Documentation.
Thank you for using Alpaca. Here are a couple more links that you might be interested in.


Sign up for the weekly newsletter to keep up with the API updates and upcoming competitions, job opportunities by clicking here.
You can also follow Alpaca and our weekly updates on our LinkedIn, Alpaca Community Slack, and @AlpacaHQ on Twitter!
Commission-Free trading means that there are no commission charges for Alpaca self-directed individual cash brokerage accounts that trade U.S. listed securities through an API. Relevant SEC and FINRA fees may apply.
Brokerage services are provided by Alpaca Securities LLC ("Alpaca"), member FINRA/SIPC, a wholly-owned subsidiary of AlpacaDB, Inc. Technology and services are offered by AlpacaDB, Inc.


