All of the code for the following tutorial can be found in this repo.
Part 1 of this tutorial can be found here.

In Part 2, we will use the Alpaca OAuth Implementation Guide to integrate security into a web application. The web application scaffolding was set up in Part 1 using React and Firebase.

We will be using Firebase functions in order to handle the authorization flow. Firebase functions are functions that are written locally and then deployed to run in the cloud. They are triggered by certain actions. You can read all about them here. The trigger we will use in our application is a simple button click. From the click of the button, the authentication process will be started and finished.
Let's Get To It
In your project directory, create new folder for the Alpaca component we are going to create. Inside the folder, create a file titled AlpacaConnectionButton.js. This file will contain all of the logic for our button component. Write the code below into the file.
import React, { useContext } from 'react';
import { Button } from 'react-bootstrap'
import { FirebaseContext } from '../config/Firebase/FirebaseContext';

const AlpacaConnectionButton = () => {
    const firebase = useContext(FirebaseContext)

    async function connectToAlpaca() {

    }

    return (
        <Button onClick={() => connectToAlpaca()}>
        	Connect to Alpaca
        </Button>
    );
}

export default AlpacaConnectionButton;
At the top of the file, below the imports. Copy and paste the following code. We will fill in the blanks later. If you are not using port 3000, be sure to switch to the correct port.
const base_url = "https://app.alpaca.markets"
const client_id = ""
const client_secret = ""
const redirect_uri = encodeURIComponent('http://localhost:3000/')
Next, navigate to App.js. Import the Alpaca connection button, and replace the Bootstrap button we used as a placeholder from Part 1.
Following the Alpaca OAuth Integration Guide
1. End user requests service from application. Application redirect users to request Alpaca access.
In AlpacaConnectionButton.js, write the following two sections of code. When a user clicks the button in order to connect to Alpaca, our application will request the authentication service.
async function connectToAlpaca() {
        const random_string = crypto.randomBytes(20).toString('hex')
        const codeURI =
            `https://app.alpaca.markets/oauth/authorize?` +
            `response_type=code&` +
            `client_id=${client_id}&` +
            `redirect_uri=${redirect_uri}&` +
            `state=${random_string}&` +
            `scope=data`
        try {
            const { code, state } = await openAlpacaPopUp(codeURI)
            if (!requestIsValid(random_string, state)) {
                throw new Error("Alpaca Authentication Invalid")
            }
   			console.log(code)
            console.log(state)
        }
        catch (e) {
            const error = {}
            error.message = e.message
            console.log(error)
        }

    }
The second function, openAlpacaPopUp, opens a new window, which takes the user on the OAuth journey. Although the code is extensive, it follows the instructions outlined in the guide written by Alpaca.
const requestIsValid = (inital_state, returned_state) => { return inital_state === returned_state }

const openAlpacaPopUp = (uri) => {
        return new Promise((resolve, reject) => {
            const authWindow = window.open(uri);
            let snippet = uri | null;

            const interval = setInterval(async () => {
                try {
                    snippet = authWindow && authWindow.location && authWindow.location.search;
                } catch (e) { }
                if (snippet) {
                    const rawCode = snippet.substring(1);
                    const code = JSON.parse('{"' + rawCode.replace(/&/g, '","').replace(/=/g, '":"') + '"}', function (key, value) { return key === "" ? value : decodeURIComponent(value) })
                    authWindow.close();
                    resolve(code);
                    clearInterval(interval)
                }
            }, 100);
        });
    };
2. End user authorizes API access for the applications.
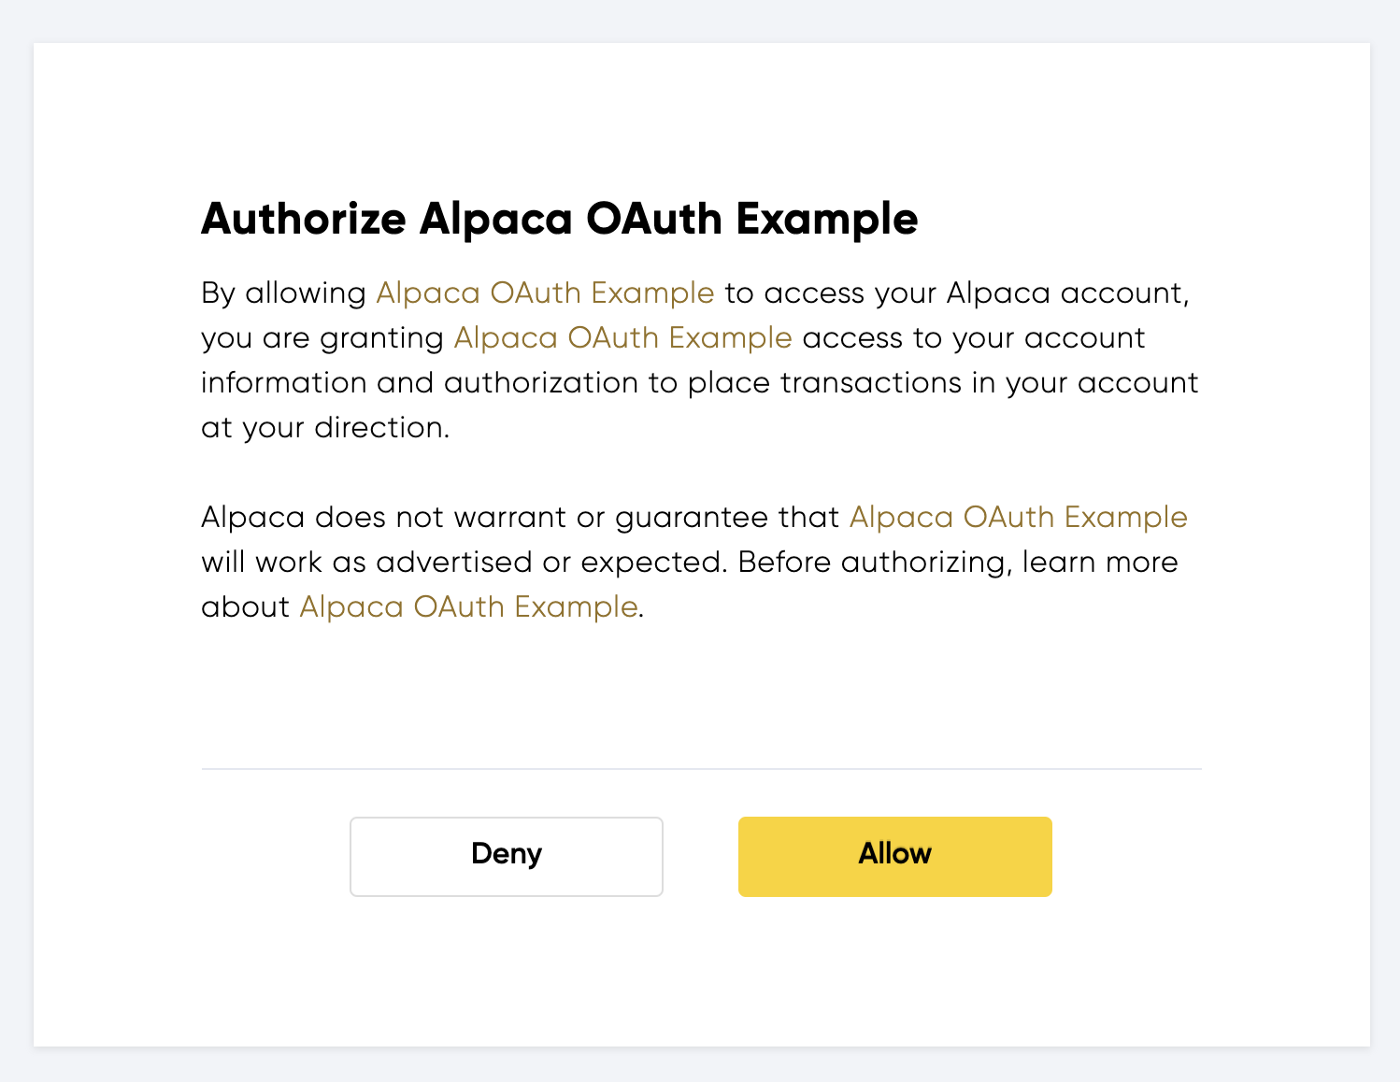
After clicking the button, and waiting for the new window to pop up, the user should be redirected to the following screens. The user will select to allow the authorization from Alpaca.


3. Alpaca redirects end user to application with an authorization code.
After clicking allow, the pop up window will close and the user will be redirected back to our application with a code. The code is sent by Alpaca to our application and is essential to the OAuth flow.
4. Application receives the authorization code
If the previous code was implemented correctly, you should see a string in the console representative of the code sent back by Alpaca. The code itself can be shared and is not sensitive information. All of the previous steps can be completed from the browser.
The code is used as an exchange for an access token. The next steps are completed with the help of Firebase functions, which is a secure way to handle the OAuth flow without needing to spin up a separate server.
At this point, it is also important to note that in order to make outside API calls with Firebase, you need to switch from the free Spark plan to the Blaze plan. Nothing in this tutorial will cost any money, we are not making enough function calls for that, so no worries, everything is still free! You just need to enter some billing information.
5. Application exchanges the authorization code with an access token from Alpaca
This part of the implementation guide is the most exhaustive. Most of the application logic for handling OAuth occurs here, so bear with me.
In Part 1, when initializing Firebase, we set up our project to use Firebase functions, and a folder was created in the project directory. Navigate to index.js inside the functions folder.
In order to properly write the subsequent code, we will need to install two packages inside the functions directory. The axios package makes running API calls easy, and the query-string package is used for formatting. Run:
npm install axios query-stringIn Part 1, we set up an app on the Alpaca platform. The two items that we need in order to get the access token are the client id and secret. Firebase makes using environment variables easy. The line of code below is to be run in the command line. The command will shoot the variables into the cloud so that we can access them safely and securely in our functions.
firebase functions:config:set alpaca.client_id={CLIENT_ID} alpaca.client_secret={CLIENT_SECRET}(Replace the capitalized words with your client id and secret.)
The Functions
The code for the functions is best viewed in the repo. In order for the functions to properly run, it may help to set up a service account. A service account allows the functions to access admin privileges. The firebase-admin package should be enough, but I ran into some issues, and decided to set up a service account. You can set up a service account by going to project settings in the Firebase console, selecting the service account tab, and then downloading a new private key. Place the file in your project directory and then import it into index.js.
getAlpacaAuthorization— This function is the brains of the operation, and will be imported into our project so it is called upon a user clicking the button to connect to Alpaca. In this function, a call is made to the Alpaca authorization server in order to receive an access token. The access token is sensitive information and cannot be handled by the client, which is why this is all done in the cloud through Firebase functions. After receiving the token, we use several helper functions, each with a different purpose, to complete the full flow.getAlpacaAccountInformation— After receiving the token, we can make calls to the Alpaca API on behalf of the user who is accessing our application. This function is a call to the account endpoint which returns information about the user’s account.updateTokenInFirebase— After a user has been authorized through Alpaca, it is necessary to store the token in our database. If other Alpaca API calls are made, the OAuth flow does not need to be completed again while the user is logged in. Instead, the token can be pulled safely from the database. The user is identified based on their account id provided by Alpaca. When logging in, the new token that is generated will be stored based upon the user’s account id, so that it is consistent.updateUserInFirebase— Since the database is NoSQL, it is good practice to flatten stored data. This function is very similar to the one above, in that we are simply storing the user’s account information we previously pulled. During each login, the user’s account information will be updated.authenticateUserThroughFirebase— The last function is arguably the most important and is specific to Firebase. Firebase handles authentication efficiently. If a new user logs into our application, a new user will be created through Firebase, based on the user’s Alpaca account id, and a Firebase authentication token will be returned. If an existing user logs in, a Firebase authentication token will also be returned. The Firebase authentication token is safe to be used by the client in order to log a user into firebase.
After your functions are written, the final step is as easy as running:
firebase deployYour functions will be uploaded to the cloud. Now, we can set up the trigger.
Back to the Client
Only a little more!
Navigate back to AlpacaConnectionButton.js. In order to trigger the function to fun on a button click, we need to use a special command called httpsCallable provided by Firebase. When the user clicks the button, and the code runs to the callable line, our cloud function will be triggered to run. All we have to do is wait on the response!
const AlpacaConnectionButton = ({ props }) => {
    const firebase = useContext(FirebaseContext)
    const { actions } = useContext(AuthContext)
    const [error, setError] = useState({})
    const [loading, setLoading] = useState(false)

    async function connectToAlpaca() {
        setLoading(true)
        //Change to false for deployment
        const dev = false
        const redirect_uri = dev ? encodeURIComponent('http://localhost:3000/') : encodeURIComponent('https://alpacafirebaseoauth.web.app/')
        const random_string = crypto.randomBytes(20).toString('hex')
        const codeURI =
            `https://app.alpaca.markets/oauth/authorize?` +
            `response_type=code&` +
            `client_id=${client_id}&` +
            `redirect_uri=${redirect_uri}&` +
            `state=${random_string}&` +
            `scope=data`
        try {
            const { code, state } = await openAlpacaPopUp(codeURI)
            if (!requestIsValid(random_string, state)) {
                throw new Error("Alpaca Authentication Invalid")
            }
            const getAlpacaAuthorization = firebase.functions.httpsCallable('getAlpacaAuthorization');
            const { data } = await getAlpacaAuthorization({ code, dev })
            await actions.login(data)
            props.history.push("/dashboard");
        }
        catch (e) {
            const error = {}
            error.message = e.message
            setError(error)
            setLoading(false)
        }

    }
After receiving the firebase credentials from our cloud functions at the client. The next step is to handle authentication so that our users can access sensitive parts of our application. It is important to note that the following steps are not necessary, since we have already handled the goal of implementing OAuth through Alpaca. Consider the following sections an added bonus.
Handling Authentication
Right now our application is only a landing page. In order to highlight the benefits of using OAuth, let’s create a new component called Dashboard, which will only be accessible by users who have conducted the OAuth procedure. On the page, we will show the logged in user’s portfolio value. The code for the Dashboard component is pictured below.
import React, { useEffect, useContext, useState } from 'react';
import SignoutButton from "../components/SignoutButton"
import { Container, Jumbotron } from 'react-bootstrap'
import { FirebaseContext } from '../config/Firebase/FirebaseContext';
import { AuthContext } from '../session/AuthContext';


const Dashboard = () => {
    const { authState: { user } } = useContext(AuthContext);
    const { uid } = user || JSON.parse(localStorage.getItem("user"))
    const firebase = useContext(FirebaseContext)
    const [portfolioValue, setPortfolioValue] = useState(null)

    useEffect(() => {
        if (uid)
            firebase.db.ref(`/users/${uid}`)
                .on("value", function (snapshot) {
                    setPortfolioValue(snapshot.val().portfolio_value)

                })

    }, [firebase, uid])

    return (
        <Container>
            <Jumbotron>
                <h1>Congrats! You have been authenticated</h1>
                {portfolioValue && <p>Current Portfolio Value: ${portfolioValue}</p>}
                <div>
                    <SignoutButton />
                </div>
            </Jumbotron>
        </Container>
    );
}

export default Dashboard;
Next, import the component into your App.js.
import React from 'react';
import Dashboard from './pages/Dashboard';
import Landing from './pages/Landing';
import { Switch, Route } from 'react-router-dom'
import AuthenticatedRoute from './session/AuthenticatedRoute';


function App() {
  return (
    <Switch>
      <Route exact path="/" component={Landing} />
      <AuthenticatedRoute exact path="/dashboard" component={Dashboard} />
    </Switch>

  );
}

export default App;
Hmm… Authenticated Route. That’s new. I followed this tutorial loosely for how to handle protected routes. The logic is if a user has been authenticated, he can access the page. If not, he is redirected back to the landing page. the code for the authenticated route looks like this:
import React, { useContext } from 'react';
import { Redirect, Route } from 'react-router-dom';
import { AuthContext } from './AuthContext';


const AuthenticatedRoute = ({ component: RouteComponent, ...rest }) => {
    const { authState } = useContext(AuthContext)
    const userLocal = JSON.parse(localStorage.getItem('user'));

    return (
        <Route
            {...rest}
            render={routeProps =>
                (!!authState.user || !!userLocal) ? (
                    <RouteComponent {...routeProps} />
                ) :
                    (<Redirect to="/" />)
            }
        />
    );
};

export default AuthenticatedRoute
At this point, you may have recognized a new component AuthContext. This component is very similar to the FirebaseContext that was created in Part 1. In the repo, this component is located in the session folder. The component is used to handle the session of a logged in user. There are several ways to handle this process, but I chose to use a React reducer to make logging in efficient and easy. The AuthContext component is then imported in the main index.js and our App is wrapped in the component. If more protected routes and components are set up, those individual components can access the user’s credentials to make API calls, just like in Dashboard.js.
Conclusion
Thank you for following along. If you have any questions or issues, feel free to create an issue on the repo, and I will do my best to have it mitigated. Feel free to fork the repo. My goal was to create a barebones web application that handled the process of setting up OAuth with Alpaca. Let your imagination run, and build something great!

Commission-Free trading means that there are no commission charges for Alpaca self-directed individual cash brokerage accounts that trade U.S. listed securities through an API. Relevant SEC and FINRA fees may apply.
Technology and services are offered by AlpacaDB, Inc. Brokerage services are provided by Alpaca Securities LLC (alpaca.markets), member FINRA/SIPC. Alpaca Securities LLC is a wholly-owned subsidiary of AlpacaDB, Inc.
You can find us @AlpacaHQ, if you use twitter.


