Ever wanted to feel like you were on the floor of NYSE, yelling at brokers? Well, now you can do that from the comfort of your own home using any Alexa-enabled device and your Alpaca account.
Follow this tutorial to teach your Alexa a skill that will link end up linking your Alpaca account, therefore allowing for trades via Amazon device!
Brief outline
Here’s a basic outline of building the Alexa skill from start to finish:
- Setup Alexa skill on the Alexa Developer Console
- Write the script
- Create an AWS Lambda function
- Connect the Lambda function to the Alexa skill
- Upload script to the Lambda function
- Release the skill for beta testing
Once all these steps are done, you’ll be able to make trades from an Alexa-enabled device.
Setting up on Alexa Developer Console
Creating the Alexa Skill
First, navigate to the Alexa Developer Console. The console should look something like this:
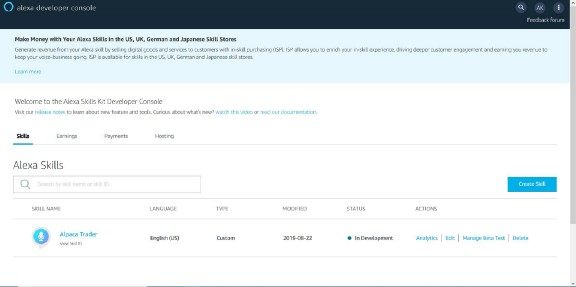
From here, click “Create Skill” to create your new skill. Enter a name and leave everything as the default values (custom skill, your provisions), and then create the skill. Your screen should now look like this:
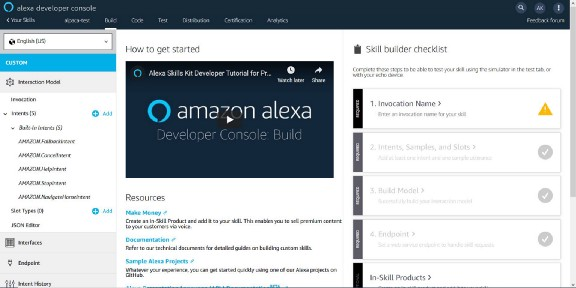
Creating an Intent
From here, you’ll need to create an intent, which is how Alexa classifies voice requests. Create an intent by clicking “Add” next to “Intents” (listed in the sidebar on the left).
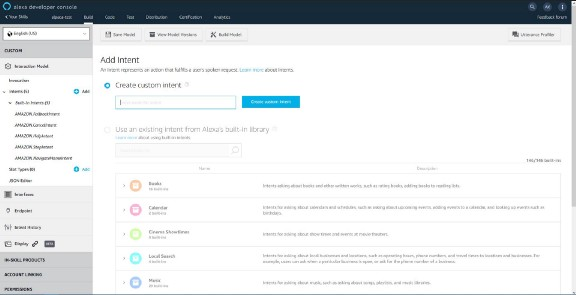
Enter “MarketOrderIntent” into the “Create Custom Intent” section, then click “Create Custom Intent” to create it. Now, your screen should look like the following:
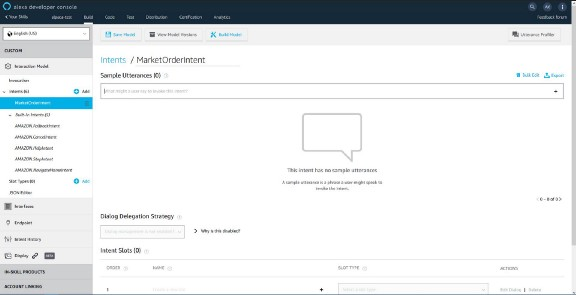
Now you’ll need to create sample phrases that Alexa can use to recognize when you want to place trades (invoke the intent). The sample phrases will also need to include all the information we need to execute this skill, which get stored as slots.
For this intent, we’ll need the stock, quantity, and side (time in force is day by default). So, a sample utterance might look like this (slots shown in curly braces):
market {side} {quantity} {stock}
After typing this into “Sample Utterances”, click the “+” to add the utterance to the intent.
Adding Slots to the Intent
You’ll notice that your slots now appear in the section called “Intent Slots.” This is where you’ll need to specify the types of words Alexa should look for in this slot. For example, quantity should have a slot type of AMAZON.NUMBER.
However, for the side and stock, there’s only a select amount of values that these slots can be, so you’ll need to add your own. Click the “Add” button next to “Slot Types” on the left bar, and enter “side” into the custom slot type. Click “Create custom slot type” to get to a screen like this:
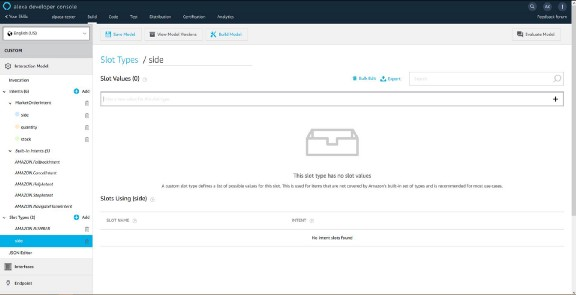
Once you’re here, you can add custom values for this slot. For the “side” slot, the only values you should accept are buy and sell.
For the “stock” slot, you’ll want to use a list of stock names and symbols as stocks that you can trade, like this Top 100 Robinhood example. This is done to improve stock recognition for Alexa and work around some difficulties Alexa has trying to parse stock symbols and names. To do this, use the “Bulk Edit” option found near the top of the slot creation page, near “Export” and the search bar. Here, you can upload a CSV of the one hundred options you’re going to let Alexa accept. (Example CSV).
Once you’ve created both the stock and side slots, navigate back to MarketOrderIntent where your new custom slots should appear (when trying to add a slot type to a slot). Set each slot with their respective slot type. Save and build the model.
Exit out of that skill by clicking “Your Skills” at the top left corner. Here, you’ll see your newly made skill on the list. Underneath the name of your skill, there’s a clickable called “View Skill ID.” You can click on this to retrieve the skill ID of your skill. You’ll need this for later to link your skill to your Lambda function, so remember how to access this.
Setting up the Environment
The script is written as a part of a Node.js app (download Node.js here). After installing Node, you’ll need to perform the following actions.
- Create a new folder, cd into the folder, and run the following command (you can just hit enter through all the options that the console prompts you with):
$ npm init && npm install
- Install some core Alexa dependencies and the Alpaca API node module:
$ npm i ask-sdk-core ask-sdk-model @alpacahq/alpaca-trade-api
Writing the Script
Amazon provides a template for writing a script for Alexa, which you can find here. Create a file in the directory you made earlier, name it “index.js”, and copy-paste the Amazon template into this file.
Adding Constants
At the top of the file, add the following constants:
const Alpaca = require('@alpacahq/alpaca-trade-api');
const keyId = "KEY_ID_HERE";
const secretKey = "SECRET_KEY_HERE";
Replace the keyId and secretKey constants with your Alpaca API keys (if you don’t have an account, sign up for a free account here).
You’ll also need to declare an array mapping each of the 100 stocks we added as a stock choice to its symbol. Here’s a link to that array.
Writing the Intent Handlers
Below this are the Alexa intent handlers. Most of these intent handlers can be left alone, as they are required for the built-in Alexa intents. We will be changing HelloWorldIntentHandler into MarketOrderIntentHandler. Your function should now look like this.
This function checks whether the stock is either an accepted stock name or ticker by searching through your stock dictionary. If it finds the stock, it plugs the stock ticker into an order (along with all the other user inputs) and sends the order using the Alpaca API with the keyId and secretKey set at the top of the script.
There are other small changes you can make to the script template to improve user experience, including:
- Changing the
LaunchRequestHandlertext when launched. This can be done by changing thespeakOutputconstant to something like:'The Alpaca skill has been initiated. Tell me to do something!’ - Changing the
HelpIntentHandlertext to say something more helpful, like:'Ask me to send a market order!'
After finishing your edits, scroll to the bottom of the script (to exports.handler) and replace the HelloWorldIntentHandler with MarketOrderIntentHandler.
Save the file. Create a new empty zipped folder and move all of the files in your directory (node modules, index.js, package.json, package-lock.json) directly into the zipped folder to prepare to upload to AWS Lambda.
Here’s a link to the entire script.
Setting Up Lambda
Create the Lambda function
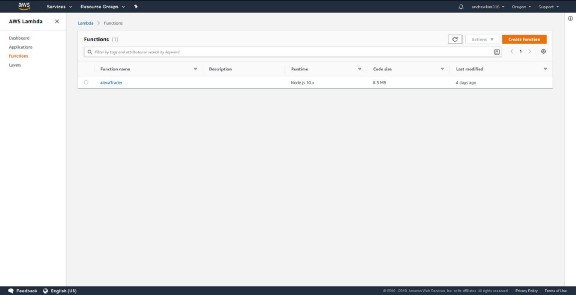
Navigate to the AWS Lambda management console (you can use the link here). It should look like:
To be able to link to Alexa, you’ll need to change your region to one of the following 4 regions (in the top right corner):
- Asia Pacific (Tokyo)
- EU (Ireland)
- US East (N. Virginia)
- US West (Oregon)
Click “Create function” and enter your function name on the next screen. You can leave everything else as defaults, then click “Create function” again at the bottom right. Your screen should now look like:
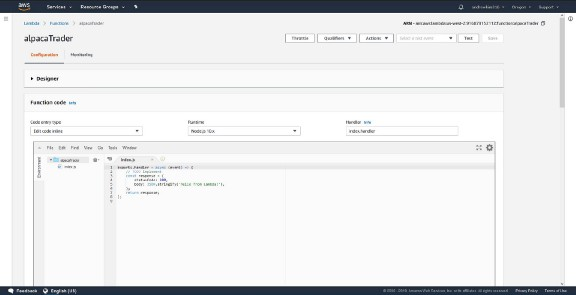
Your Lambda function is now ready to be linked to your Alexa skill.
Linking the Lambda function to the Alexa Skill
- Click “Designer” and “Add a Trigger,” where you should add “Alexa Skills Kit.” Put in the Skill ID of the Alexa skill you created.
- Once you add the trigger, you’ll be asked to configure your skill at the bottom of the screen. Before clicking the link, copy the ARN at the top right corner of the screen—you’ll need it to finish configuration.
- After clicking the link, navigate into your skill and click on “Endpoint” on the left bar. Select “AWS Lambda ARN” and paste the ARN from before into the “Default Region” section. Save the endpoint.
Upload the Script
- Navigate back to the Lambda console.
- Change the code entry type into “Upload .zip file.” Upload your zipped Node app.
- After uploading, click Save, and your script is all set. Now we can test within the Alexa Developer Console and release the skill for beta testing.
Beta Testing
Head over to the Alexa Developer Console and click into your skill. At the top navigation bar, click “Distribution,” and you’ll be brought to a screen like this:
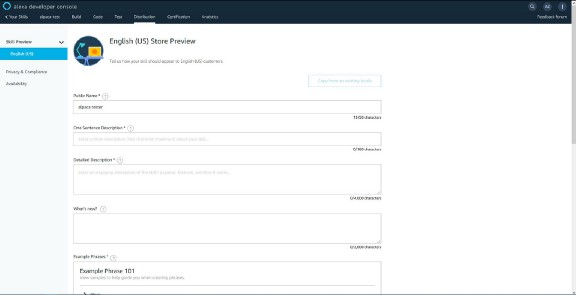
Fill out all of the required fields (they can be filled with whatever you want). After filling out this, you’ll need to fill out the Privacy & Compliance section (fill it in how you see fit for your use case). Finally, you’ll need to fill out the Availability section. This is where you can enable Beta testing to test on your own device.
Click on the Beta testing drop down, enter an Administrator email, and add a tester email (this should be the email for your Alexa account). You’ll now receive an invitation to add the skill to your Alexa-enabled device, and you should be able to play around with your skill!
Next Steps
For information on how to add more features to your Alexa skill, check out the next Alexa and Alpaca tutorial!
 Alpaca Team
Follow @AlpacaHQ on Twitter!
Brokerage services are provided by Alpaca Securities LLC ("Alpaca"), member FINRA/SIPC, a wholly-owned subsidiary of AlpacaDB, Inc. Technology and services are offered by AlpacaDB, Inc.