Introduction
OAuth 2.0 integration has become a standard among companies, allowing third-party developers to use their customer’s logins to access their accounts on other services. Alpaca has followed suit and has added their own integration so that developers can create applications for the community that wouldn’t otherwise be feasible.
While Alpaca has made the whole process easy-to-use, implementing it can be challenging in some mediums, so today we’re going to take a look at it from the perspective of Android development. The goal is that after you read this, you may want to create your own Android app with Alpaca integration.
Here's a link to the project we will be using to write this article. Go check it out!
 tamuseanmiller
Using AppAuth for OAuth Integration Setup
Requesting An Authorization Code
Using AppAuth for OAuth Integration Setup
To make our lives easier, we’re going to use AppAuth for OAuth integration, so first, we need to add it to our app's build.gradle. The version we're going to use is version 0.7.1, so add this line to the dependencies section of your build.gradle.
implementation 'net.openid:appauth:0.7.1'After you do this, you'll want to go to Alpaca's OAuth Apps Page and create your own app under the "My Developed Apps" section. You'll need to supply a name, description, website, and a redirect URI for your app. The redirect URI is going to be the URI for your app so when a user authenticates on the Alpaca website, it will redirect back to your application.
The easiest way to make a redirect URI is to use your app's package name. For example, if your package name is com.seanmiller.alpacadashboard then you can have a URI like alpacadashboard://seanmiller.com/.
This URI will have to be added to AndroidManifest.xml for AppAuth to retrieve the token being sent back during the OAuth transaction. You can do this by adding the following lines to the application section of your manifest file.
<activity
	android:name="net.openid.appauth.RedirectUriReceiverActivity"
	tools:node="replace">

		<intent-filter>
			<action android:name="android.intent.action.VIEW" />

			<category  android:name="android.intent.category.DEFAULT" />
			<category android:name="android.intent.category.BROWSABLE" />

			<data
				android:host="seanmiller.com"
				android:path="/"
				android:scheme="alpacadashboard" />
		</intent-filter>
	</activity>
You can modify the host, path, and scheme sections of the data tag to your own URI characteristics. After you create your Alpaca OAuth Application, make sure to note your Client and Secret Keys from the OAuth App you created for use later.
Requesting an Authorization Code
The first part of the OAuth 2.0 workflow is to request an authorization code and let our user login to the Alpaca website to grant access. If you want to learn more about OAuth 2.0 authentication, DigitalOcean has a fantastic article on the subject.
After the initial setup, we need to make a Login Activity for our users. So, create a new Blank Activity in Android Studio called LoginActivity and create a method called authenticate(). Inside this method, we are going to make our initial token request. Firstly, we have to create PendingIntents for if the request succeeds and if it fails. A PendingIntent calls finish() on an activity and then starts another activity when a certain condition is met. Here is how we will be setting that up:
// Create success and fail PendingIntents to next Activity
Intent intent = new Intent(LoginActivity.this, MainActivity.class);
Intent intent2 = new Intent(LoginActivity.this, LoginActivity.class);
PendingIntent ifSuccess = PendingIntent.getActivity(LoginActivity.this, 0, intent, 0);
PendingIntent ifFail = PendingIntent.getActivity(LoginActivity.this, 0, intent2, 0);
After we create our intents, we then need to create a service configuration for the endpoints to be used for authentication. For Alpaca the two endpoints are "https://app.alpaca.markets/oauth/authorize" for the authorization code and "https://api.alpaca.markets/oauth/token" to retrieve the actual token. Here is the code:
// Initialize ServiceConfig for the different OAuth Endpoints
AuthorizationServiceConfiguration serviceConfig =
	new AuthorizationServiceConfiguration(
	Uri.parse("https://app.alpaca.markets/oauth/authorize"), // authorization endpoint
	Uri.parse("https://api.alpaca.markets/oauth/token")); // token endpoint
Then we need to use a builder to create the request we will make:
// Start building request to obtain initial key
AuthorizationRequest.Builder authRequestBuilder =
  new AuthorizationRequest.Builder(
	  serviceConfig, // the authorization service configuration
	  <YOUR-CLIENT-OAUTH-KEY>, // the client ID, typically pre-registered and static
	  ResponseTypeValues.CODE, // the response_type value: we want a code
	  Uri.parse(<YOUR-REDIRECT-URI>); // the redirect URI to which the auth response is sent
Then create the actual request and an Authorization Service to carry out that request:
// Build the request in custom tabs and switch activities with PendingIntent
AuthorizationRequest authRequest = authRequestBuilder
  .setScope("account:write trading data")
  .build();

AuthorizationService authService = new AuthorizationService(this);
Now we can create a Custom Tab Intent to open the web browser within the app for our user to authenticate on the Alpaca website:
CustomTabsIntent.Builder builder = new CustomTabsIntent.Builder();
builder.setToolbarColor(getColor(R.color.yellow));
CustomTabsIntent customTabsIntent = builder.build();
customTabsIntent.intent.addFlags(Intent.FLAG_ACTIVITY_NO_HISTORY);
customTabsIntent.intent.addFlags(Intent.FLAG_ACTIVITY_NEW_TASK);
I added some extra additions like the toolbar color, which requires adding a yellow color to your colors.xml.
After this, you request the authorization code from Alpaca using the Authorization Service we created, which is where we pass our PendingIntents to:
authService.performAuthorizationRequest(authRequest, ifSuccess, ifFail, customTabsIntent);When this completes, it will activate one of the two PendingIntents, either it will redirect back to the LoginActivity or to our MainActivity.
That's it for the authorization method, so let's create a user interface for it. Open the LoginActivity layout xml file in /res/layouts then add this code:
<?xml version="1.0" encoding="utf-8"?>
<RelativeLayout xmlns:android="http://schemas.android.com/apk/res/android"
  android:layout_width="match_parent"
  android:layout_height="match_parent"
  xmlns:app="http://schemas.android.com/apk/res-auto"
  xmlns:tools="http://schemas.android.com/tools"
  tools:context=".LoginActivity">

 <com.google.android.material.button.MaterialButton
  android:layout_width="wrap_content"
  android:layout_height="wrap_content"
  android:layout_centerInParent="true"
  app:cornerRadius="15dp"
  android:stateListAnimator="@null"
  android:text="Authenticate"
  android:textColor="@color/colorPrimary"
  android:backgroundTint="@color/yellow"
  android:id="@+id/button_login" />

</RelativeLayout>
This creates a blank activity with one MaterialButton. So, if we go back to LoginActivity.java, we can add an onClickListener for the button to call our authenticate() method. In your onCreate() just write this code:
// On authenticate click
MaterialButton button_login = findViewById(R.id.button_login);
button_login.setOnClickListener(v -> {
	authenticate();
});
That's it! Now when you click the button it will open a browser for the user to authenticate and send a request for the Authorization code. Now let's see how to "catch" the authorization code and send it back to retrieve our token.
Retrieving the Access Token
The second and third steps of the OAuth 2.0 workflow is to retrieve the authorization code that we requested in the last section and to request the access token using that authorization code. After requesting the access token, AppAuth will automatically retrieve the response where we can finally retrieve the access token and make our first API request for our user’s account.
Now we can open up our MainActivity.java and create a method called finishAuthentication() which will catch the authorization code that is sent back and then also retrieve the access token. The first thing we need to do is reinitialize the service configuration:
// Reinitialize the service configuration for continued use
AuthorizationServiceConfiguration serviceConfig =
	new AuthorizationServiceConfiguration(
	Uri.parse("https://app.alpaca.markets/oauth/authorize"), // authorization endpoint
	Uri.parse("https://api.alpaca.markets/oauth/token")); // token endpoint
Then we need to catch the redirect intent that was called from our LoginActivity and parse the response or exception thrown:
AuthorizationResponse resp = AuthorizationResponse.fromIntent(getIntent());
AuthorizationException ex = AuthorizationException.fromIntent(getIntent());
Then we can check if there is an exception and the response is null, if there is not a response, then it should redirect back to LoginActivity:
if (resp == null) {
	Log.v("Exception", "Failed: ", ex);
	Intent intent = new Intent(this, LoginActivity.class);
	startActivity(intent);
	finish();
	return;
}
Now that we know that there is a response, we can continue by building a token request:
// Build the authorization request
TokenRequest.Builder tokenRequestBuilder =
	new TokenRequest.Builder(
	serviceConfig,
	<YOUR-CLIENT-OAUTH-KEY>);
Map<String, String> secret = new HashMap<>();
secret.put("client_secret", <YOUR-SECRET-OAUTH-KEY>);
Then we can finish building the request:
// Finish building the token request
TokenRequest tokenRequest = tokenRequestBuilder
  .setGrantType("authorization_code")
  .setAdditionalParameters(secret)
  .setAuthorizationCode(resp.authorizationCode)
  .setRedirectUri(Uri.parse(<YOUR-REDIRECT-URI>))
  .build();
Now that the request has been built, we can perform the request for the token:
AtomicReference<String> authenticationResponse = new AtomicReference<>();
authService.performTokenRequest(tokenRequest, (tokenResponse, ex1) -> {

	// Check to see if a token was returned
	if (tokenResponse != null) {

		// Exchange succeeded
		System.out.println("Authentication Done");
		System.out.println(tokenResponse.accessToken);
		authenticationResponse.set(tokenResponse.accessToken);
		// ...

	} else {
	  // authorization failed, check ex1 for more details
	  System.out.println(ex1);

	}
});
That's it! Now that you have the access token in tokenResponse, the best way to save it would be using SharedPreferences to store it so that the user won't have to re-authorize the next time a user opens our app.
Polygon Requests
Making Polygon requests requires one extra step to gather an ID for the user that we can use to make Polygon requests in place of an API key.
The next obvious step would be to gather the ID that can be used to make Polygon requests. We can do that by using a library like OkHttp to send a standard request. The code will look like this:
// Fetch Polygon Id and add to SharedPreferences
try {
	// Create Client and request
	OkHttpClient client = new OkHttpClient();
	Request request = new Request.Builder()
	.url("https://api.alpaca.markets/oauth/token")
	.addHeader("Authorization", "Bearer " + tokenResponse.accessToken).build();

	// Catch response after execution
	Response response = client.newCall(request).execute();

	// Convert response to JSON to find the field
	JSONObject jsonObject = new JSONObject(Objects.requireNonNull(response.body()).string());
	System.out.println(jsonObject.get("id").toString());

} catch (IOException | JSONException e) {
	e.printStackTrace();
}
Finally, we need to call this method from MainActivity.java if there is no authorization token stored. To do this, we can use SharedPreferences to store the two tokens, then we can check to see if the tokens exist on the app’s start. To do this easily, we can create a manager for SharedPreferences. I use the one from Shubham Sejpal's Stack Overflow Response.
tamuseanmillerAfter we have this file, we can then save our authorization token as a string by calling:
new SharedPreferencesManager(this).storeString("access_token", tokenResponse.accessToken);
And we can check if it exists in the onCreate() method by calling:
if (new SharedPreferencesManager(this).retrieveString("access_token", "NULL").equals("NULL")) {
	finishAuthentication();
	// ...
}
Conclusion
Hopefully you understand a little bit more about the OAuth 2.0 authentication process and how you can implement Alpaca integration on Android. If you want to learn more about Alpaca’s OAuth 2.0 workflow, check out the guide on their website.
 Alpaca
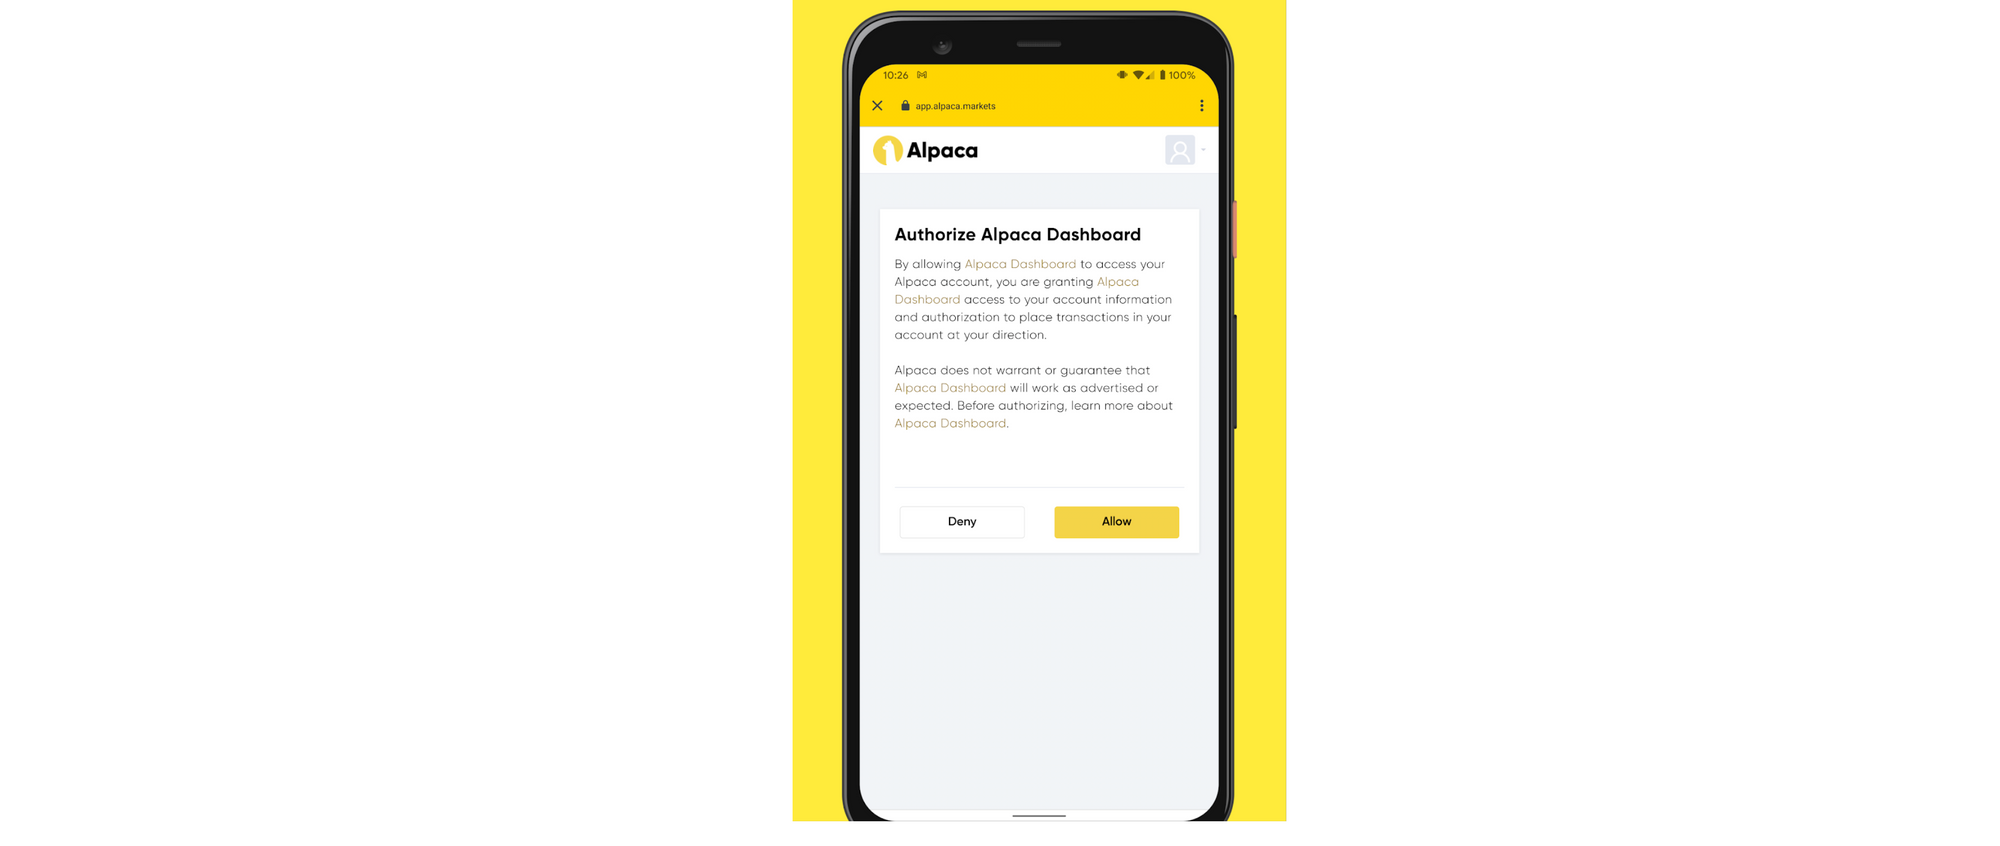
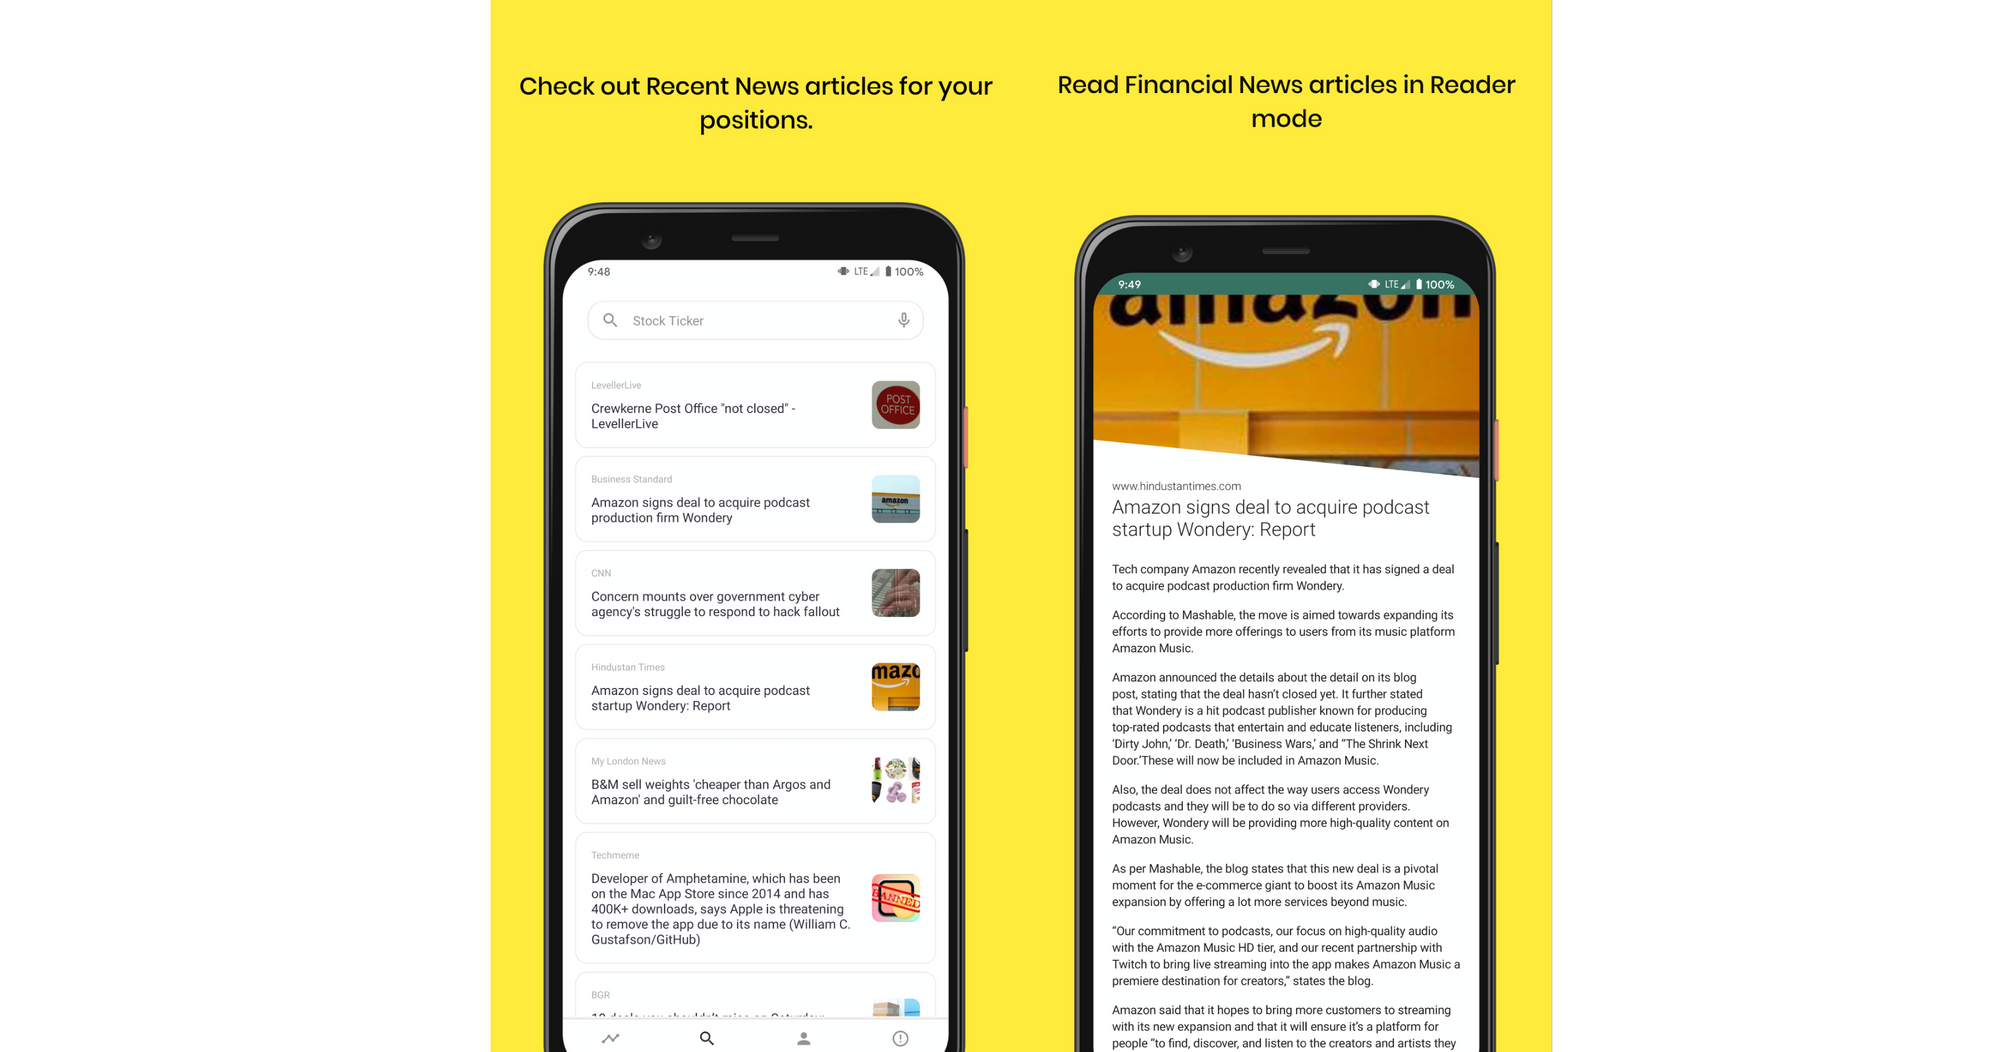
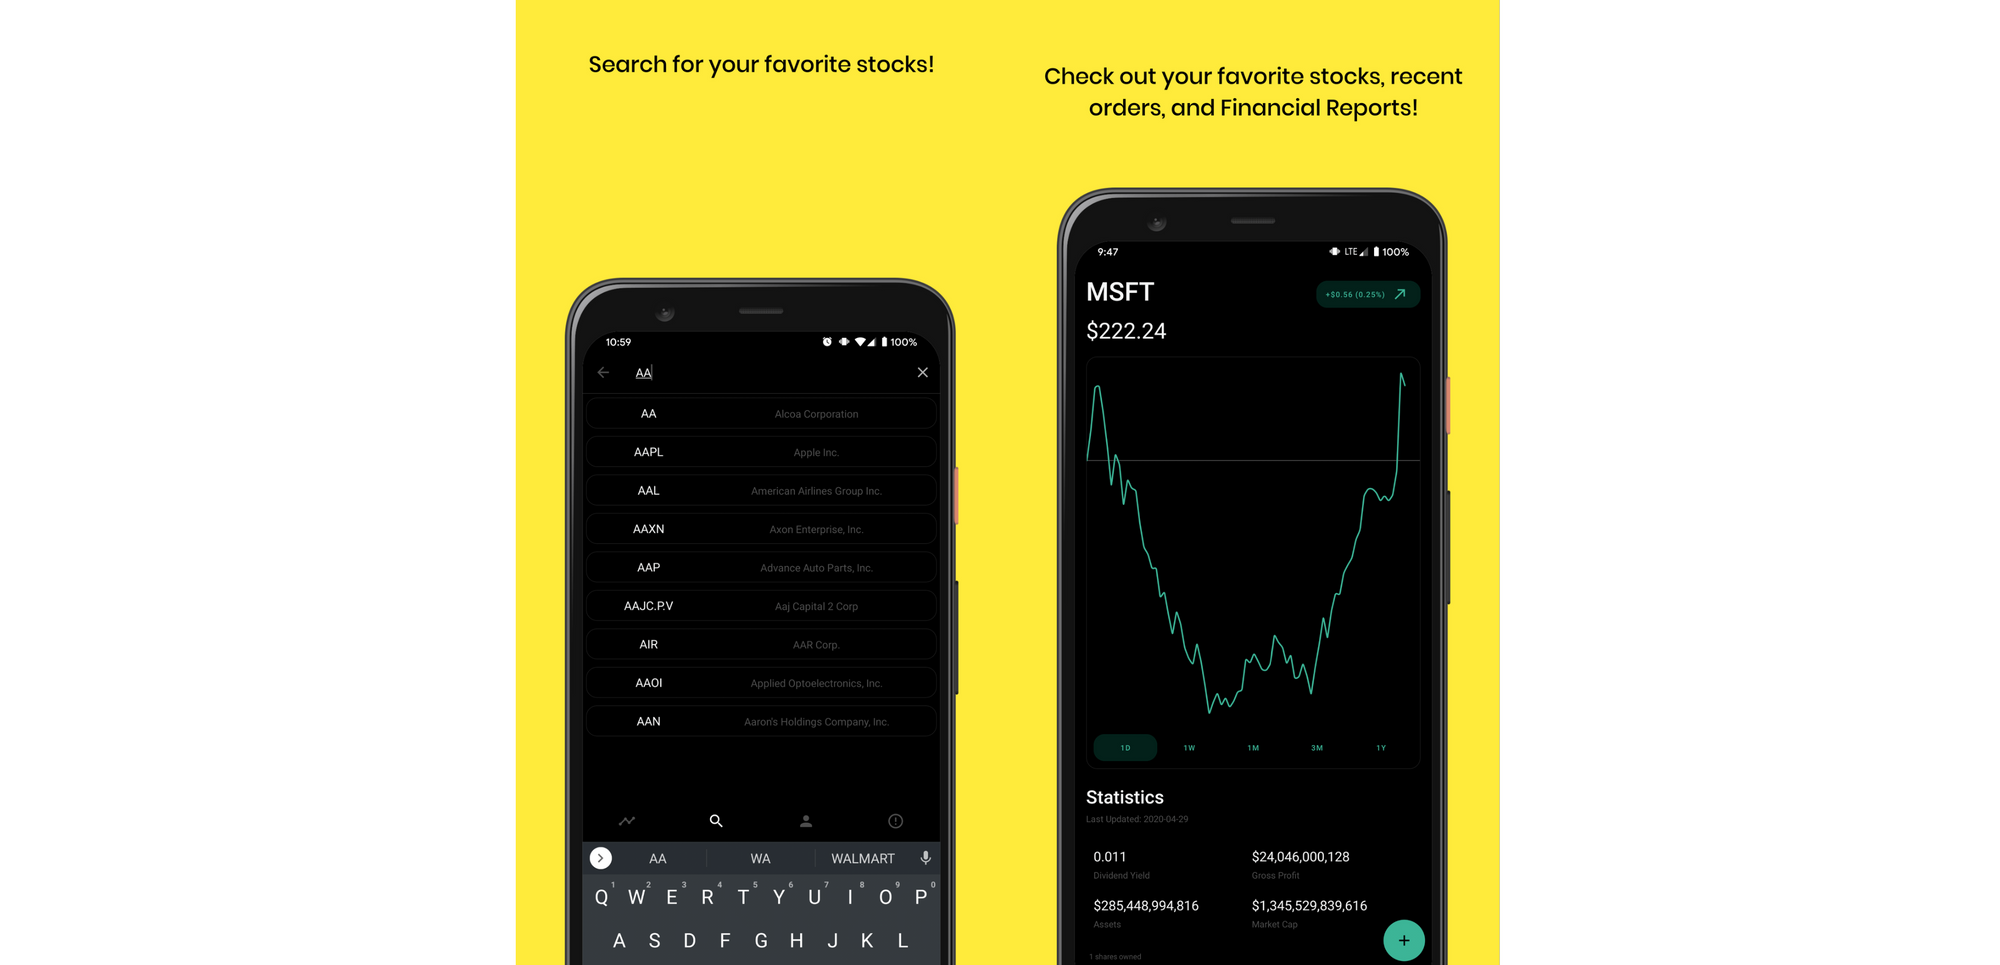
The only thing shown so far is the authentication page for this Android app, and if you want to see more in regards to Android development with Alpaca, keep an eye out for more articles. In the meantime, checkout the application that this introduction stems from. It’s a mobile Android dashboard called Alpaca Dashboard which is now available on Google Play! Go check it out!
You can also check out the code from this article as well as the rest of the code for Alpaca Dashboard for free on Github, just follow the link above!
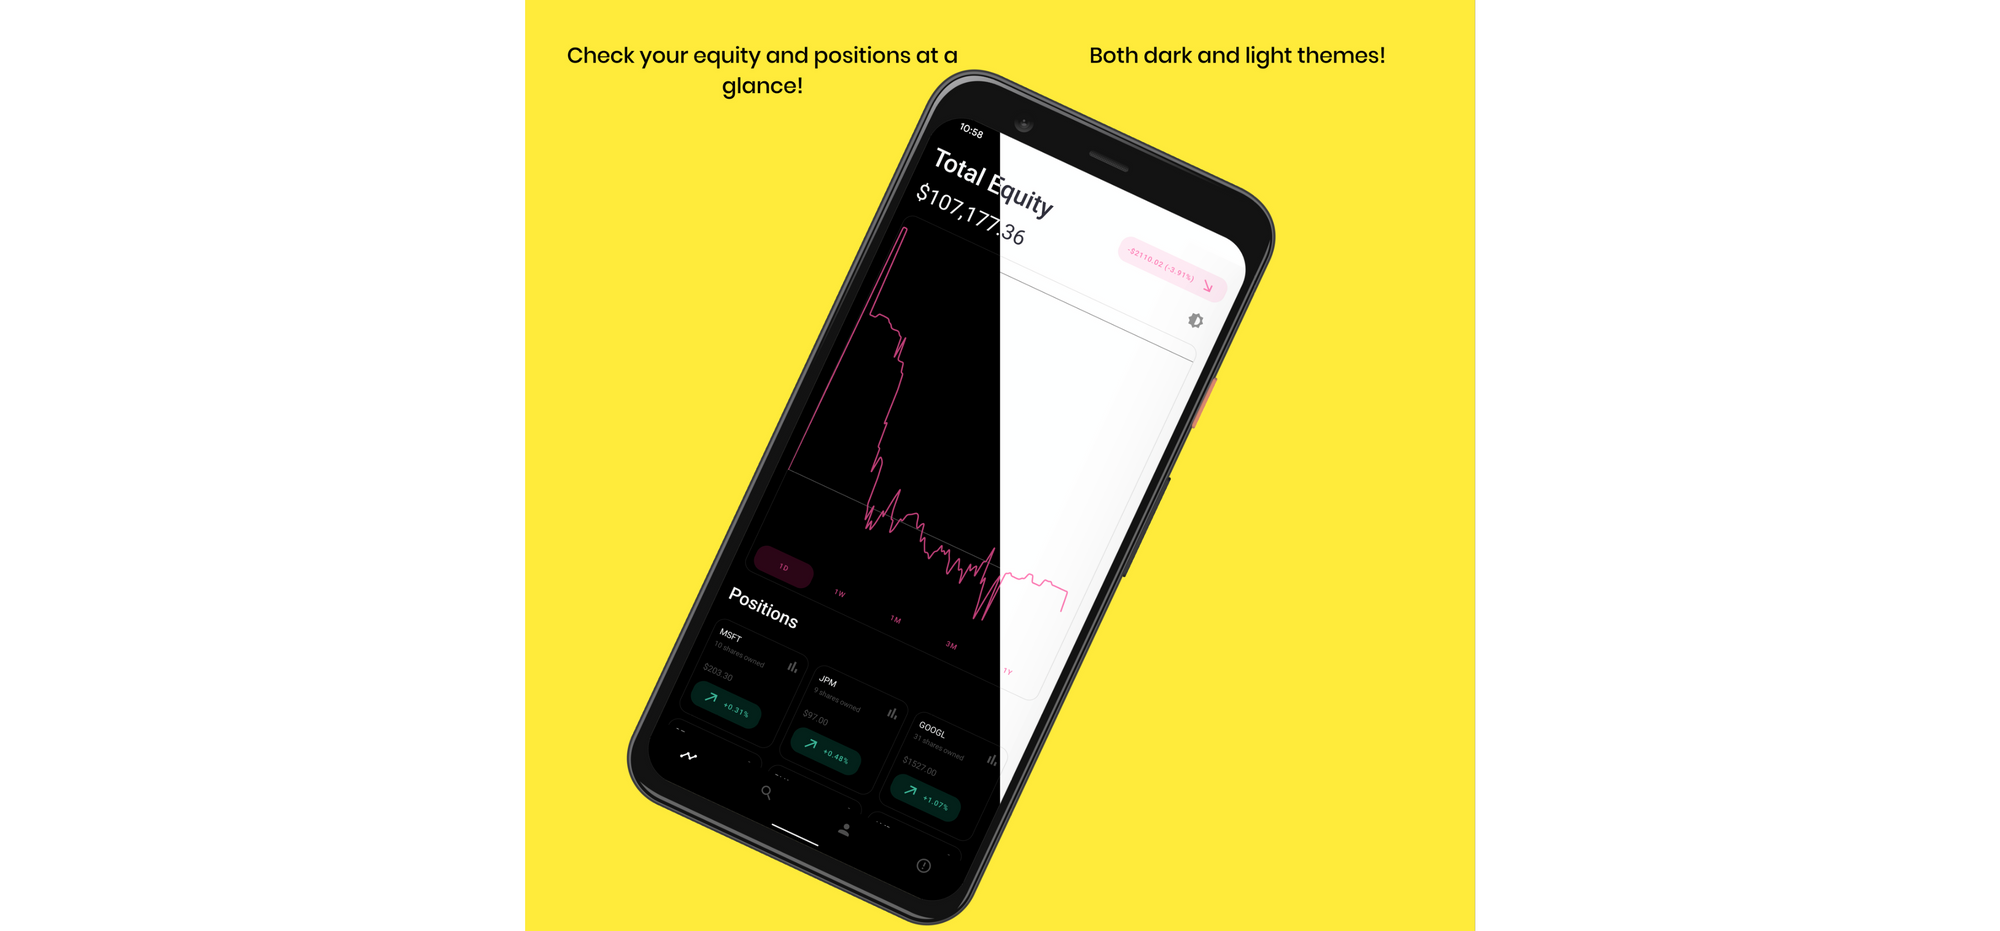
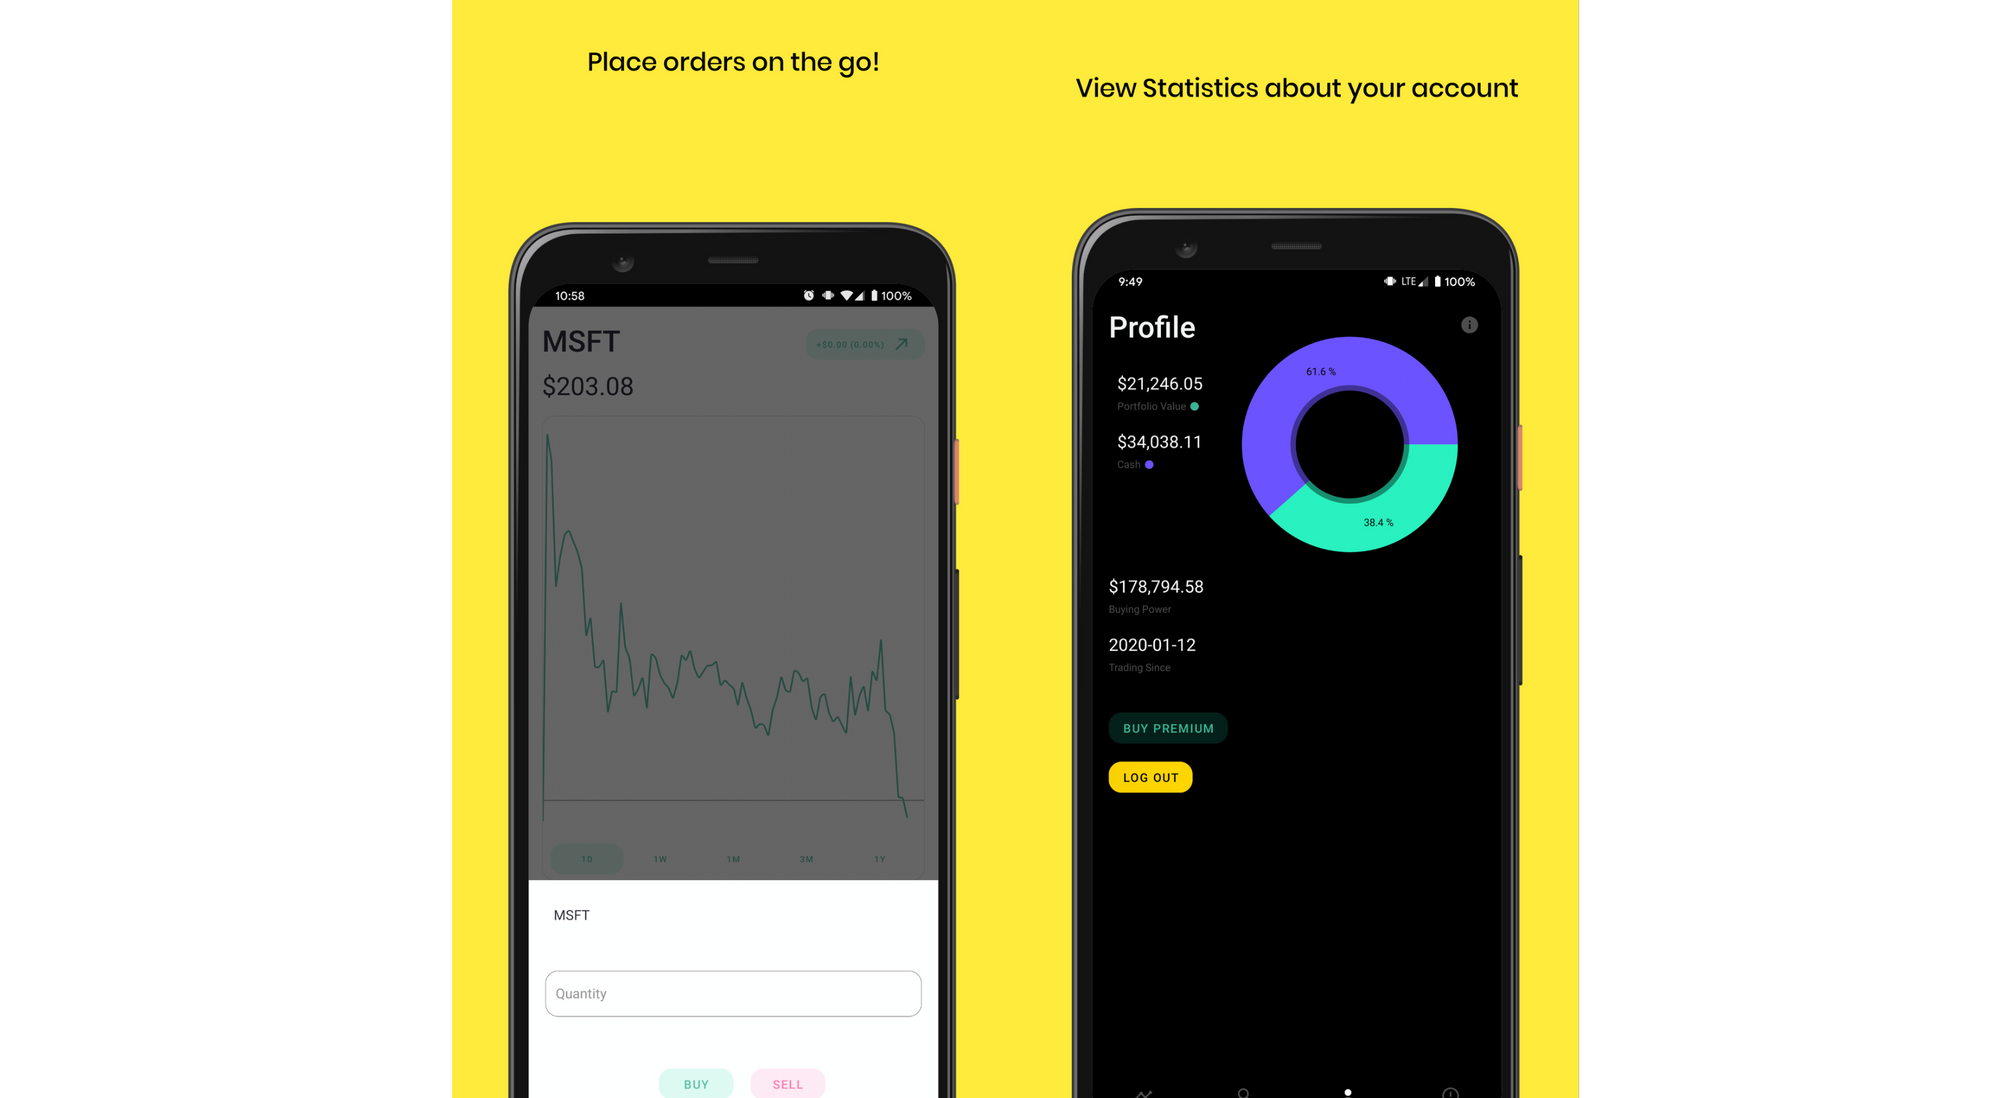
Below are some images of the Alpaca Dashboard that has been referenced throughout this article.
Technology and services are offered by AlpacaDB, Inc. Brokerage services are provided by Alpaca Securities LLC (alpaca.markets), member FINRA/SIPC. Alpaca Securities LLC is a wholly-owned subsidiary of AlpacaDB, Inc.