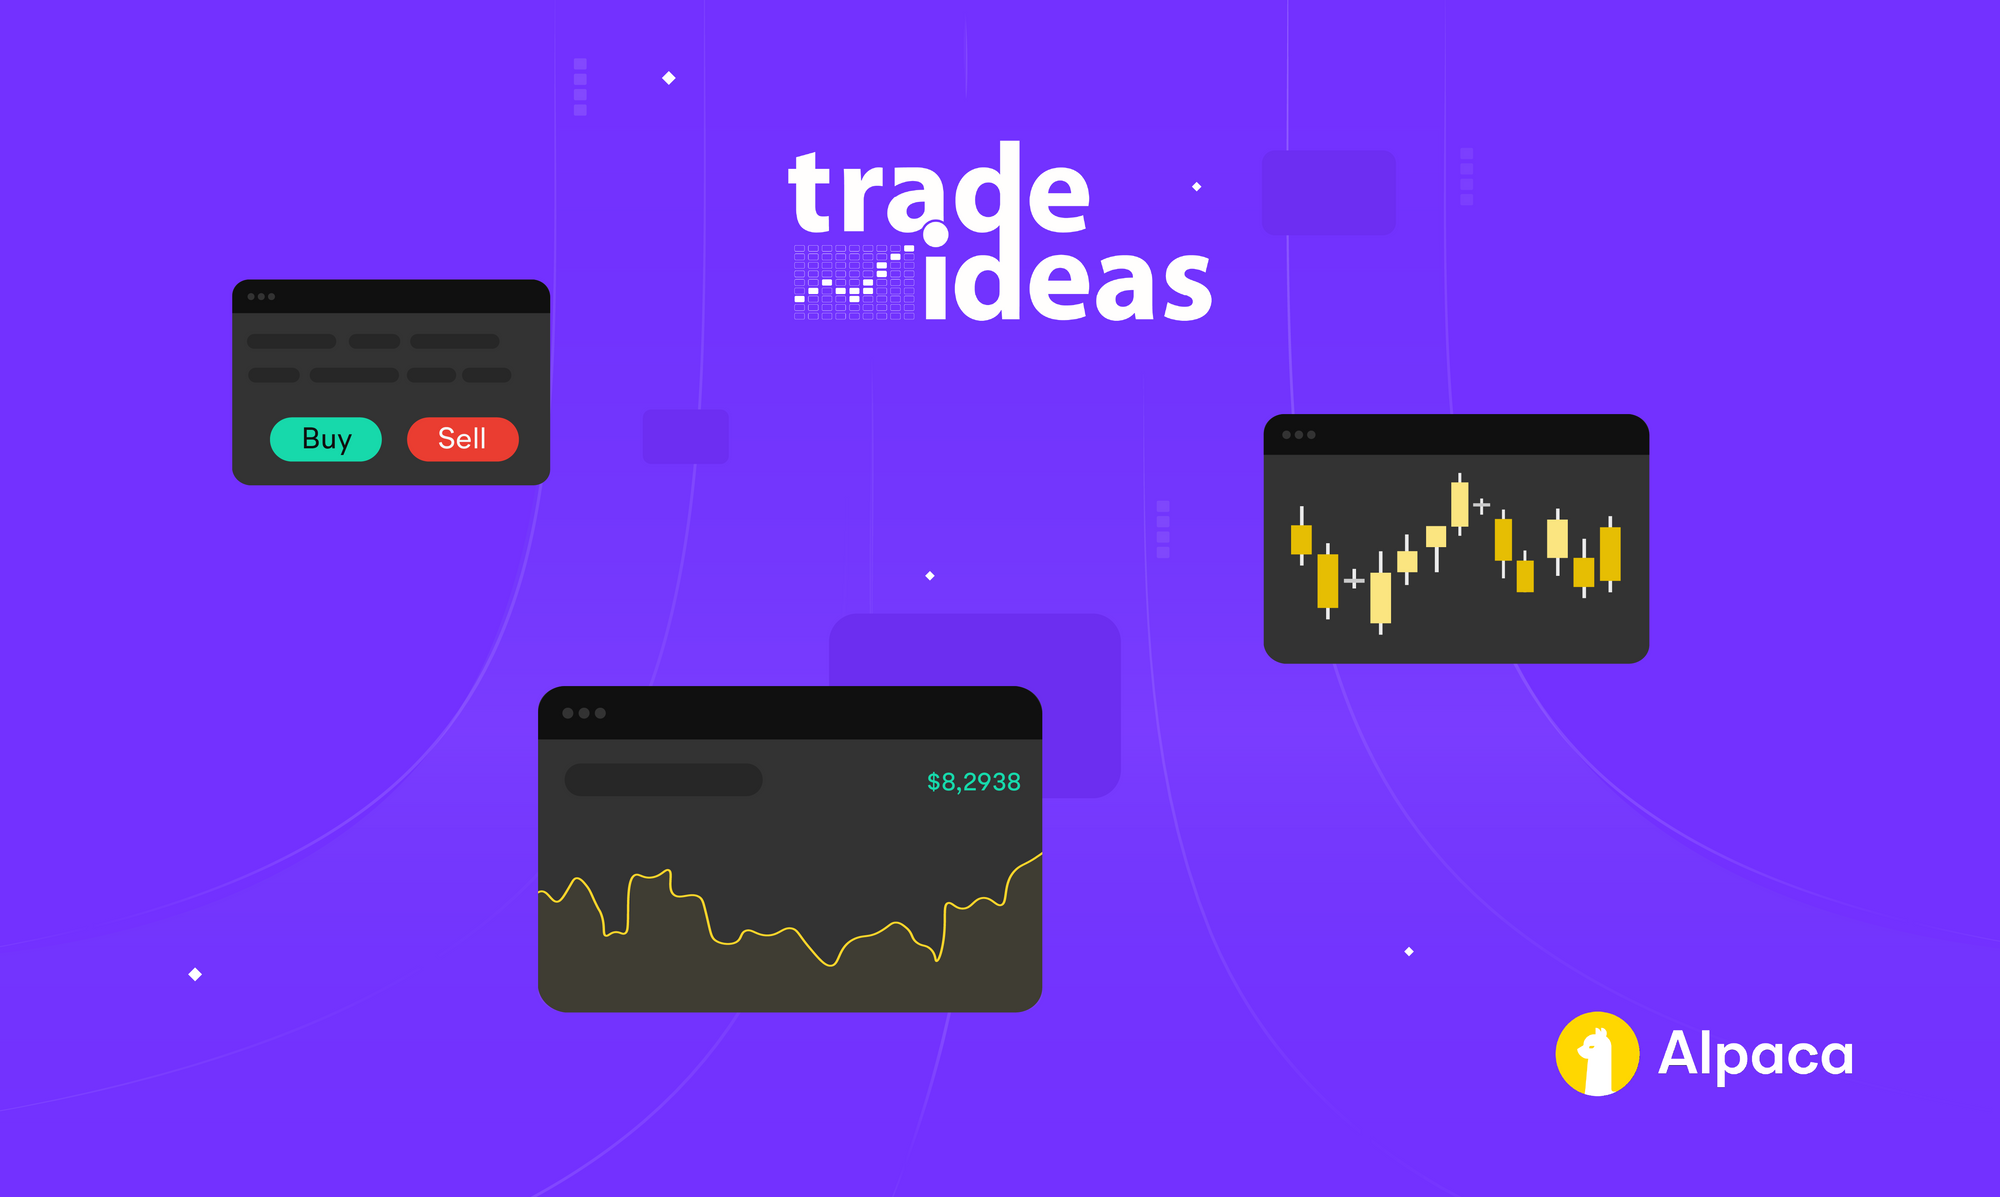
Flutter is a free and open-source UI framework designed by Google that is exploding in popularity[1]. Flutter allows developers to write a single, platform-independent codebase to build apps that are performant, scalable, and delightful to use. Consequently, in 2021 we’ve seen Flutter overtake React Native as the most popular cross-platform mobile framework[2]. This means we’ll be seeing a lot more Flutter apps out there, and in this article, we’ll be creating one of them.
Using Alpaca’s OAuth services, our application will enable users to place trades and retrieve their latest account information in real-time. This article will be using a Chrome device as an example. You can view and clone the full project from the Github repository.
Getting started with Alpaca and Flutter
Setting up Alpaca
The first thing you’ll need is an Alpaca account. If you don’t have one yet, sign up for a free account. Next, we’ll create the OAuth app and save the keys that go along with it. Follow the official docs for registering an OAuth app. In the last step of the guide, you’ll obtain the credentials for your app. Make sure to save these keys locally so that we can refer to them later.
Setting up Flutter
If you haven’t installed Flutter yet, follow the official documentation to do so. After Flutter is installed, create a project using these commands. Next, you’ll want to delete the files contained in the lib directory and create the following structure inside:
.
├── README.md
├── analysis_options.yaml
├── android
├── build
├── ios
├── lib
│   ├── generated_plugin_registrant.dart
│   ├── main.dart
│   ├── models
│   │   ├── account.dart
│   │   └── alpaca_client.dart
│   ├── pages
│   │   ├── dashboard.dart
│   │   └── login.dart
│   ├── utils
│   │   ├── get_alpaca_account.dart
│   │   └── send_alpaca_order.dart
│   └── widgets
│       ├── account_builder.dart
│       └── button_widget.dart
├── pubspec.lock
├── pubspec.yaml
├── test
├── web
├── windows
└── .env
For security, create a .env file to store your sensitive variables. To follow along with this example, it should contain your OAuth client keys, redirect URI, and the Alpaca URLs for trading and data.
OAUTH_CLIENT_ID=<Your-Client-ID>
OAUTH_CLIENT_SECRET=<Your-Client-Secret>
OAUTH_REDIRECT_URI=http://localhost:3000/dashboard
ALPACA_TRADE_URL=https://paper-api.alpaca.markets/
ALPACA_DATA_URL=https://data.alpaca.markets/
The last step before we can get into the code is installing your dependencies. Open your pubspec.yaml file and type in the following dependencies:
dependencies:
 html: ^0.15.0
 oauth2_client: ^2.3.3
 http: ^0.13.4
 url_strategy: ^0.2.0
 flutter_dotenv: ^5.0.2
 flutter:
   sdk: flutter
Writing the foundation of your app
As in many other applications, our app originates from the main file. Starting from the top, we’ll import our relevant dependencies and create names for our routes. Inside of the main function call, we’ll make calls to the URL strategy and .env dependencies then initialize our app.
import 'package:flutter/material.dart';
import 'pages/login.dart';
import 'pages/dashboard.dart';
import 'package:url_strategy/url_strategy.dart';
import 'package:flutter_dotenv/flutter_dotenv.dart';
import 'dart:html';

const loginRoute = '/';
const dashboardRoute = '/dashboard';

Future<void> main() async {
 setPathUrlStrategy(); // Removes /#/ from the URL
 await dotenv.load();
 runApp(const MyApp());
}

class MyApp extends StatelessWidget {
 const MyApp({Key? key}) : super(key: key);

 @override
 Widget build(BuildContext context) {
   return MaterialApp(onGenerateRoute: _routes(), theme: _theme());
 }
 ...
}
The last two things we need to define here are the routing and the theme for our app. Our two main routes will be our login page and dashboard, with a default case that handles our OAuth flow pop-up. Our main routes simply render their respective pages, but our default route is a bit more complex. The details on its implementation can be found in the documentation for the OAuth package used for this project.
RouteFactory _routes() {
   return (settings) {
     Widget screen;
     switch (settings.name) {
       case loginRoute:
         screen = LoginPage(title: "Log in with Alpaca");
         break;
       case dashboardRoute:
         screen = const Dashboard();
         break;
       default:
         String? code = Uri.base.queryParameters['code'];
         // This code tells the pop-up auth window to send the code to parent
         if (window.opener != null && code != null) {
           window.opener!.postMessage(window.location.href, "http://localhost:3000");
         }
         return null;
     }
     return MaterialPageRoute(builder: (BuildContext context) => screen);
   };
 }
In our theme, we’ll return a theme data object setting the primary swatch and visual density.
ThemeData _theme() {
   return ThemeData(
     primarySwatch: Colors.yellow,
     visualDensity: VisualDensity.adaptivePlatformDensity,
   );
 }
Creating a login page and completing the OAuth flow
Firstly, import the necessary packages and initialize the relevant environment variables.
import 'package:flutter/material.dart';
import 'package:flutter_dotenv/flutter_dotenv.dart';
import 'package:oauth2_client/oauth2_helper.dart';

import '../models/alpaca_client.dart';

class LoginPage extends StatelessWidget {
 LoginPage({Key? key, required this.title}) : super(key: key);
 final String title; // Passed in from main.dart
  // Get variables from .env
 final clientId = dotenv.env['OAUTH_CLIENT_ID'] ?? 'CLIENT ID NOT FOUND';
 final clientSecret =
     dotenv.env['OAUTH_CLIENT_SECRET'] ?? 'CLIENT SECRET NOT FOUND';
 final redirectUri =
     dotenv.env['OAUTH_REDIRECT_URI'] ?? 'REDIRECT URI NOT FOUND';
...
}
The OAuth package in our project has two classes that we’ll be dealing with: an OAuth client class and an OAuth helper class. We’ll be implementing a custom client specifically for Alpaca. Following the documentation for our OAuth package and the Alpaca OAuth docs, we’ll implement the Alpaca OAuth client as follows:
import 'package:oauth2_client/oauth2_client.dart';

class AlpacaClient extends OAuth2Client {
 String clientId;
 String clientSecret;
 AlpacaClient(
     {required String redirectUri,
     required String customUriScheme,
     required this.clientId,
     required this.clientSecret})
     : super(
           authorizeUrl:
               'https://app.alpaca.markets/oauth/authorize',
           tokenUrl:
               'https://api.alpaca.markets/oauth/token',
           redirectUri: redirectUri,
           customUriScheme: customUriScheme);

 // Override the base class to add extra fields to the request parameters
 @override
 Map<String, dynamic> getTokenUrlParams(
     {required String code,
     String? redirectUri,
     String? codeVerifier,
     Map<String, dynamic>? customParams}) {
   var foo = super.getTokenUrlParams(
       code: code,
       redirectUri: redirectUri,
       customParams: customParams);
   foo['client_id'] = clientId;
   foo['client_secret'] = clientSecret;
   return foo;
 }
}
Now we can instantiate the client and helper classes on our login page before we start the OAuth flow.
// Instantiate OAuth client and helper
 late AlpacaClient client = AlpacaClient(
     redirectUri: redirectUri,
     customUriScheme: redirectUri,
     clientId: clientId,
     clientSecret: clientSecret);
 late OAuth2Helper oauthHelper = OAuth2Helper(client,
     grantType: OAuth2Helper.AUTHORIZATION_CODE,
     clientId: clientId,
     clientSecret: clientSecret,
     scopes: ['account:write', 'trading', 'data']);
The last thing to complete on the login page is the build function. Since our project is focused on trading, we’ll keep this page simple. Let’s design our login page to have one button in the middle that starts the OAuth flow and then navigates to the trading dashboard after the flow has finished.
void startLogin(BuildContext context) {
   oauthHelper.getToken();
   Navigator.pushNamed(context, "/dashboard");
 }

 @override
 Widget build(BuildContext context) {
   final ButtonStyle style =
       ElevatedButton.styleFrom(textStyle: const TextStyle(fontSize: 20));

   return Scaffold(
     appBar: AppBar(
       title: Text(title),
     ),
     body: Center(
       child: Column(
         mainAxisSize: MainAxisSize.min,
         children: <Widget>[
           ElevatedButton(
               style: style,
               onPressed: () {
                 startLogin(context);
               },
               child: const Text('Log in')),
         ],
       ),
     ),
   );
 }
Launching the app, we’ll see our interface in action.

That’s it for our login page! Now we’ll write the most important part of our app, the trading dashboard.
Creating a trading dashboard and making requests to Alpaca’s endpoints
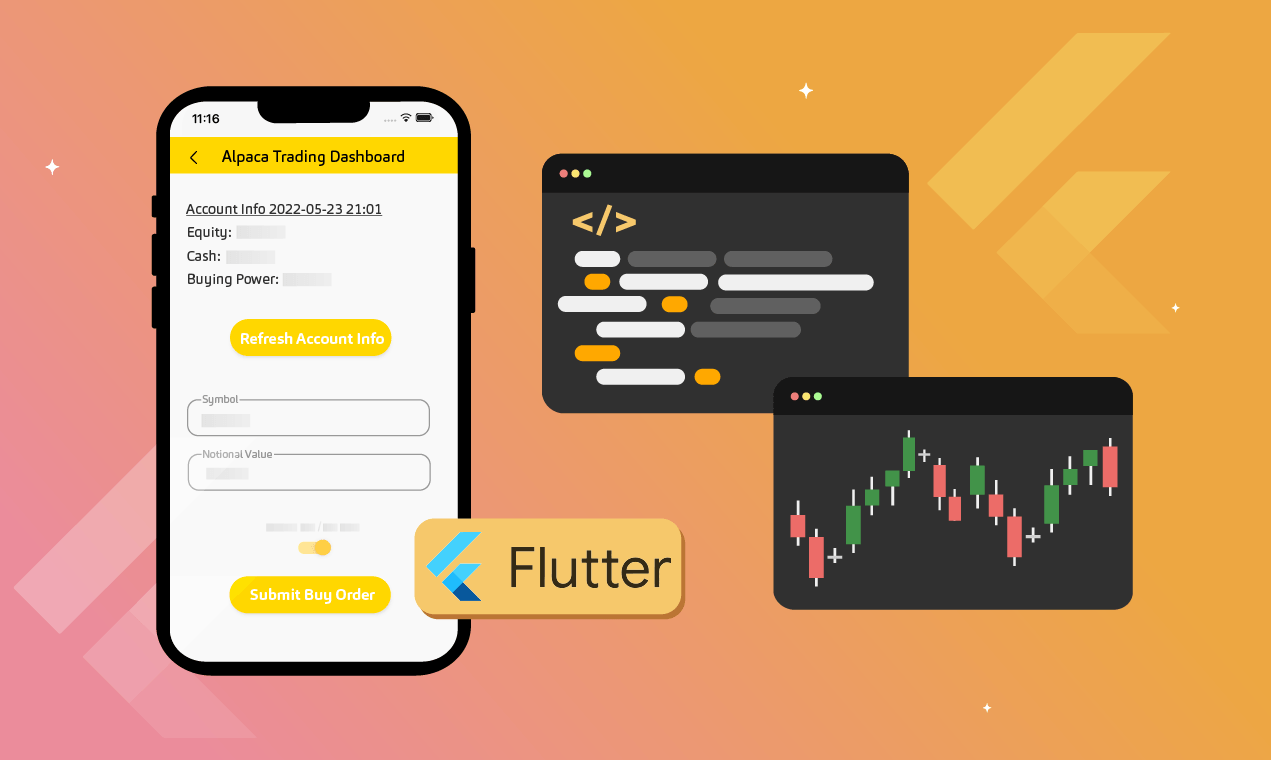
The end product of our dashboard has two sections on the screen. One area displaying the user’s current account information and one area enabling the user to place buy and sell orders.
We’ll start the dashboard in the same way as the login page, by importing dependencies and instantiating an OAuth helper and client. However, a key difference between the dashboard and the login page is that the dashboard is stateful, with the state containing variables such as account equity and buying power.
import 'package:flutter/material.dart';
import 'package:flutter_dotenv/flutter_dotenv.dart';
import 'package:oauth2_client/oauth2_helper.dart';

import '../models/alpaca_client.dart';
import '../models/account.dart';
import '../utils/get_alpaca_account.dart';
import '../utils/send_alpaca_order.dart';
import '../widgets/account_builder.dart';
import '../widgets/button_widget.dart';

class Dashboard extends StatefulWidget {
 const Dashboard({Key? key}) : super(key: key);

 @override
 State<Dashboard> createState() => _DashboardState();
}

class _DashboardState extends State<Dashboard> {
 // Env variables
 final clientId = dotenv.env['OAUTH_CLIENT_ID'] ?? 'CLIENT ID NOT FOUND';
 final clientSecret =
     dotenv.env['OAUTH_CLIENT_SECRET'] ?? 'CLIENT SECRET NOT FOUND';
 final redirectUri =
     dotenv.env['OAUTH_REDIRECT_URI'] ?? 'REDIRECT URI NOT FOUND';

 // OAuth client and helper
 late AlpacaClient client = AlpacaClient(
     redirectUri: redirectUri,
     customUriScheme: redirectUri,
     clientId: clientId,
     clientSecret: clientSecret);
 late OAuth2Helper oauthHelper = OAuth2Helper(client,
     grantType: OAuth2Helper.AUTHORIZATION_CODE,
     clientId: clientId,
     clientSecret: clientSecret,
     scopes: ['account:write', 'trading', 'data']);
...
}
A logical first step for creating stateful widgets is to define what the initial state should be like. In our case, we need to update our state with the user’s current account information. This requires us to do two things: define a model for the account response and write the account request.
A complete example of what the account endpoint response looks like can be found in the Alpaca docs. In this project’s model, we want buying power, cash, equity, and a timestamp for that information. Therefore, in our constructor, we will parse from JSON buying power, cash, and equity, generate a current timestamp string, and return that inside an Account object.
class Account {
 final String buyingPower;
 final String cash;
 final String equity;
 final String date;

 const Account({
   required this.buyingPower,
   required this.cash,
   required this.equity,
   required this.date,
 });

 factory Account.fromJson(Map<String, dynamic> json) {
   // Takes a string-type number and returns it with two decimal places
   String roundNumber(String number) {
     double numAsDouble = double.parse(number);
     String roundedNumber = numAsDouble.toStringAsFixed(2);
     return roundedNumber;
   }

   // Creates a string for the current date and time
   DateTime now = DateTime.now();
   String convertedDateTime =
       "${now.year.toString()}-${now.month.toString().padLeft(2, '0')}-${now.day.toString().padLeft(2, '0')} ${now.hour.toString().padLeft(2, '0')}:${now.minute.toString().padLeft(2, '0')}:${now.second.toString().padLeft(2, '0')}";

   return Account(
     buyingPower: roundNumber(json['buying_power']),
     cash: roundNumber(json['cash']),
     equity: roundNumber(json['equity']),
     date: convertedDateTime,
   );
 }
}
The endpoint exposing account information is GET v2/account and the documentation for it can be found here. The library used for OAuth in this project implements a convenient function for making get requests that only requires the URL as input, taking care of the authentication for us. Therefore, we can define the account request function as:
import 'dart:convert';
import 'package:oauth2_client/oauth2_helper.dart';
import 'package:http/http.dart' as http;
import 'package:flutter_dotenv/flutter_dotenv.dart';
import '../models/account.dart';

Future<Account> getAlpacaAccount(OAuth2Helper oauthHelper) async {
 // Create the account endpoint
 final String tradeUrl = dotenv.env['ALPACA_TRADE_URL'] ?? 'TRADE URL NOT FOUND';
 const String accountEndpoint = 'v2/account';

 // Send get request and check for error
 http.Response response = await oauthHelper.get('$tradeUrl$accountEndpoint');
 if (response.statusCode == 200) {
   return Account.fromJson(jsonDecode(response.body));
 } else {
   throw Exception('Failed to get account');
 }
}
Putting these together, we can complete the dashboard’s state initialization method.
// Retrieves the latest account information and sets the state
 void getAccount(OAuth2Helper oauthHelper) async {
   Future<Account> accountResponse = getAlpacaAccount(oauthHelper);
   setState(() {
     account = accountResponse;
   });
 }

// On initialization, get the current state of the account
 @override
 void initState() {
   super.initState();
   getAccount(oauthHelper);
 }
In building the dashboard we compose a few different widgets. On the top level, we have a form that is validated upon submission. Inside the form, we have our account information builder, TextFormFields that take user specifications for an order, a Switch for toggling buy/sell side, and SizedBox widgets that add space between these widgets.
@override
 Widget build(BuildContext context) {
   return Scaffold(
     appBar: AppBar(
       title: const Text("Alpaca Trading Dashboard"),
     ),
     body: Form(
         key: formKey,
         child: ListView(
           padding: const EdgeInsets.all(16),
           children: [
             AccountBuilder(account),
             const SizedBox(height: 16),
             ButtonWidget(
                 text: 'Refresh Account Info',
                 onClicked: () => getAccount(oauthHelper)),
             const SizedBox(height: 64),
             Text("Place an Order", style: titleStyle),
             const SizedBox(height: 4),
             buildSymbol(),
             const SizedBox(height: 16),
             buildNotional(),
             const SizedBox(height: 32),
             const Text(
               "Toggle Buy/Sell Side",
               textAlign: TextAlign.center,
             ),
             buildSwitch(),
             const SizedBox(height: 32),
             buildSubmit(),
           ],
         ),
     ),
   );
 }
Going through these widgets from top to bottom, let’s first look at the account builder widget. The main thing to note is that since Account is a Future value, we need to have it built inside a FutureBuilder widget. Inside of it, if the account request has come back with a value we’ll display each of the properties inside of Text widgets. Otherwise, a circular progress indicator will be rendered.
import 'package:flutter/material.dart';
import '../models/account.dart';

class AccountBuilder extends StatelessWidget {
 Future<Account>? _account;
 final TextStyle titleStyle = const TextStyle(
   decoration: TextDecoration.underline,
   fontSize: 20,
 );
 final TextStyle style = const TextStyle(fontSize: 20);

 AccountBuilder(Future<Account>? account) {
   _account = account;
 }

 @override
 Widget build(BuildContext context) {
   return FutureBuilder<Account>(
       future: _account,
       builder: (context, snapshot) {
         if (snapshot.hasData) {
           return ListView(
               scrollDirection: Axis.vertical,
               shrinkWrap: true,
               children: [
                 Text('Account Info as of ${snapshot.data!.date}',
                     style: titleStyle),
                 Text('Equity: \$${snapshot.data!.equity}', style: style),
                 Text('Cash: \$${snapshot.data!.cash}', style: style),
                 Text('Buying Power: \$${snapshot.data!.buyingPower}',
                     style: style),
               ]);
         } else if (snapshot.hasError) {
           return Text('${snapshot.error}');
         }

         // Center and size the circular indicator upon rendering
         return (const Center(
             child: SizedBox(
                 width: 30, height: 30, child: CircularProgressIndicator())));
       });
 }
}
Next, we have a button widget that we use for both our account refreshing and order submission. This implementation wraps a RaisedButton with styling to make the dashboard’s build function less verbose.
import 'package:flutter/material.dart';

class ButtonWidget extends StatelessWidget {
 final String text;
 final VoidCallback onClicked;

 const ButtonWidget({
   required this.text,
   required this.onClicked,
   Key? key,
 }) : super(key: key);

 @override
 Widget build(BuildContext context) => RaisedButton(
       child: Text(
         text,
         style: const TextStyle(fontSize: 24),
       ),
       shape: const StadiumBorder(),
       color: Theme.of(context).primaryColor,
       padding: const EdgeInsets.symmetric(horizontal: 16, vertical: 12),
       textColor: Colors.white,
       onPressed: onClicked,
     );
}
The next two widgets, the symbol input builder and notional input builder, are both TextFormField widgets and are implemented similarly. We include one extra parameter for our notional builder that specifies the input should be numerical. Other than this, we define their respective labels, validators, and onSaved functions.
// Builds the text form field for symbol input
 Widget buildSymbol() => TextFormField(
       decoration: const InputDecoration(
         labelText: 'Symbol',
         border: OutlineInputBorder(),
       ),
       validator: (value) {
         if (value == null || value.isEmpty) {
           return 'Please enter a valid symbol (e.g. BTCUSD)';
         } else {
           return null;
         }
       },
       onSaved: (value) => setState(() => symbol = value!),
     );

 // Builds the text field for notional value input
 Widget buildNotional() => TextFormField(
       keyboardType: TextInputType.number,
       decoration: const InputDecoration(
         labelText: 'Notional Value',
         border: OutlineInputBorder(),
       ),
       validator: (value) {
         if (value == null || value.isEmpty) {
           return 'Please enter a number (e.g. 12.5)';
         } else if (double.parse(value) <= 0) {
           return 'Please enter a number greater than 0';
         } else {
           return null;
         }
       },
       onSaved: (value) => setState((() => notional = value!)),
     );
Next is the switch widget. This widget toggles a boolean value that dictates whether we’re submitting a buy or sell order.
// Toggles between sell and buy orders
 void toggleOrderSide() {
   if (isBuySide) {
     side = 'Buy';
   } else {
     side = 'Sell';
   }
 }

// Builds the switch for toggling buy and sell side
 Widget buildSwitch() => Switch(
       value: isBuySide,
       onChanged: (switchVal) => setState(() {
         isBuySide = switchVal;
         toggleOrderSide();
       }),
     );
For the last widget, we have our order submission button. On click, it will validate the form and react accordingly. If we have a valid form submission, then send the order and display a message notifying the user of their order.
// Builds the submit order button
 Widget buildSubmit() => Builder(
       builder: (context) => ButtonWidget(
         text: 'Submit $side Order',
         onClicked: () {
           final isValid = formKey.currentState!.validate();
           if (isValid) {
             formKey.currentState!.save();
             final message =
                 'Submitted a ${side.toLowerCase()} order for \$$notional of ${symbol.toUpperCase()}';
             final snackBar = SnackBar(
               content: Text(
                 message,
                 style: const TextStyle(fontSize: 20),
               ),
               backgroundColor: Colors.green,
             );
             ScaffoldMessenger.of(context).showSnackBar(snackBar);
             sendOrder();
           }
         },
       ),
     );
Finally, all we must do now is implement the order request. The endpoint for placing trades is POST v2/orders. For simplicity, this project will only place market orders by notional value. A comprehensive list of parameters for placing orders can be found in the docs. As with getting account information, our OAuth2Helper class has a method for making post requests. Defining the endpoint and encoding the input parameters into JSON, pass these values into your helper’s post method to complete the order request.
import 'dart:convert';
import 'package:http/http.dart' as http;
import 'package:flutter_dotenv/flutter_dotenv.dart';
import 'package:oauth2_client/oauth2_helper.dart';


void sendAlpacaOrder(OAuth2Helper oauthHelper, String notional, String symbol,
   String side) async {
  // Creating the proper endpoint
 final String tradeUrl =
     dotenv.env['ALPACA_TRADE_URL'] ?? 'TRADE URL NOT FOUND';
 const String ordersEndpoint = 'v2/orders';
 String combinedUrl = '$tradeUrl$ordersEndpoint';

 // Parameters for the order
 String timeInForce = 'day'; // Must be day for notional orders
 String type = 'market'; // Hardcoding notional market orders for this example
 String body = jsonEncode(<String, String>{
   'symbol': symbol,
   'notional': notional,
   'side': side,
   'type': type,
   'time_in_force': timeInForce
 });

 // Send post request
 http.Response response = await oauthHelper.post(combinedUrl, body: body);

 if (response.statusCode != 200) {
   throw Exception('Failed to send order');
 }
}
Inside the dashboard, we’ll wrap this implementation in a function that will update the user’s account information upon order submission.
// Sends a buy/sell order and updates the displayed account information
 void sendOrder() {
   sendAlpacaOrder(
       oauthHelper, notional, symbol.toUpperCase(), side.toLowerCase());
   getAccount(oauthHelper);
 }
Putting everything together and launching the app, we get our end product!

Conclusion
This project combines many different elements of Flutter to integrate with the Alpaca API. Hopefully, the skills you’ve gained here enable you to deploy your own app with these tools. There are many more features to add to a project like this one, and one of them is charting market data. If you’d like to take your app to the next level, check these articles on charting cryptocurrencies and creating interactive line charts.
Sources
[1] - “Stack overflow,” Stack Overflow Insights - Developer Hiring, Marketing, and User Research. [Online]. Available: https://insights.stackoverflow.com/trends?tags=flutter%2Creact-native. [Accessed: 24-May-2022].
[2] - L. S. Vailshery, “Cross-platform mobile frameworks used by global developers 2021,” Statista, 21-Feb-2022. [Online]. Available: https://www.statista.com/statistics/869224/worldwide-software-developer-working-hours/. [Accessed: 24-May-2022].
Alpaca and Flutter are not affiliated and neither are responsible for the liabilities of the other.
Please note that this article is for general informational purposes only. All screenshots are for illustrative purposes only. Alpaca does not recommend any specific securities, cryptocurrencies or investment strategies.
Alpaca does not prepare, edit, or endorse Third Party Content. Alpaca does not guarantee the accuracy, timeliness, completeness or usefulness of Third Party Content, and is not responsible or liable for any content, advertising, products, or other materials on or available from third party sites.
All investments involve risk and the past performance of a security, or financial product does not guarantee future results or returns. Keep in mind that while diversification may help spread risk it does not assure a profit, or protect against loss. There is always the potential of losing money when you invest in securities, or other financial products. Investors should consider their investment objectives and risks carefully before investing.
Securities brokerage services are provided by Alpaca Securities LLC ("Alpaca Securities"), member FINRA/SIPC, a wholly-owned subsidiary of AlpacaDB, Inc. Technology and services are offered by AlpacaDB, Inc.
Cryptocurrency is highly speculative in nature, involves a high degree of risks, such as volatile market price swings, market manipulation, flash crashes, and cybersecurity risks. Cryptocurrency is not regulated or is lightly regulated in most countries. Cryptocurrency trading can lead to large, immediate and permanent loss of financial value. You should have appropriate knowledge and experience before engaging in cryptocurrency trading. For additional information please click here.
Cryptocurrency services are made available by Alpaca Crypto LLC ("Alpaca Crypto"), a FinCEN registered money services business (NMLS # 2160858), and a wholly-owned subsidiary of AlpacaDB, Inc. Alpaca Crypto is not a member of SIPC or FINRA. Cryptocurrencies are not stocks and your cryptocurrency investments are not protected by either FDIC or SIPC. Depending on your location, cryptocurrency services may be provided by West Realm Shires Services, Inc., d/b/a FTX US (NMLS #1957771). Please see the Disclosure Library for more information.
This is not an offer, solicitation of an offer, or advice to buy or sell securities or cryptocurrencies, or open a brokerage account or cryptocurrency account in any jurisdiction where Alpaca Securities, Alpaca Crypto, or FTX US respectively, are not registered or licensed, as applicable.