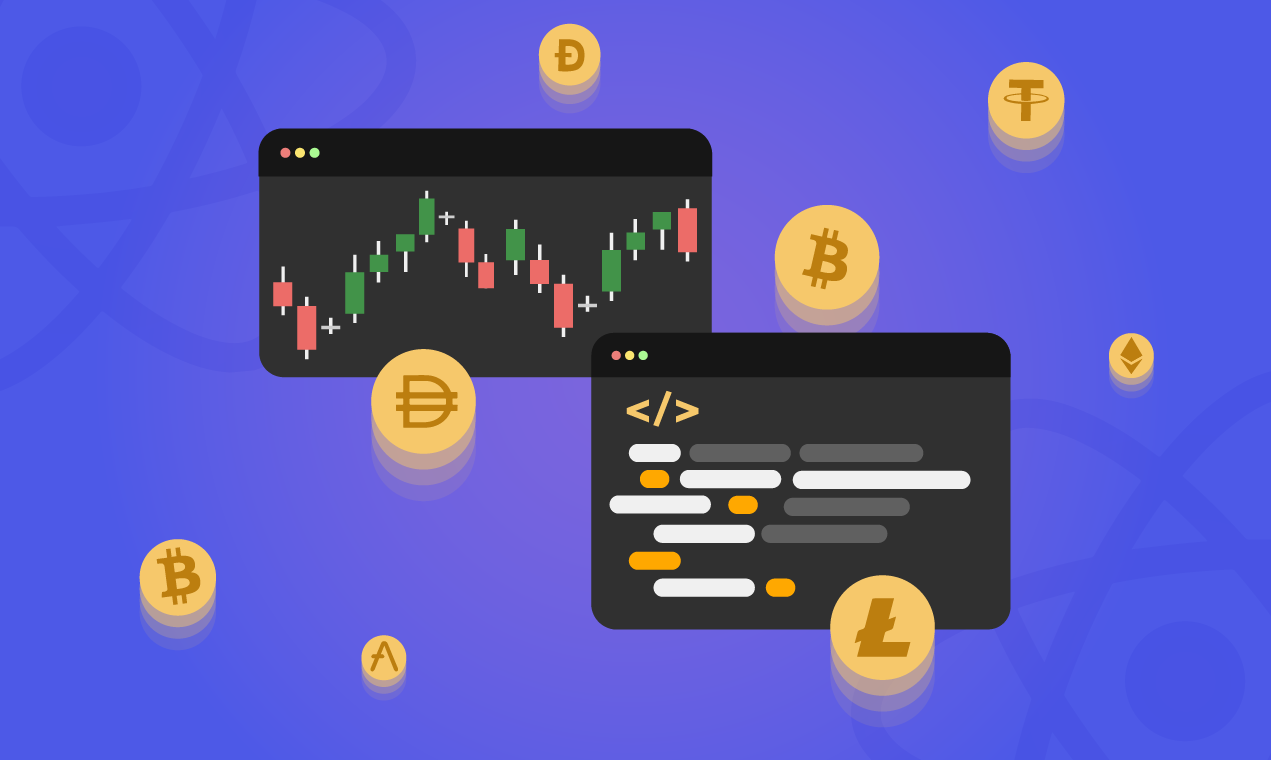
Web3 and crypto have been drawing more attention as the financial infrastructure space grows [1,2]. I’m excited to share that Alpaca has partnered up with FTX, an industry-leading [3] crypto exchange, to bring Alpaca Crypto API access to more than 20 crypto coins. The possibilities for new and existing apps have been taken to another level, and today we’ll be exploring just one of them.
In this post, we’ll create a live candlestick chart that showcases all of these new coins. To get data, use Alpaca’s JavaScript SDK for historical data and native WebSockets for real-time data. To create a fun and engaging user experience, we’ll create a selector that dynamically changes the current chart’s symbol at the click of a button. If you’d like to clone the end product, check out this repo.
Getting started with Alpaca’s JavaScript SDK
To integrate with Alpaca’s APIs, sign up for a free account and get your API keys. After you’ve created an account, follow this quick guide to locate your API keys. Next, follow the installation instructions on the GitHub repository, import the module, and instantiate an Alpaca client with your API keys.
Great! Now we can use this client to make the API calls for us. I’ve set the paper property to be false since I’m using Alpaca’s unlimited market data plan. This helps me get access to every US stock exchange, unlimited WebSocket subscriptions, and most importantly, historical data without delays. There is also a free plan option.To read more about the differences between unlimited and free, read the market data API docs.
Setting up our web application
To quickly start up our application, let’s build on this OAuth stock charting app. By cloning the repo of this project, we’ll have a file setup that looks close to what we’ll need. From here, clean up the filespace as shown in the figure below, and change the app component to render the dashboard component by default.

function App() {
  return (
    <ChakraProvider>
      <Router>
        <Routes>
          <Route exact path="/" element={<Dashboard />} />
        </Routes>
      </Router>
    </ChakraProvider>
  );
}
The skeleton for our live cryptocurrency charting app is ready. In creating candlestick charts, we can split up our data into two categories: historical and real-time. The first category we’ll tackle is historical data.
How can I use the SDK to get historical data?
With the client instantiated inside your program, we can simply call the getCryptoBars function. This function takes two parameters, symbol and options, and will return a promise containing a bars object. Symbol is a string representing the cryptocurrency/stock you’re trying to query for. Options is an object specifying the parameters controlling your response bars. In our case, we’ll be using four properties: exchanges, timeframe, start, and end. Exchanges specifies the exchanges from which you’d like to source your data, timeframe specifies the unit of time on which the bar data will be aggregated, and start/end will define the interval that your bars can come from. More details on usage can be found in this analogous code example.
For this application, we’ll define our options to query 1-minute bars in the past 5 days from either Coinbase or FTX. For Bitcoin and Ethereum, we’ll query from Coinbase. Otherwise, we’ll query from FTX. Then, following the code example linked previously, we’ll call the function with these parameters, store it in an array and return that array.
const cbseOptions = {
  start: new Date(new Date().setDate(new Date().getDate() - 5)),
  end: new Date(),
  timeframe: "1Min",
  exchanges: "CBSE",
};

const ftxuOptions = {
  start: new Date(new Date().setDate(new Date().getDate() - 5)),
  end: new Date(),
  timeframe: "1Min",
  exchanges: "FTXU",
};

async function getHistoricalBars(symbol) {
  let options = null;
  if (symbol in cbseCoins === true) {
    options = cbseOptions;
  } else {
    options = ftxuOptions;
  }

  let bars = [];
  let resp = alpaca.getCryptoBars(symbol, options);
  for await (let bar of resp) {
    bars.push(bar);
  }
  return bars;
}
To test the functionality, we can write a simple request using our shiny new function and print the response to the console.
symbol = "SHIBUSD";
getHistoricalBars(symbol).then((response) => {
  console.log(response);
});
[
  {
    Symbol: 'SHIBUSD',
    Timestamp: '2022-03-19T06:43:00Z',
    Exchange: 'FTXU',
    Open: 0.00002242,
    High: 0.00002242,
    Low: 0.00002242,
    Close: 0.00002242,
    Volume: 35500000,
    TradeCount: 2,
    VWAP: 0.00002242
  },...
]
Perfect! Now this leaves the other category, real-time data. We’ll use a new tool, Websockets, for this.
How can I subscribe to real-time data using WebSockets?
The JS SDK has an API that simplifies getting real-time data. Unfortunately, since our app is running in the browser, we’ll have to use native WebSockets. The documentation for how to stream data with native WebSockets can be found here.
Following the above documentation, the first thing we’ll do is define an object to subscribe to our symbol’s bars and initialize our WebSocket object. The two events we need to configure coming through our socket are 1) what to do upon receiving a message, and 2) what to do upon opening a connection.
Once the socket connection has been opened, we need to send a stringified object with our Alpaca credentials to authenticate the connection. After that, we can freely send messages to subscribe and unsubscribe. On receiving messages from the server we’ll destructure the message, parse it, then decide what do to with it. If the message is a new bar, we’ll append it to the state so that we can render it; otherwise, we’ll do nothing.
initializeSocket = () => {
  const subscribeObject = {
    action: "subscribe",
    bars: [this.state.symbol],
  };
  const socket = new WebSocket(this.wsURL);

  socket.onmessage = (msg) => {
    const { data } = msg;
    let parsedMsg = JSON.parse(data)[0];
    // Looking specifically for messages that are bars
    if (parsedMsg["T"] === "b") {
      this.appendNewBar(parsedMsg);
    }
  };

  // Once connection is open, authenticate then subscribe to symbol's bars
  socket.onopen = () => {
    this.socket = socket;
    this.socket.send(JSON.stringify(this.apcaCredentials));
    this.socket.send(JSON.stringify(subscribeObject));
  };
};
Now that we’ve taken care of our socket’s initialization, we need to tackle the challenge of unsubscribing and subscribing to bars when our chart’s symbol changes. Luckily, all we have to do is create one unsubscribe object, one subscribe object, and then send them both through the socket. Since we keep track of the chart’s previous symbol in the dashboard’s state, this is only a few lines.
getNewRealtimeBars = () => {
  const unSubscribeObject = {
    action: "unsubscribe",
    bars: [this.state.prevSymbol],
  };
  const subscribeObject = {
    action: "subscribe",
    bars: [this.state.symbol],
  };
  this.socket.send(JSON.stringify(unSubscribeObject));
  this.socket.send(JSON.stringify(subscribeObject));
  this.setState({ prevSymbol: this.state.symbol });
};
That’s it for fetching data in our app! Now that we have data flowing in, we need to handle the problems that come along with raw data.
Transforming your data into candles
When receiving live data, we have to address two problems. One, multiple bars coming in for the same minute. Two, if a bar comes in with a gap in time, we need to fill the space. In addition, we’ll need to satisfy the following constraints so that the chart component can render the data (array of bar objects) properly:
- On each bar, the date property contains a date object
- The properties of each bar object are date, open, high, low, close, volume
- The bars are in ascending order
Starting from the top, we can check for a repeated bar by ignoring any incoming bars that have a date less than or equal to the most recent bar’s date. Otherwise, we can continue to append that bar to our state’s data. Next, if bars come in with a gap in time, we should forward fill bars to reflect no activity during that time interval.
function createEmptyBar(previousBar) {
  let emptyBar = {
    // Creates a new date object one minute ahead of previous bar
    date: new Date(new Date().setTime(previousBar.date.getTime() + 1000 * 60)),
    open: previousBar.close * 1,
    high: previousBar.close,
    low: previousBar.close,
    close: previousBar.close * 1,
    volume: 0,
  };
  return emptyBar;
}
export function fillBars(bars) {
  let filledBars = [bars[0]];
  for (let i = 0; i < bars.length - 1; i++) {
    let currentBar = bars[i];
    let nextBar = bars[i + 1];
    let timeDiff = (nextBar.date - currentBar.date) / msToMinutes;

    let lastBar = currentBar;
    // If the time difference is more than one, fill the space with empty bars
    for (let j = 0; j < timeDiff - 1; j++) {
      let emptyBar = createEmptyBar(lastBar);
      filledBars.push(emptyBar);
      lastBar = emptyBar;
    }
    filledBars.push(nextBar);
  }
  return filledBars;
}
To satisfy the constraints, we’ll create more helper functions. To create date objects from the timestamp strings we can import timeParse from d3-time-format and specify the format of the string received. Then, noting what the incoming bar data looks like from previous code blocks, we can write a function, parseBar, that returns the same data but with the desired properties.
import { timeParse } from "d3-time-format";
const parseDate = timeParse("%Y-%m-%dT%H:%M:%SZ");

function parseBar(bar) {
  let parsedBar = {
    date: parseDate(bar.Timestamp),
    open: bar.Open,
    high: bar.High,
    low: bar.Low,
    close: bar.Close,
    volume: bar.Volume,
  };
  return parsedBar;
}
Lastly, we must ensure the order of bars is correct so that we can plot time on the x-axis properly. To do this we’ll update our getHistoricalBars function to include a sort after we’ve received all bars.
export async function getHistoricalBars(symbol) {
  let options = null;
  if (symbol in cbseCoins === true) {
    options = cbseOptions;
  } else {
    options = ftxuOptions;
  }

  let bars = [];
  let resp = alpaca.getCryptoBars(symbol, options);
  for await (let bar of resp) {
    let parsedBar = parseBar(bar);
    bars.push(parsedBar);
  }

  bars.sort((a, b) => {
    if (a.date > b.date) {
      return 1;
    } else if (a.date < b.date) {
      return -1;
    } else {
      return 0;
    }
  });

  let filledBars = fillBars(bars);
  return filledBars;
}
Putting things together and rendering the chart
With our app ready to query for data on the fly, let’s set up the dashboard to keep track of data and pass this into the chart. You’ll need to set the default symbol to something so that the home page loads. This example will use Bitcoin.
class Dashboard extends React.Component {
  constructor(props) {
    super(props);
    this.state = {
      data: null,
      prevSymbol: "BTCUSD",
      symbol: "BTCUSD",
    };
    this.socket = null;
    this.handleSelection = this.handleSelection.bind(this);
    this.apcaCredentials = {
      action: "auth",
      key: "<Your-Key-Here>",
      secret: "<Your-Secret-Here>",
    };
    this.wsURL =
      "wss://stream.data.alpaca.markets/v1beta1/crypto?exchanges=CBSE,FTXU";
  }

  handleSelection = ...

  getNewRealtimeBars = ...

  initializeSocket = ...

  componentDidMount() { ... }


  render() {
    if (this.state.data == null) {
      return <div>Loading...</div>;
    }
    return (
      <div className="dashboard-container">
        <div className="selector">
          <Selector handler={this.handleSelection} />
        </div>
        <div className="chart">
          <label className="chart-symbol">
            Current Symbol: <b> {this.state.symbol} </b>{" "}
          </label>
          <Chart data={this.state.data} />
        </div>
      </div>
    );
  }
}

export default Dashboard;
For our chart component, we’ll follow the quick-start example found on the React Stockcharts repo but change it to suit our needs. The key differences here are switching the timeframe to minutes and now only needing to destructure the data variable from props.
import React from "react";
import PropTypes from "prop-types";
import "./Chart.scss";

import { scaleTime } from "d3-scale";
import { utcMinute } from "d3-time";

import { ChartCanvas, Chart } from "react-stockcharts";
import { CandlestickSeries } from "react-stockcharts/lib/series";
import { XAxis, YAxis } from "react-stockcharts/lib/axes";
import { fitWidth } from "react-stockcharts/lib/helper";
import { last, timeIntervalBarWidth } from "react-stockcharts/lib/utils";

class CandleStickChart extends React.Component {
  render() {
    const { data } = this.props;
    const height = 500;
    const width = 1000;
    const ratio = 3;
    const margin = { left: 50, right: 50, top: 10, bottom: 30 };
    const xAccessor = (d) => d.date;
    const xExtents = [
      xAccessor(data[data.length - 100]),
      xAccessor(last(data)),
    ];
    return (
      <ChartCanvas
        height={height}
        ratio={ratio}
        width={width}
        margin={margin}
        seriesName="BTCUSD"
        data={data}
        xAccessor={xAccessor}
        xScale={scaleTime()}
        xExtents={xExtents}
      >
        <Chart id={2} yExtents={(d) => [d.high, d.low]}>
          <XAxis axisAt="bottom" orient="bottom" ticks={6} />
          <YAxis axisAt="left" orient="left" ticks={5} />
          <CandlestickSeries width={timeIntervalBarWidth(utcMinute)} />
        </Chart>
      </ChartCanvas>
    );
  }
}

CandleStickChart.propTypes = {
  data: PropTypes.array.isRequired,
  width: PropTypes.number.isRequired,
  ratio: PropTypes.number.isRequired,
};

CandleStickChart = fitWidth(CandleStickChart);

export default CandleStickChart;

Now we have a functioning, real-time candlestick chart for Bitcoin! The last step is creating a selector component to showcase any of the new coins Alpaca has to offer.
Creating the selector for different cryptocurrencies
Currently, our chart works great but we can only watch Bitcoin. Let’s create a clickable component that shows off what each cryptocurrency is and changes the chart’s symbol to the clicked on symbol. To simplify things, I’ve saved the symbol data for each coin into a JSON file that we’ll load into our component. All available symbols in alphabetical order can be found in this article.
[
  {
    "id": 0,
    "symbol": "AAVEUSD"
  },
  {
    "id": 1,
    "symbol": "BATUSD"
  },
{...}
]
To create our component, render a table of buttons and map each symbol to it. On each button, set the onClick to a handler function that is defined within the dashboard and pass the symbol in as a parameter. This handler will query for new historical data and update the dashboard’s state symbol, causing the dashboard to re-render and the chart along with it.
import React from "react";
import "./Selector.scss";
import symbols from "./symbol-data.json";
import { Button, Table, Thead, Tbody, Tr, Th } from "@chakra-ui/react";

class Selector extends React.Component {
  constructor(props) {
    super(props);
    this.state = {
      symbolData: symbols,
    };
  }

  render() {
    return (
      <div>
        <Table className="buttons" size="sm">
          <Thead>
            <Tr>
              <Th>Render Data</Th>
            </Tr>
          </Thead>
          <Tbody>
            {this.state.symbolData.map((symbol) => (
              <Tr>
                <Button onClick={() => this.props.handler(symbol.symbol)}>
                  {symbol.symbol}
                </Button>
              </Tr>
            ))}
          </Tbody>
        </Table>
      </div>
    );
  }
}

export default Selector;
handleSelection = async (symbol) => {
const data = await getHistoricalBars(symbol);
this.setState({ data: data });
this.setState({ symbol: symbol });
this.getNewRealtimeBars();
};
The result is a fun and interactive candlestick chart that will delight any user!

Conclusion
Alpaca Crypto API makes creating reactive apps simple! Armed with these new coins and our API, you’ll have the tools to create something great in your next app.
If you’re looking for more crypto content, check out this article on making your own crypto ETF.
References
1. Google trends. [Online]. Available: https://trends.google.com/trends/explore?date=today%205-y&geo=US&q=web3. [Accessed: 14-Apr-2022].
2. Google trends. [Online]. Available: https://trends.google.com/trends/explore?date=today%205-y&geo=US&q=crypto. [Accessed: 14-Apr-2022].
3. “Top cryptocurrency exchanges ranked by volume,” CoinMarketCap. [Online]. Available: https://coinmarketcap.com/rankings/exchanges/. [Accessed: 14-Apr-2022].
Please note that this article is for general information purposes only. All screenshots are for illustrative purposes only. Alpaca does not recommend any specific securities, cryptocurrencies or investment strategies.
Alpaca does not prepare, edit, or endorse Third Party Content. Alpaca does not guarantee the accuracy, timeliness, completeness or usefulness of Third Party Content, and is not responsible or liable for any content, advertising, products, or other materials on or available from third party sites.
Cryptocurrency is highly speculative in nature, involves a high degree of risks, such as volatile market price swings, market manipulation, flash crashes, and cybersecurity risks. Cryptocurrency is not regulated or is lightly regulated in most countries. Cryptocurrency trading can lead to large, immediate and permanent loss of financial value. You should have appropriate knowledge and experience before engaging in cryptocurrency trading. For additional information please click here.
Cryptocurrency services are made available by Alpaca Crypto LLC ("Alpaca Crypto"), a FinCEN registered money services business (NMLS # 2160858), and a wholly-owned subsidiary of AlpacaDB, Inc. Alpaca Crypto is not a member of SIPC or FINRA. Cryptocurrencies are not stocks and your cryptocurrency investments are not protected by either FDIC or SIPC. Please see the Disclosure Library for more information.
This is not an offer, solicitation of an offer, or advice to buy or sell cryptocurrencies, or open a cryptocurrency account in any jurisdiction where Alpaca Crypto is not registered or licensed, as applicable.