Please note that this article is for educational and informational purposes only. All screenshots are for illustrative purposes only. The views and opinions expressed are those of the author and do not reflect or represent the views and opinions of Alpaca. Alpaca does not recommend any specific securities or investment strategies.
This article originally appeared on Medium, written by Irving Derin
Sitting at home for a year, one starts to explore a variety of new and different hobbies to try and keep their sanity. Personally, I decided to help my friends find financial ruin with a stock trading Discord bot!
Along this journey I’ve decided to build my new Discord friend, Dispaca the Alpaca!
I’ll walk through my steps of building this potentially horrible idea so that others can also share their wealth amongst their friends, with no accountability (yet… stay tuned for part 2).
⚠️ WARNINGS AND DISCLOSURES ⚠️
This tutorial will be using a paper account on https://app.alpaca.markets/, so there is no real money involved.
If you decide to use real money, be very mindful that there could be legal and tax ramifications for allowing other people trading securities in your name. I do not know what those ramifications are; the knowledge that they exist is enough to keep me away from giving other people that sort of control. My recommendation is that you too don’t give other people control over your money. Any actions you take outside of that recommendation is your own decision.
Here are some useful resources in general:
Step 0 — Setting up an environment
This tutorial won’t go into the nitty-gritty details of my development setup, but I will discuss how I’m hosting this bot and my process in getting changes out into 'production.'
Caprover on DigitalOcean
Caprover is a deployment platform that I’ve found myself using over the last couple of months to simplify self hosting some of the open source software I use (bitwarden, etc.), as well as small personal projects.
I found Caprover since I use DigitalOcean as my hosting provider. Their marketplace has an easy to deploy image that gets you started pretty quickly. Just make sure that you’ve got a domain name ready to go.
We’ll be deploying Dockerfiles to Caprover in this tutorial, so any other hosting options or local docker runs will work just as well.
Initial File Structure
We’ll be starting this project off with the following file structure.

This corresponds to our Docker looking like this.
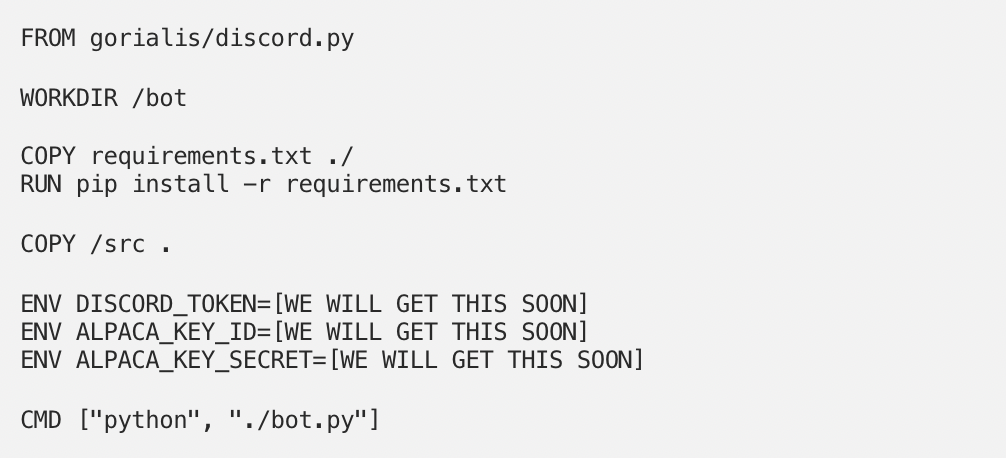
The base image for this Dockerfile was built with the discord.py library in mind.
With this file structure and docker installed, all we need to do to get up and running is just run the following command.

Any time we add a change, we just rerun docker build and docker run and we’ll be able to see our changes deployed live!
Step 1 — Setting up your Discord Bot
At the end of this step, we’ll have a Discord bot user that we can invite to our server, as well as an application token to add to our Docker file.
First thing we need to do is get our Discord bot set up and ready to go.
Note that I’m writing this tutorial after slash commands were introduced, but before I really explored how to use them.
Since we’re only making a chat bot without any special kinds of permission, we don’t need to worry about messy OAuth stuff.
We start off by going to https://discord.com/developers. I’m assuming that you, the reader, have a discord account. If not, go ahead and make one!
Once you’re logged in you should find a page that looks similar to this screenshot:
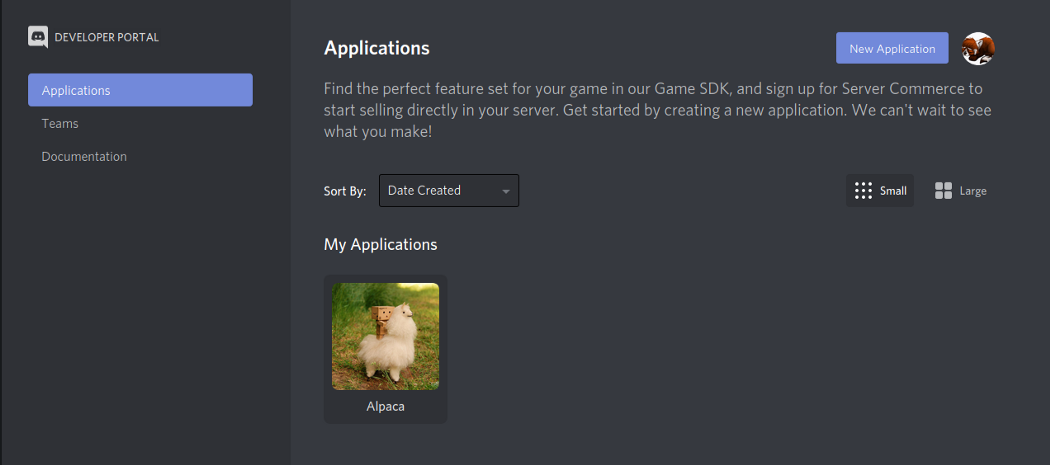
From here, we’ll click on New Application and name our wonderful new application. This will bring us to the General Information page.
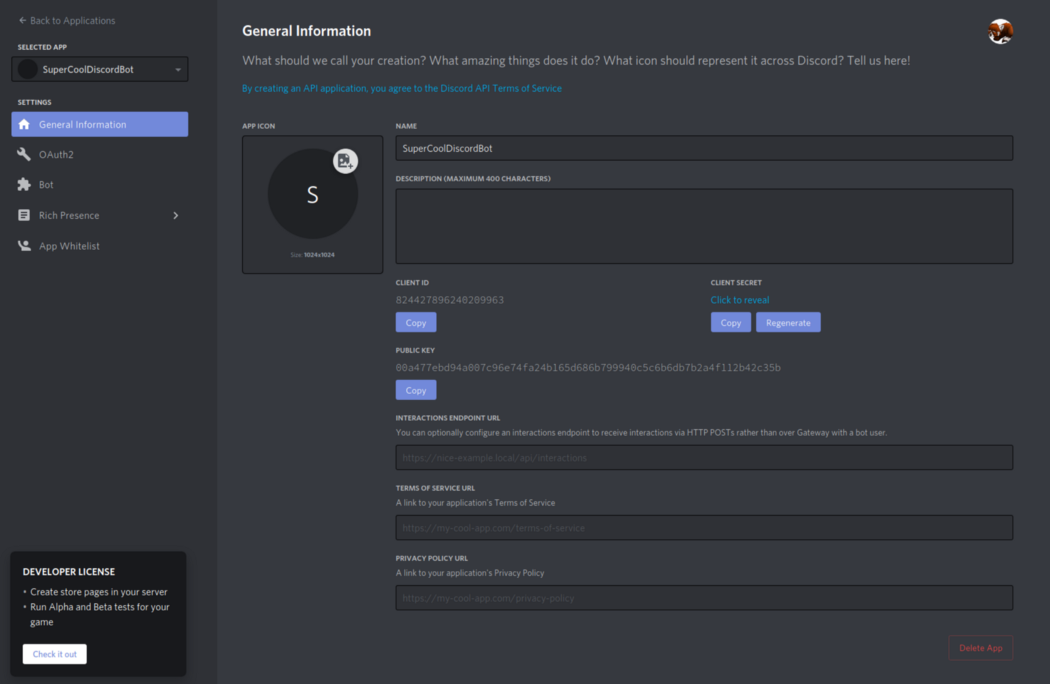
To make our application an actual bot, we need to click on the Bot sidebar option and then Build-A-Bot. YOU HAVE TO DO THIS TO CREATE A BOT USER.
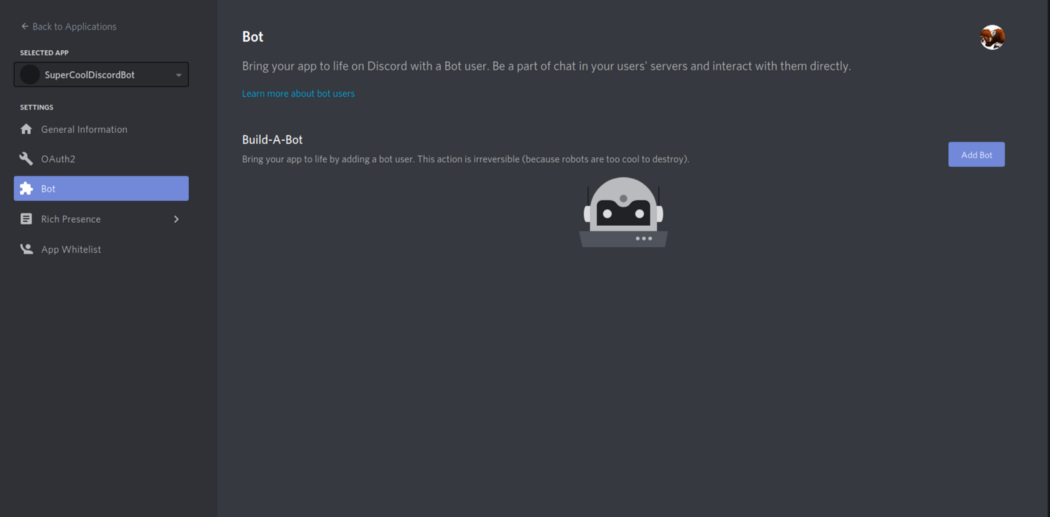
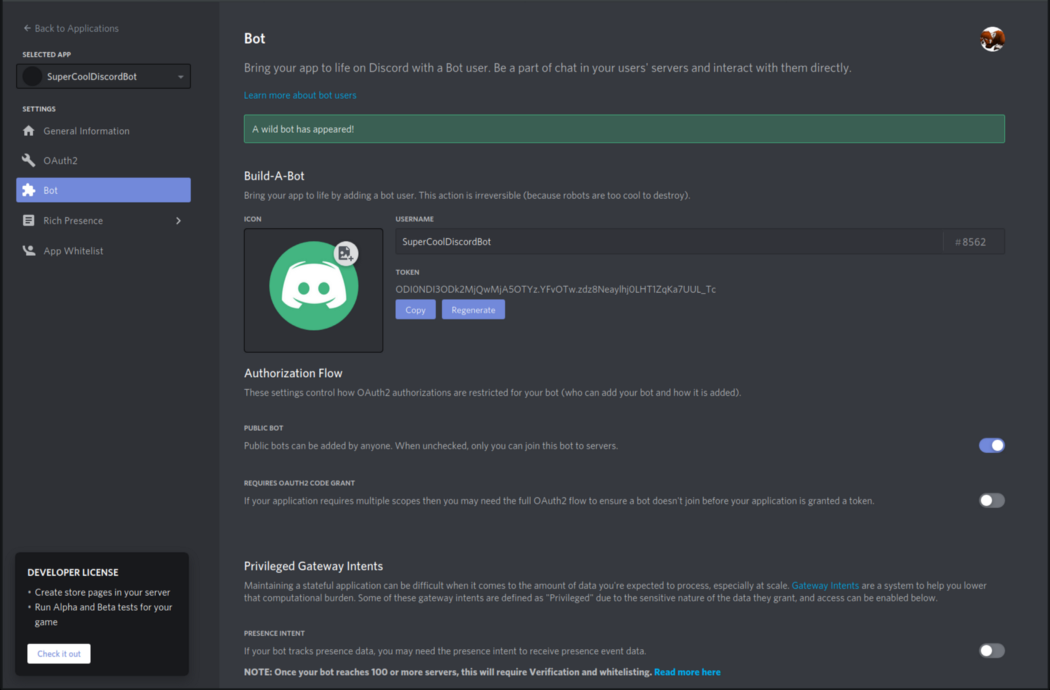
This is an irreversible action and Discord will make sure to tell you that. Once our bot is created, we can grab our DISCORD_TOKEN for our Dockerfile.
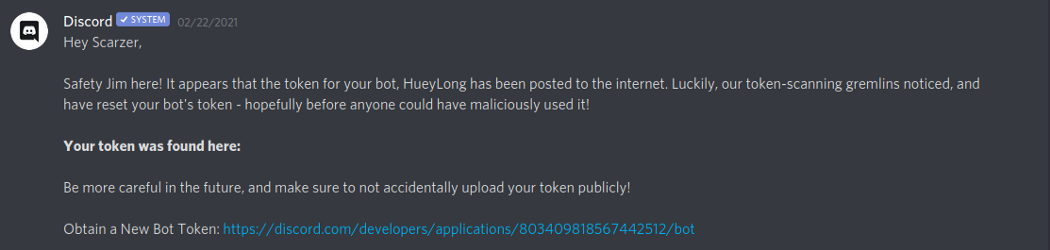
DO. NOT. PUSH. YOUR. DISCORD. TOKEN. TO. GITHUB.
They will find it. They will tell you about it. They will revoke it.
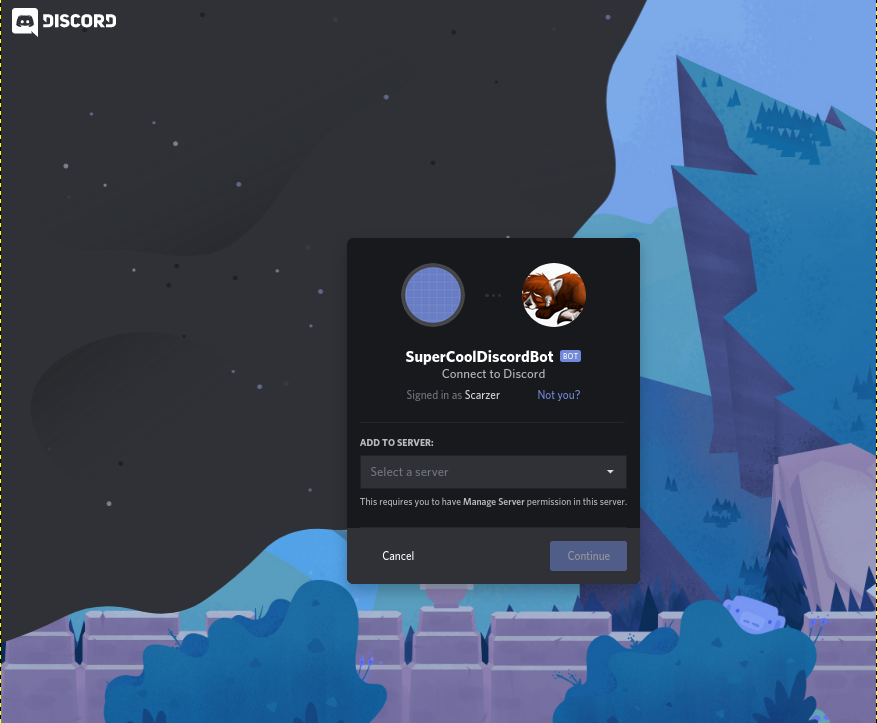
Finally, the last step is to invite your bot to your server. This is done by going to the OAuth2 side menu option. We can get our bot going without requiring us to setup user authentication and redirects. This greatly simplifies our lives.
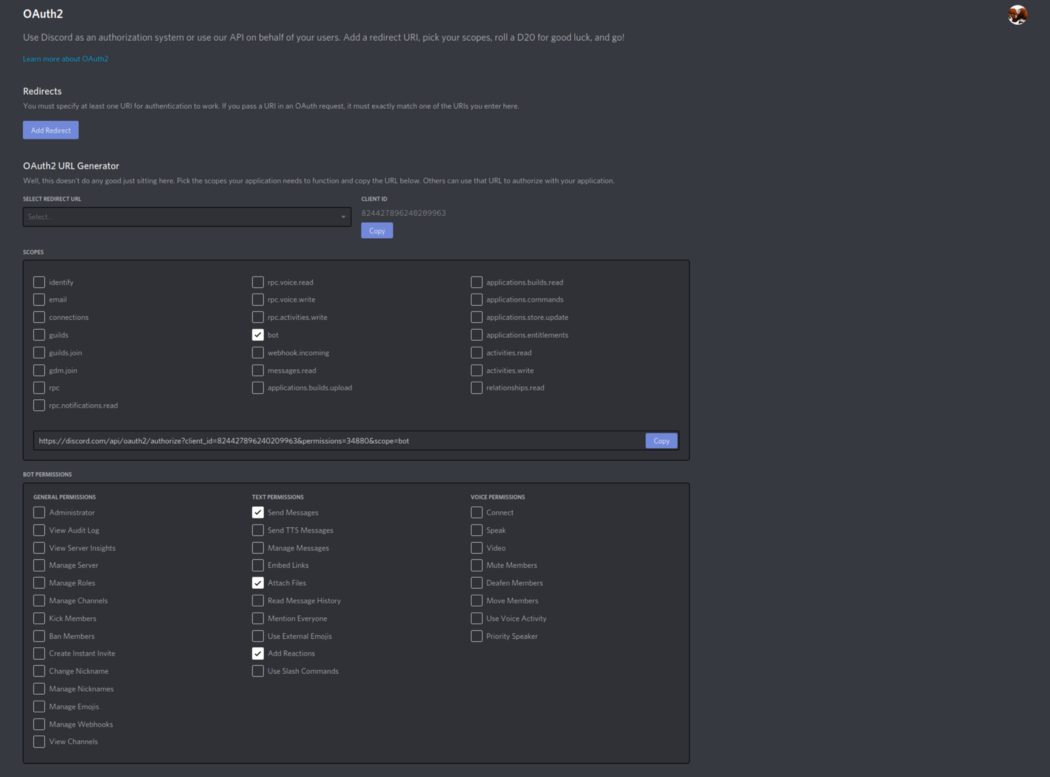
We’ll select the bot OAuth scope, which will generate an invite link that we can use to add our bot to a server. Before we add our bot, we want to make sure we’ve got our permissions selected as well.
For this project we’ll only need Send Messages, Attach Files, and Add Reactions. Once you’re all set, go to the link you’ve generated and you’ll find yourself able to add your bot to any server that gives you the permission to do so.

Step 2 — Setting up your Alpaca account
At the end of this step, we’ll have an Alpaca paper account that will allow us to trade stocks, as well as get historical data. Their API documentation is pretty fantastic.

I like Alpaca. It’s easy to get up and running. It gives you a paper account to practice your algorithms and then makes it easy to switch over to real money.
⚠ BE VERY CAREFUL WHEN TRADING YOUR OWN MONEY. ⚠️
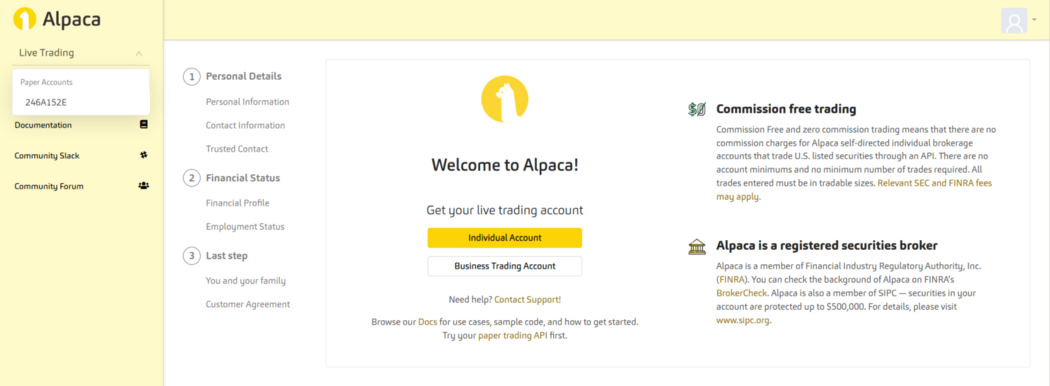
When you make your account and verify your email address, you’ll find yourself in a potentially intimidating screen. We can completely ignore it by switching over to our paper account. We do that by clicking on Live Trading and selecting the paper trading account in the dropdown.
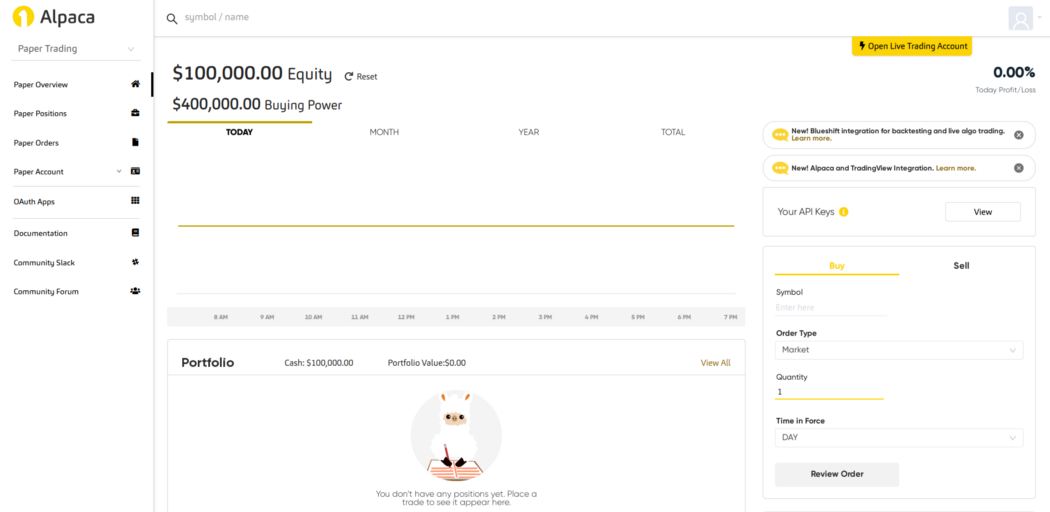
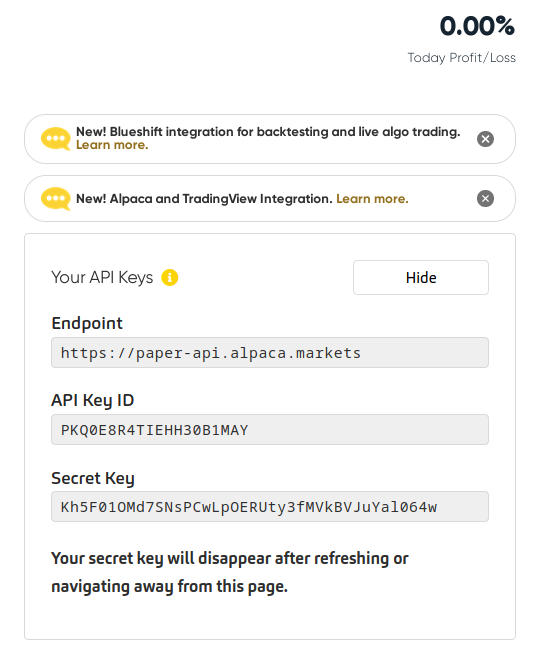
Once we’re on our paper trading account, we can generate our API Key and add them to our Dockerfile above. This is done by clicking on the View button in the Your API Keys box.
Step 3 — Relaying data from Alpaca to you
We have a Discord bot account. We have an Alpaca trading account. Let's start building a bot getting data from it. At the end of this step, we will have the early workings of a bot that will respond to commands and give us information about an individual stock. It’s always important to be informed when trading.
This tutorial won’t touch upon how to do any kind of financial analysis. That’s a complicated topic that I’m not qualified to talk about. There are plenty of other sources on Medium, YouTube and what have you that will teach you about markets.
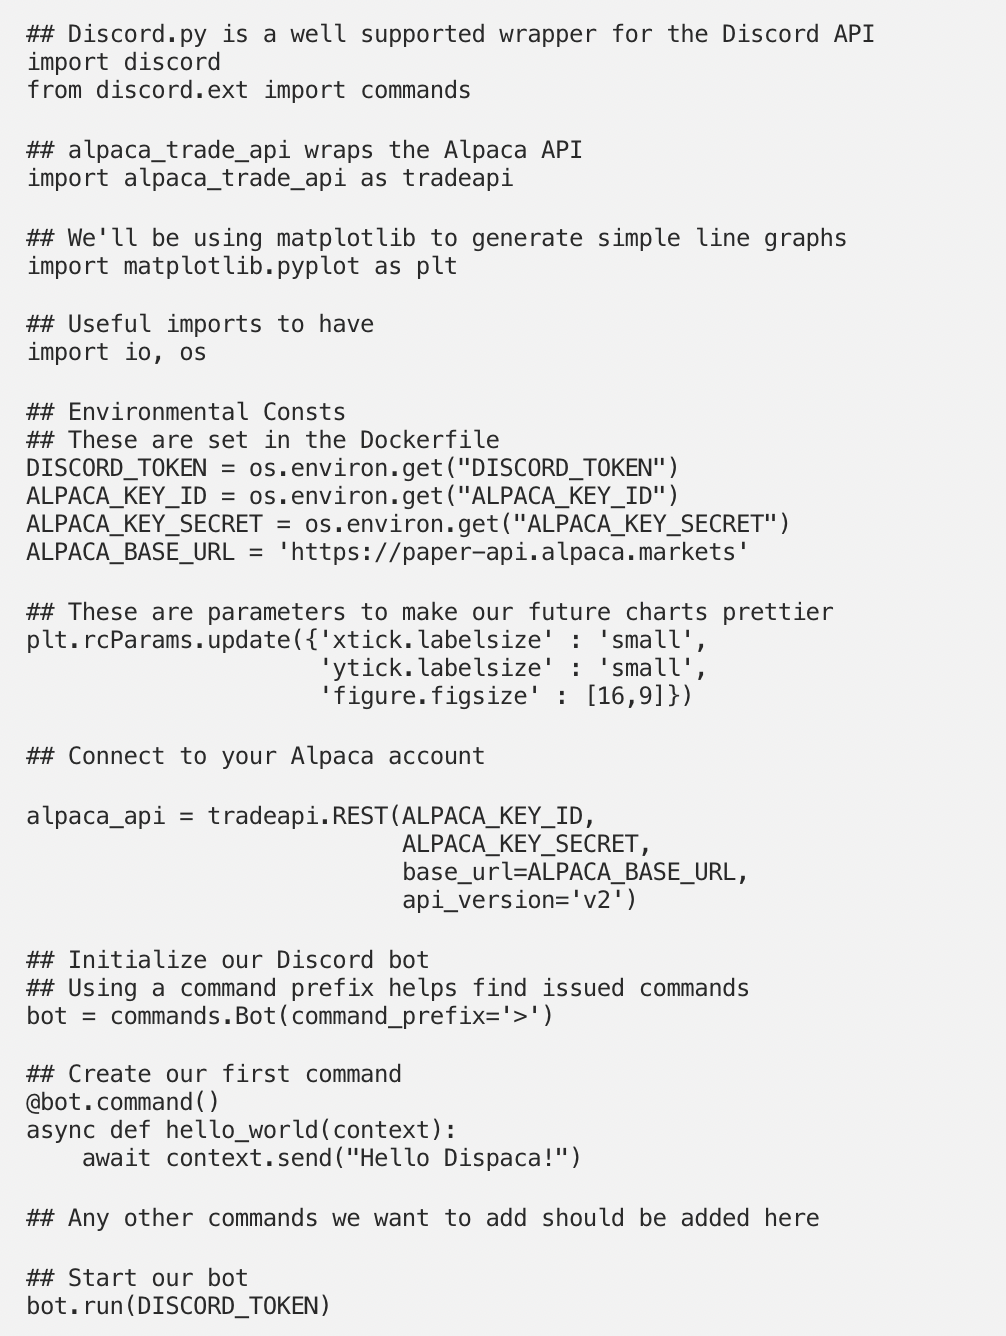
If we open up bot.py we can get started on returning some information when we ask for it.
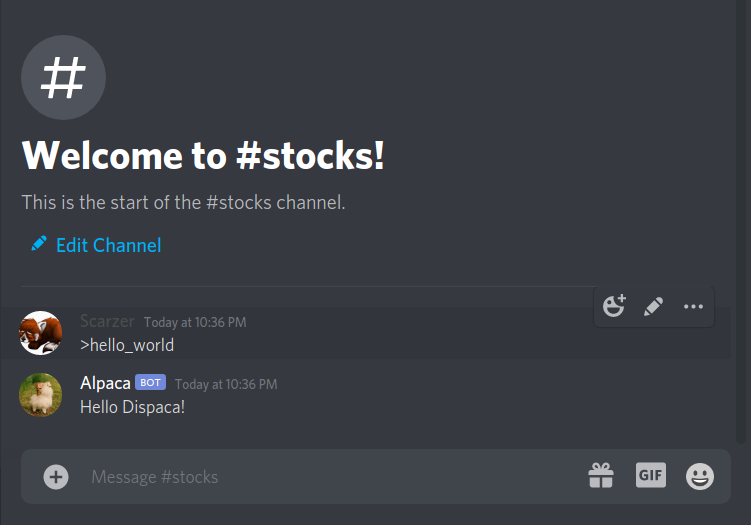
If we deploy our bot.py from above, we’ll be able to get our first bot communications!
Type in >hello_world into a server that you share with your bot, and you’ll get a response back!
Every subsequent command that we add is going to follow the same structure that the async def hello_world() follows. We use the @bot.command() decorator to designate functions as commands. Be sure to check out the documentation to see what more you can do with the decorators.
Now that we can have a conversation with Dispaca, let's start making it a useful conversation.
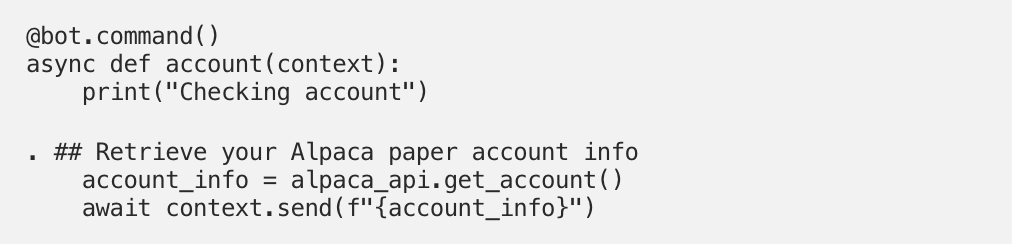
Adding async def account(context) to your bot will allow you to use the >account command.
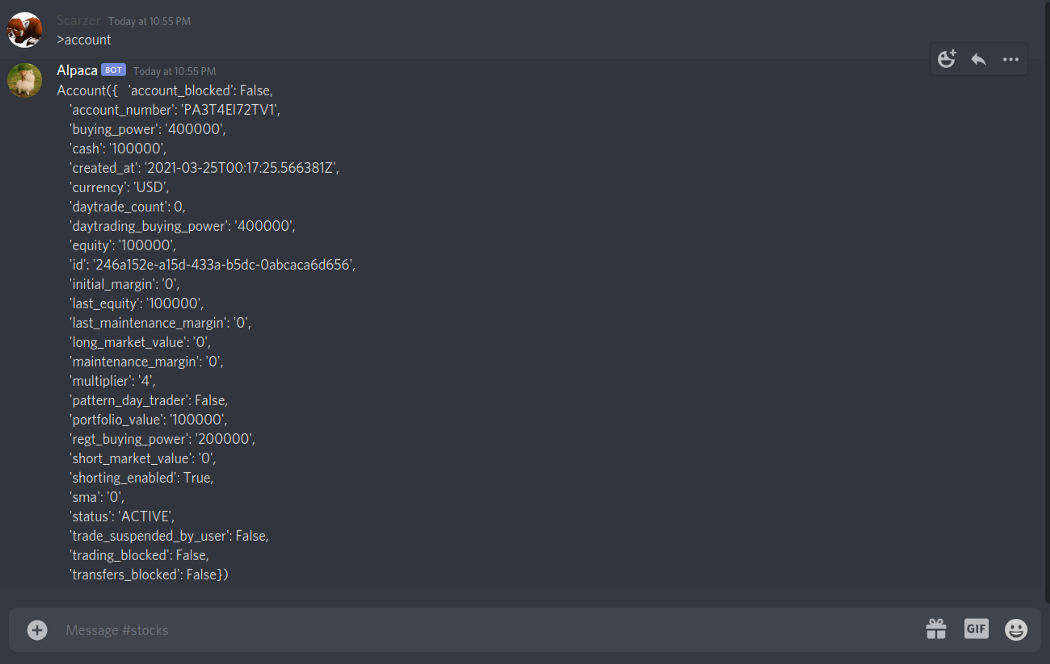
When called, your bot will reach out to the Alpaca API and retrieve your account information. It’ll be ugly but cleaning it up will be for another section. Before we move on, it’s important to note that this will be where we can retrieve our buying power, cash, and other important values.
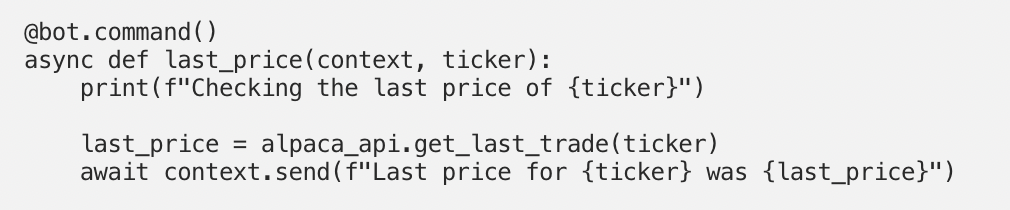
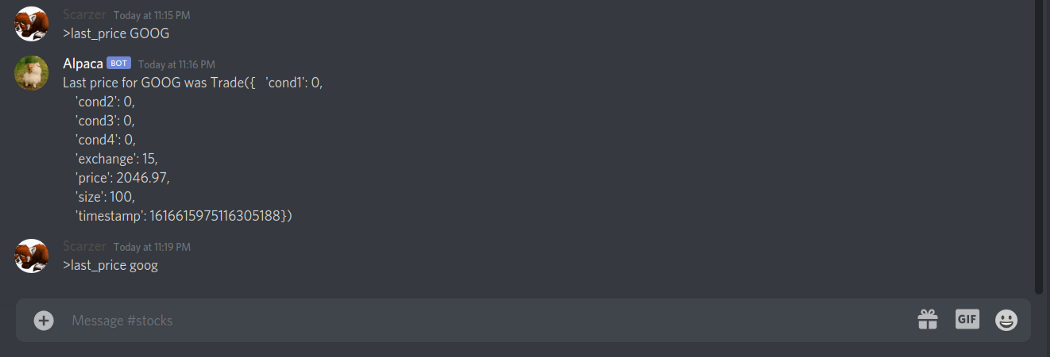
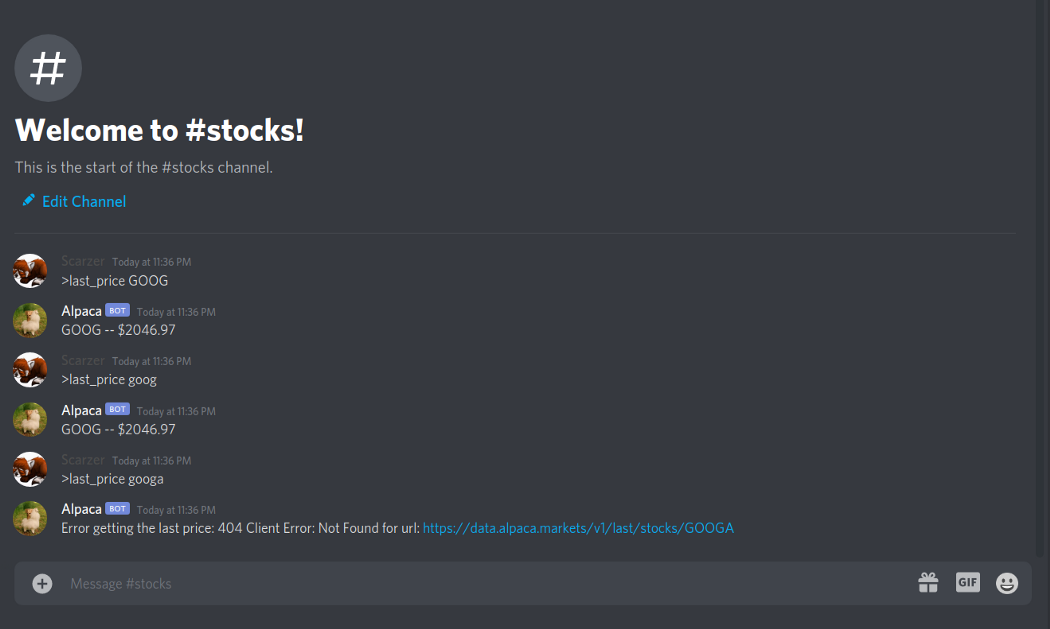
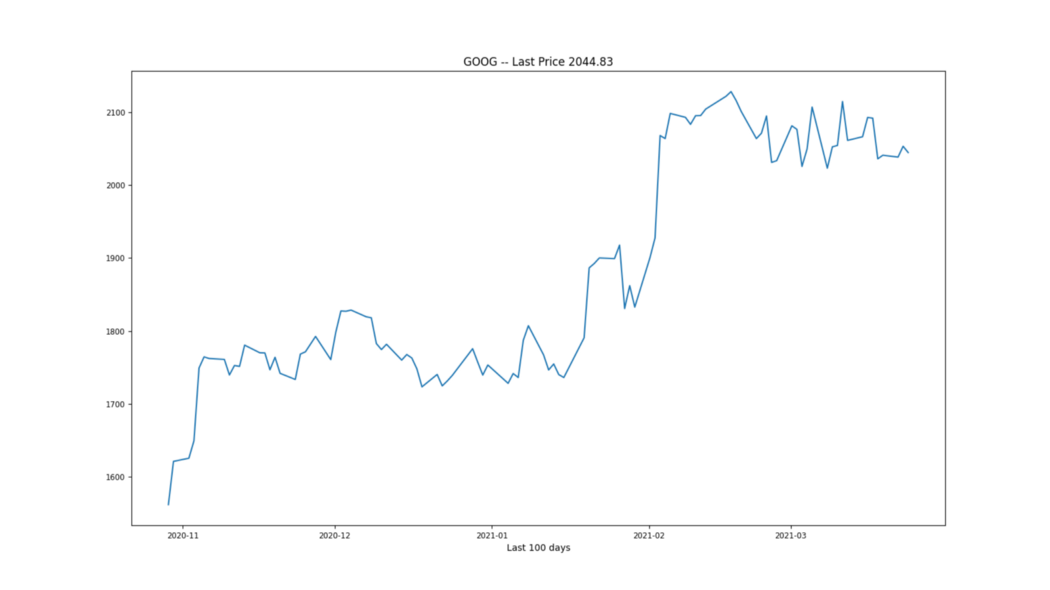
Here we’ve added >last_price that will do exactly what it says- grab the last price of some stock. As an example we can send >last_price GOOG and get the last price!

Let us take this moment to talk about exceptions. Discord.py will ignore exceptions in commands. The code as written above can easily fail when getting a command, and the user might never know.
Here’s what happens when you send >last_price goog.
Looking at the output logs from Docker will reveal exactly what went wrong.
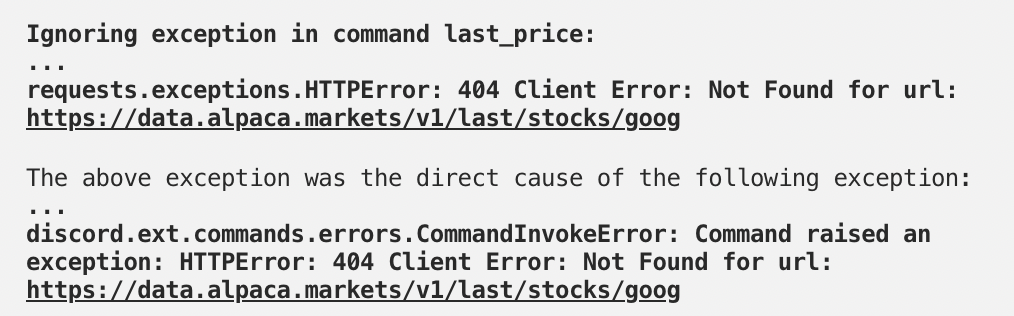
Alpaca’s market data is case sensitive, so searching for goog will not yield the same results as GOOG.
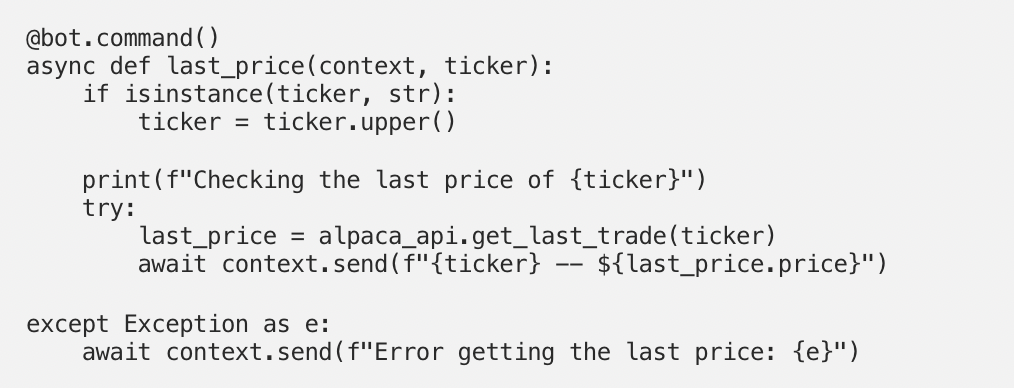
For a quick mitigation, let's set all inputs to upper case. Also, we should add an exception so that we can send back notice of a failure.
Now we’re handling some errors.
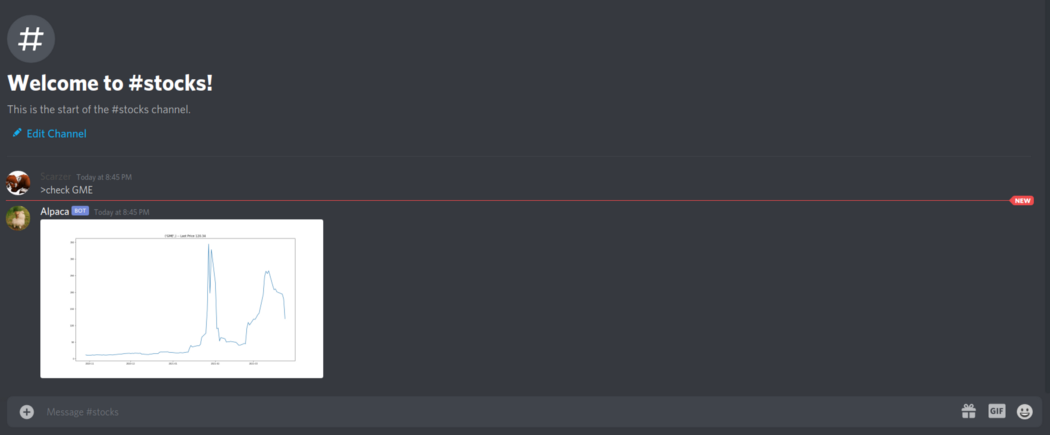
Finally, let's make a chart and send it to the user. What good is the last price without some context? While there are several different ways to share a chart, I decided to generate a .png with Matplotlib and send it to Discord. This way we don’t have to worry about any other services or hosting.
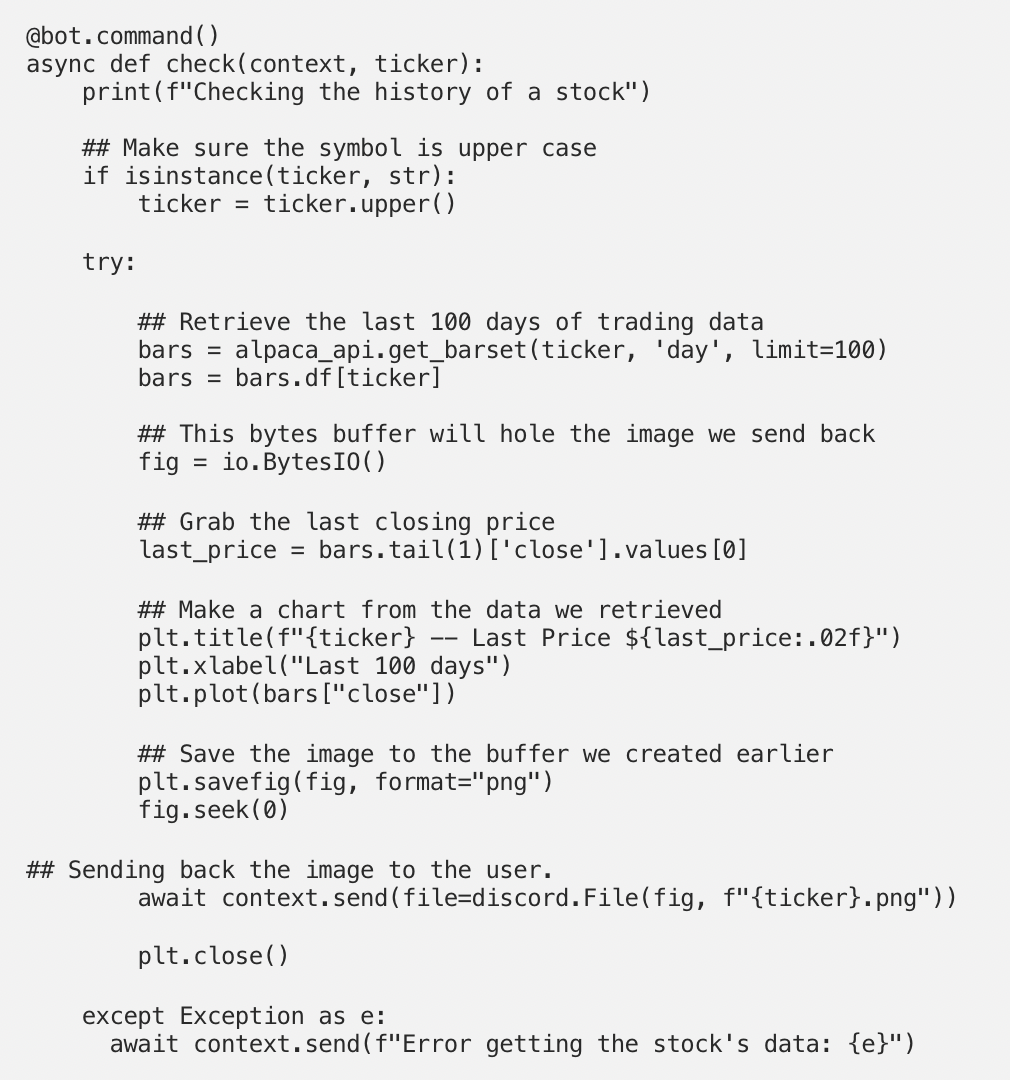
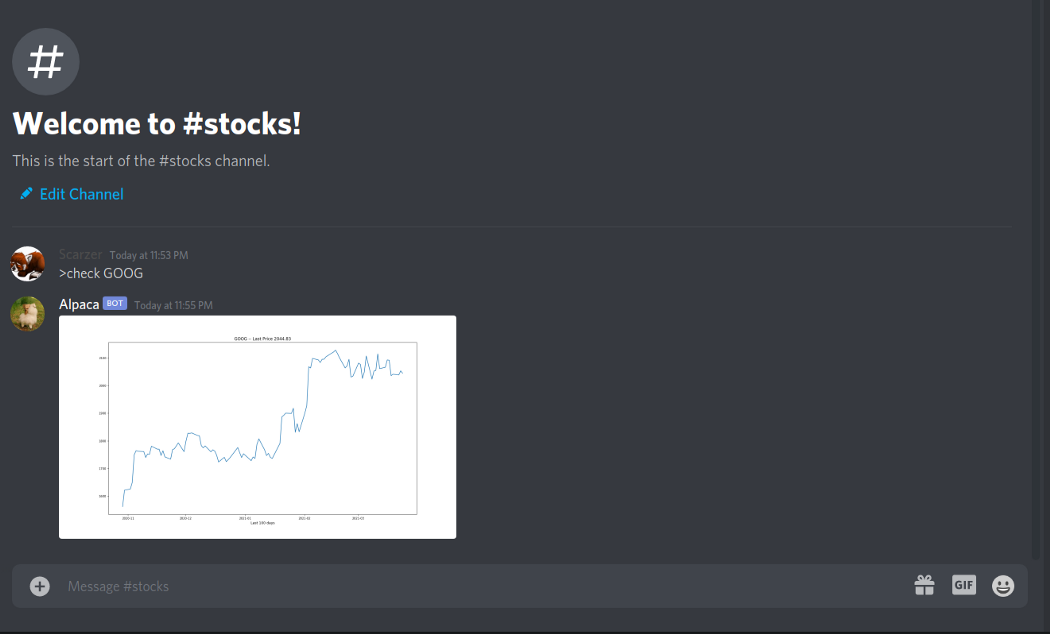
Since this is an image being uploaded to Discord, we can share a public link to anyone.
Step 4 — Generating Embeds for general user friendliness
Now we can access a lot of data and make simple graphs of that data. Let's start making some of that data easier to look at in Discord. In this step, we’ll be designing an Embed, populating it with only the information we care about, and returning it back to the user.
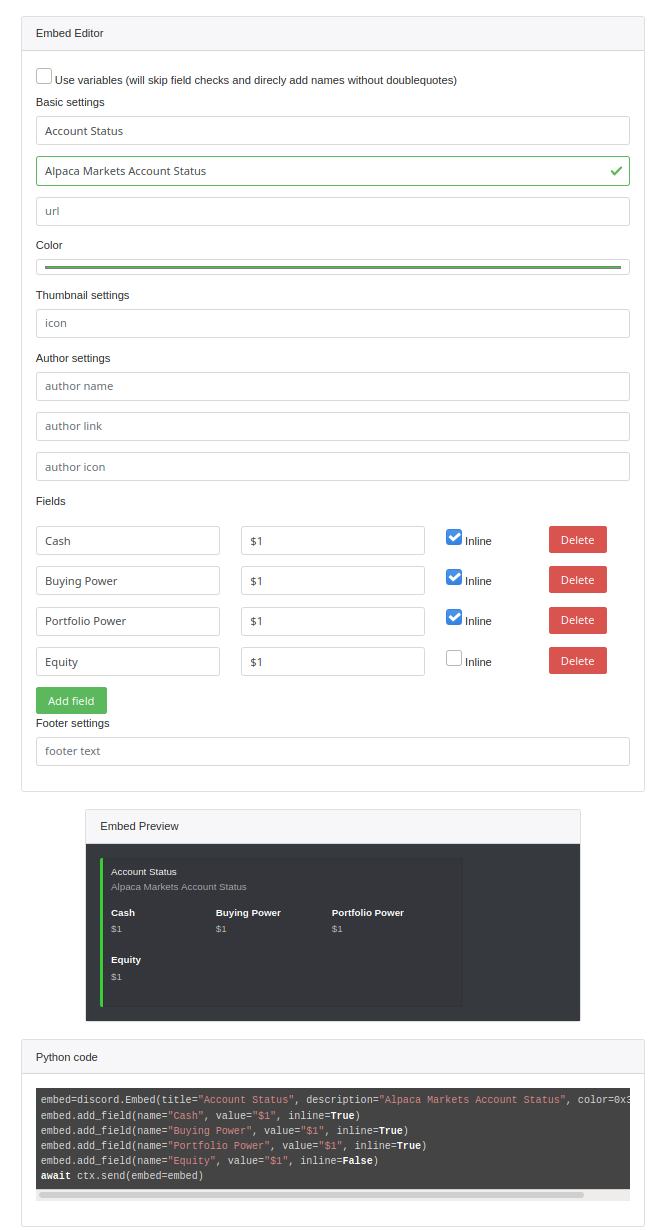
I used Discord Embed Sandbox to design my embeds. Other tools also exist.
Let's look back at what the account JSON looked like. (Documentation on accounts).
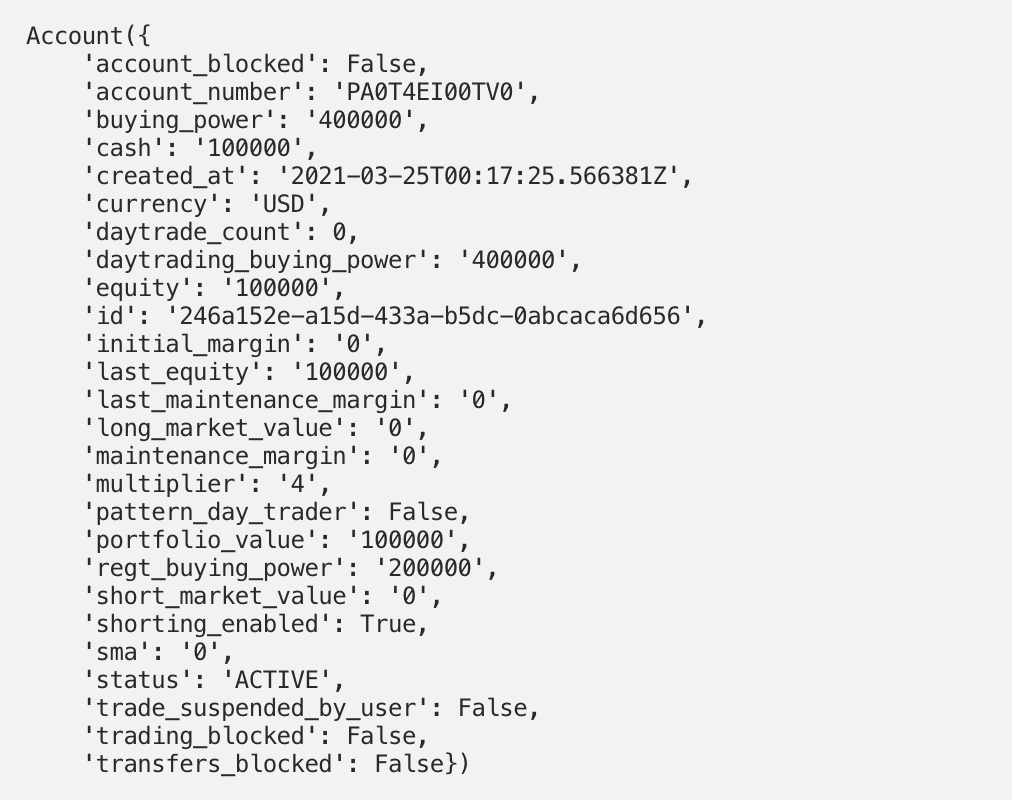
Feels like we can confidently grab:
cashbuying_powerequityportfolio_value
If we find that we need other values, we’ll add them later.
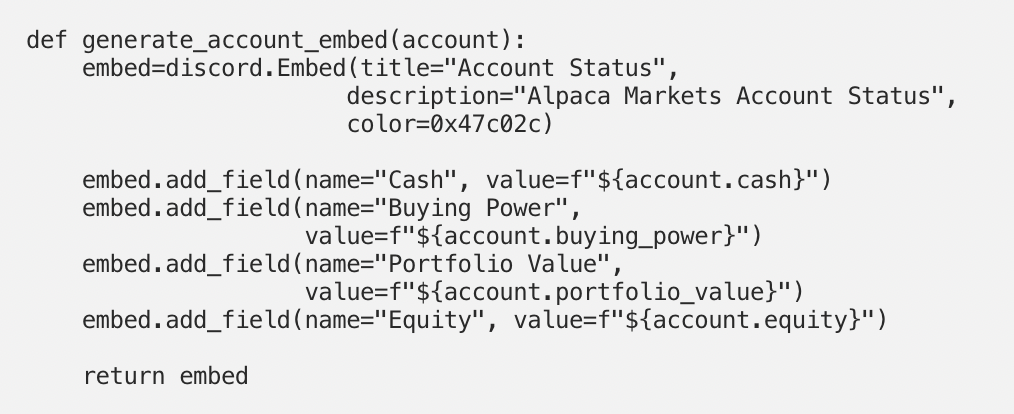
Here we’re using the generated python code as a template for our embed. We populate it with all of the variables that we’re passing in.
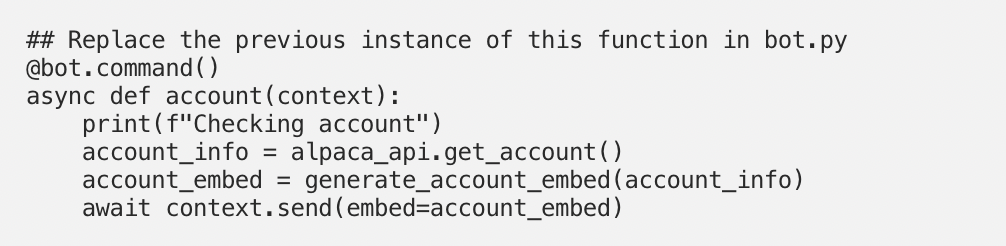
Don’t forget to replace your account function in your bot.py before rerunning.
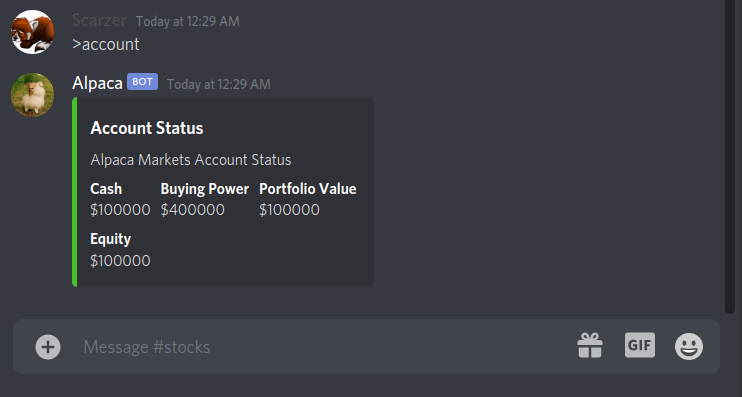
Look at how much cleaner and easier it is to see your current account status.
Step 5 — Reactions for trade confirmations
It’s been a long journey, but we’re finally ready to ask Dispaca to go buy some securities for us. At the end of this step we’ll be able to ask Dispaca to make a trade for us, as well as confirm with us before it issues that trade. We wouldn’t want to accidentally buy 100 shares of GameStop… right? ?
In the case of our bot, let's see what the simplest buy command could look like.
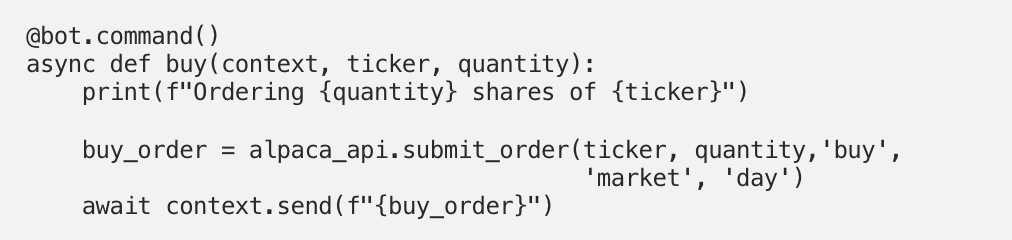
Issuing a >buy GME 100 will just tell Alpaca that we want 100 shares of GameStop and to go buy them.
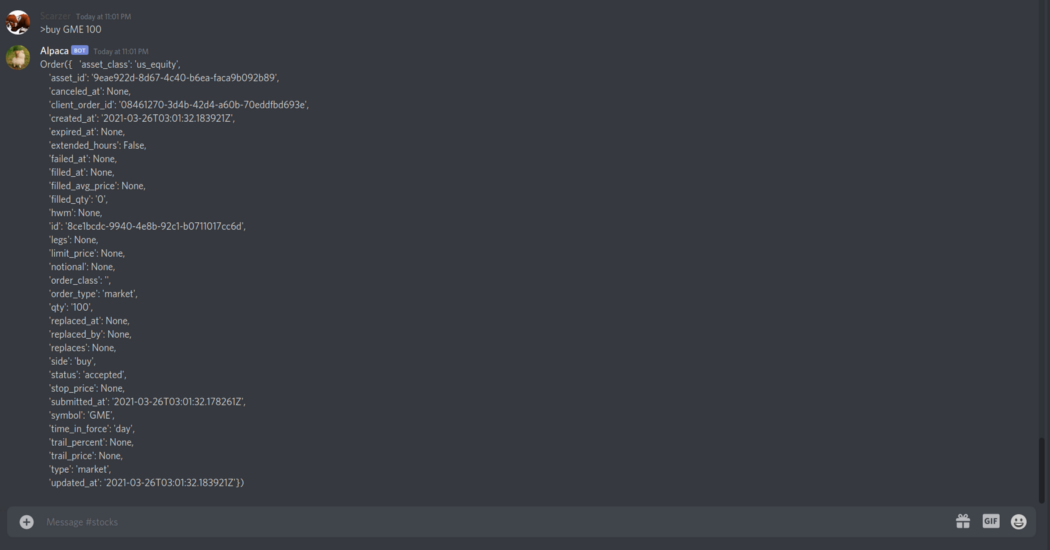
No confirmation, no checking of account value, nothing. All we would get back is an order confirmation. An ugly JSON blob at that.

Buying securities shouldn’t be easy, it’s a lot of responsibility! How about instead we build an embed that we can use to show what our order is going to look like? Then we wait for an order confirmation via a reaction on that embed. If we get the right reaction we make the order, otherwise we just time out and pretend that nothing ever happened.
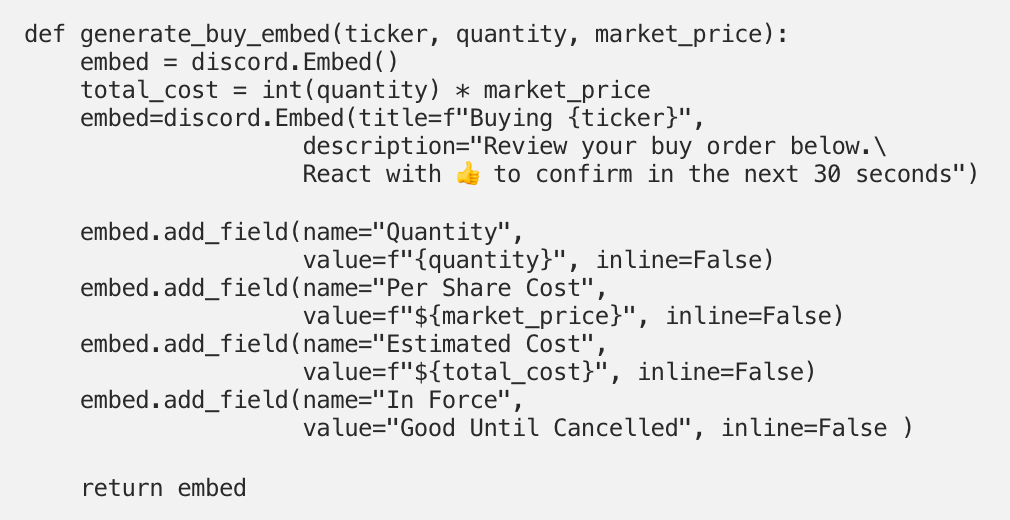
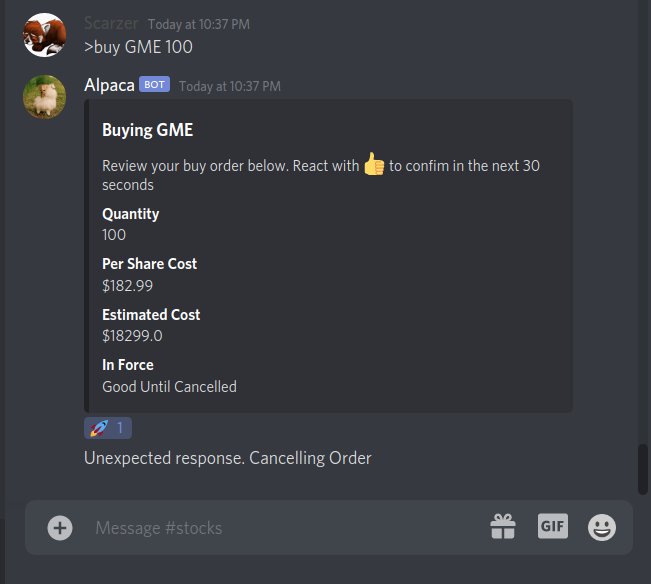
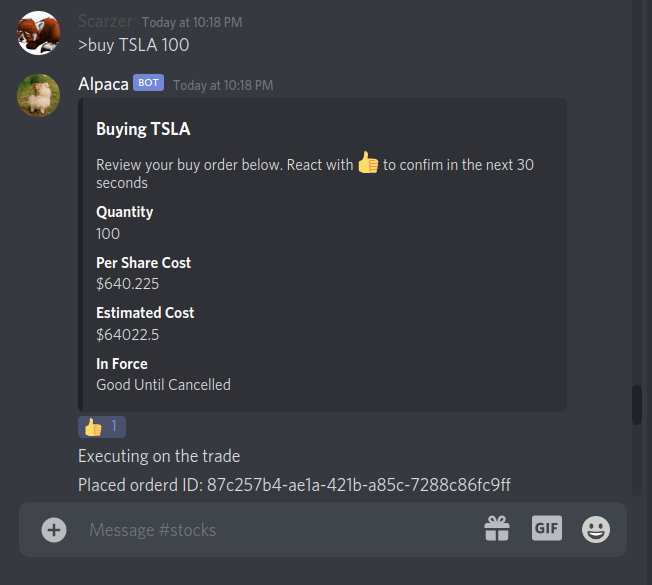
Above we’re starting to build up what we want our embed to look like. We want to make the information quick to digest, as well as simple to react to.

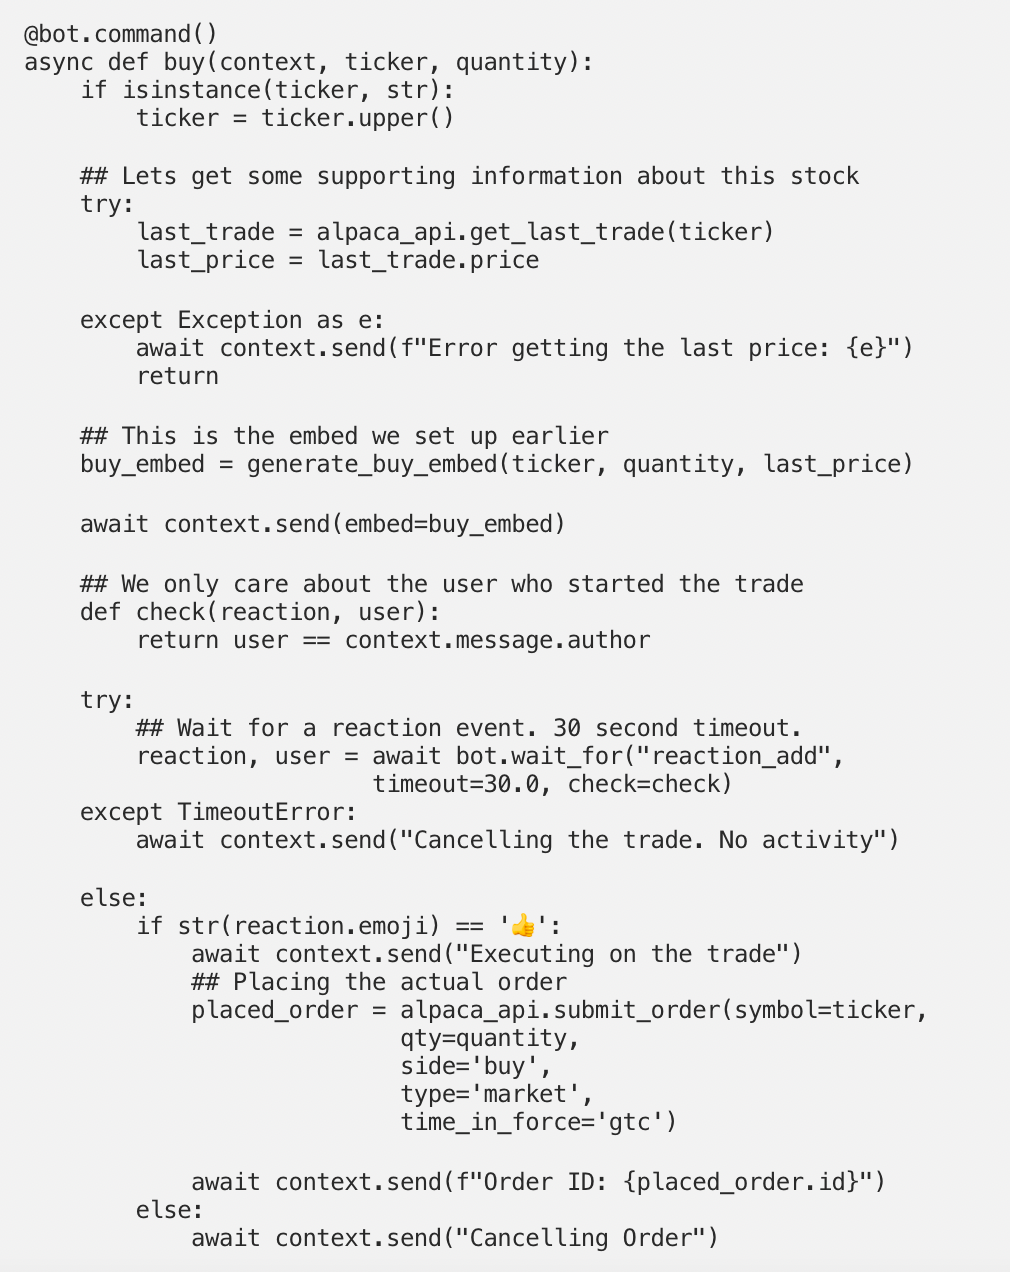
This is a bit more complex of a command, but it’s super cool!
When Dispaca sees a >buy GME 100, it’ll go out and grab the last trade price. We will use that price to estimate the cost of our order.
await bot.wait_for("reaction_add", timeout=30.0, check=check)
Here we’re telling our bot to listen for reactions for 30 seconds. If the user who started the order responds with ?, then the order will proceed! We send a buy order at the current market price. On the other hand if the user reacts with any other emoji, or 30 seconds pass, then the order will be cancelled.
This gives us at least a sense of how much we’ll be spending and the added benefit of avoiding a catastrophic mistake =].
I strongly recommend checking out Alpaca’s Order API to see how you can make different types of market orders. For this tutorial, we went with the simplest option.
Conclusion
Thank you for following this tutorial till the end. At this point, you should have been able to deploy a Discord bot that can buy, with confirmation, stocks on your behalf.
There’s still A LOT that can be done such as selling the securities you’ve just bought, and more advanced order types and analysis. Stay tuned for Part 2 where I explore more topics in building out Dispaca, the Discord Alpaca.
Alpaca does not prepare, edit, or endorse Third Party Content. Alpaca does not guarantee the accuracy, timeliness, completeness or usefulness of Third Party Content, and is not responsible or liable for any content, advertising, products, or other materials on or available from third party sites.
Brokerage services are provided by Alpaca Securities LLC ("Alpaca"), member FINRA/SIPC, a wholly-owned subsidiary of AlpacaDB, Inc. Technology and services are offered by AlpacaDB, Inc.
