How to Set Up Your Trading Platform — Part I

Please note that this article is for educational and informational purposes only. All screenshots are for illustrative purposes only. The views and opinions expressed are those of the author and do not reflect or represent the views and opinions of Alpaca. Alpaca does not recommend any specific securities or investment strategies.
There are quite a few articles on trading ideas and algorithmic samples. Sadly, there are only a handful of step-by-step guides on creating an automated/autonomous trading platform. I am trying to fill this avoid with this short series of articles. By the end of this, you should have a good idea of what the "retail" algo-trading platform looks like how to set it up yourself.
I am going to break the series into two parts:
- Part I: prerequisite, high-level setup details, setup details, backtesting a Crypto strategy.
- Part II: Completing the setup. Autonomous trading on a paper account, Moving to production.
The target audience of this series are developers with an understanding of algo-trading basics, intermediary knowledge of Python, and adventures flare for "DevOps."
I'm going to use LiuAlgoTrader as the backtesting and trading platform of choice. However, many of the concepts apply to other platforms, as well as your home-grown codebase.
If you haven't done so, I recommend reading and trying the previous series: LiuAlgoTrader Part I (background) and LiuAlgoTrader Part II (example).
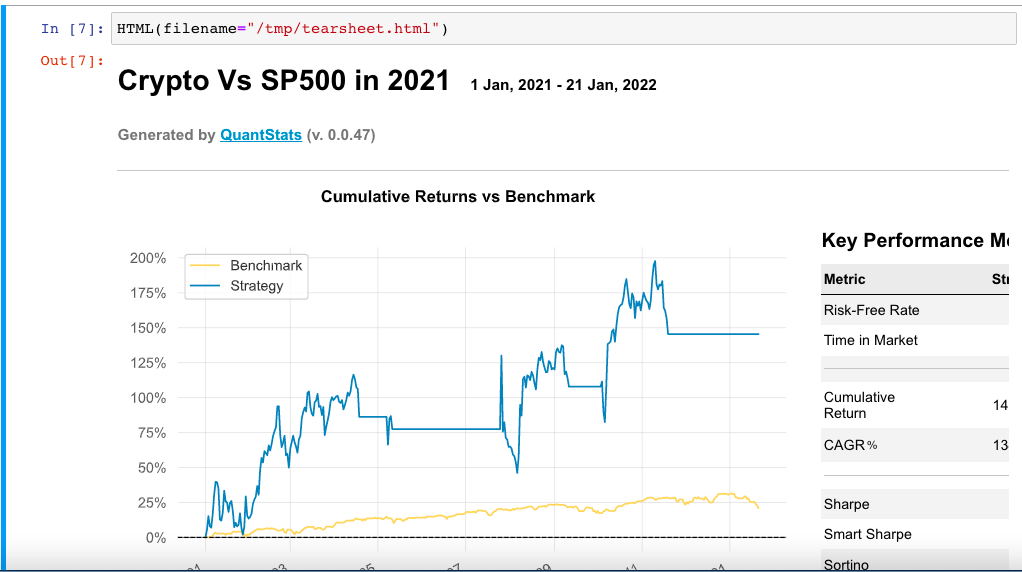
For this guide, we'll be using a simple Crypto trading algo that had excellent returns in 2021:
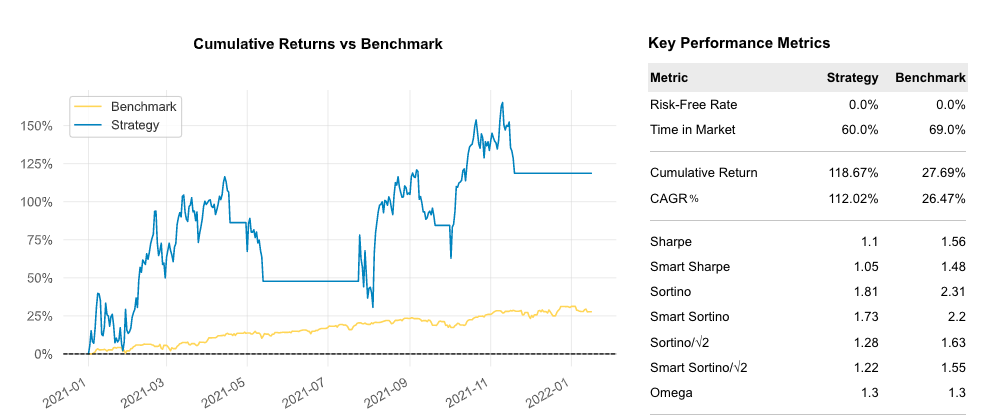
You can find details of the tear sheet here and the code sample here.
Before we start:
- Make sure you have registered with Alpaca.Markets and obtained API Keys.
- You have a local setup that includes: Python 3.9+, an installed design of LiuAlgoTrader, and have a local script w/ the relevant environment variables. If you do not have this setup ready, please refer to the links at the head of this article.
- Decide where to host your automated trading platform. For the past couple of years, I have been running my setup on Google Cloud Platform (GCP for short), and I will be using it in the examples. However, you may choose any cloud or on-premise setup. As long as you have the account/keys set up, you should be good to go. If you decide to use GCP, sign up and go through the billing steps.
- [Optional] Depending on your local hardware setup, search online how to install the
psqlapplication (PostgreSQL command-line tool). I know it's hardcore, and most IDEs have Database connectivity tools. However, since I occasionally connect to the Database from a remote machine, I prefer to get familiar with the bare-bones toolset. Once you get used to it, you'll go Phhhh each time you see someone using one of these fancy Database connectivity tools.
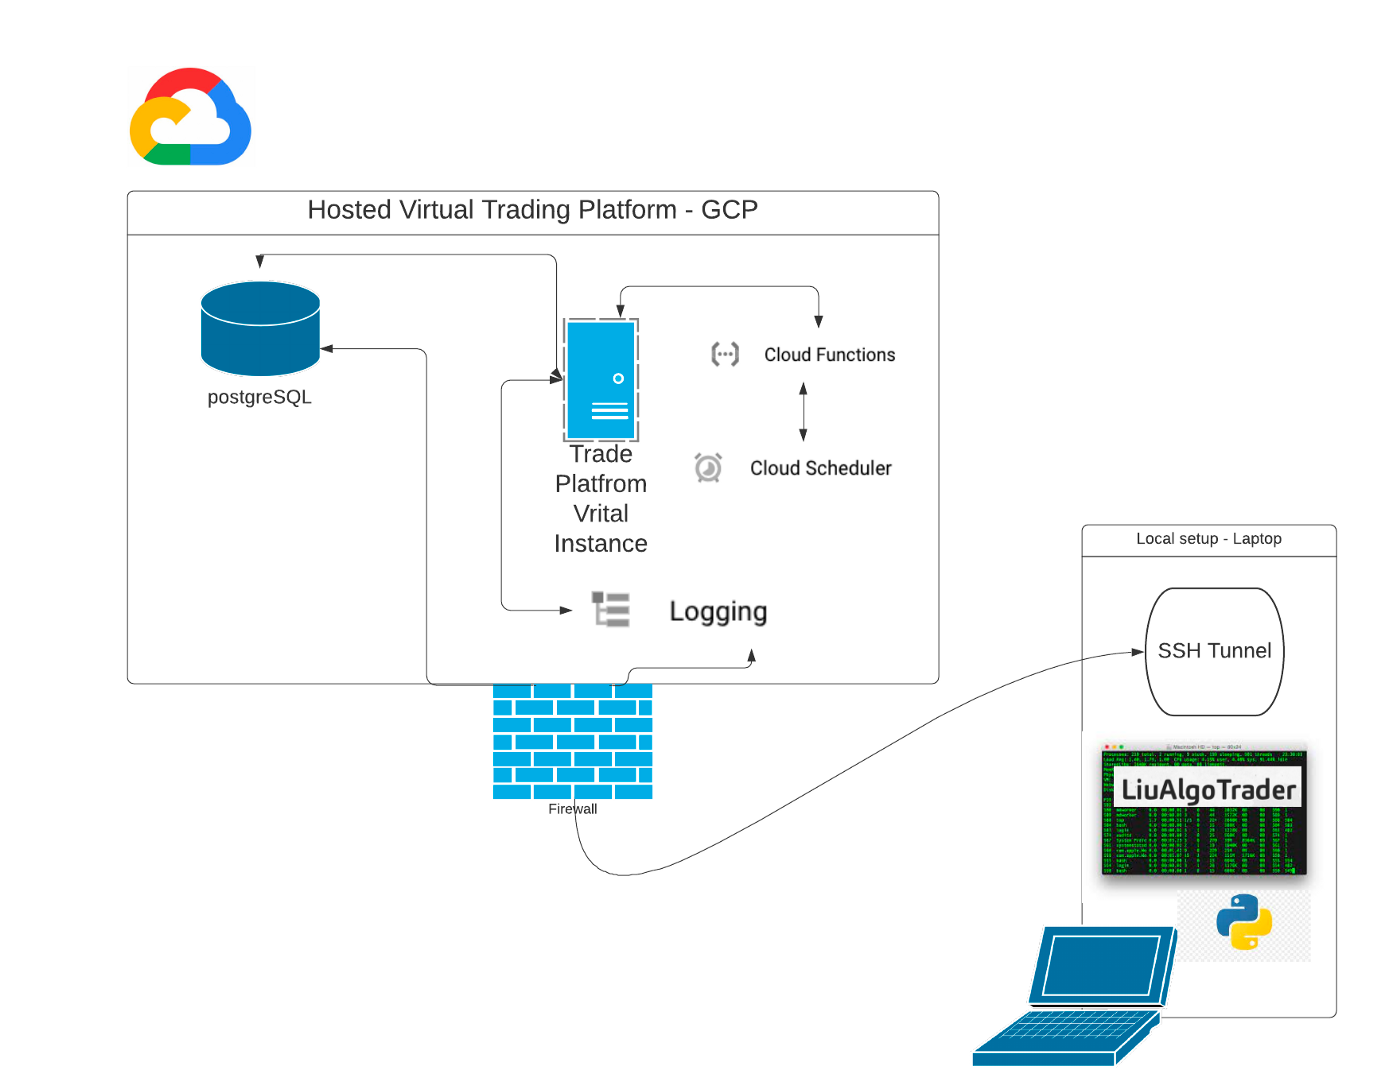
Figure 2 shows the schematics of my setup:
- Centralized Postgre SQL instance, running a production database instance, and a paper-trading one. I use the GCP SQL service for hosting my data instance(s).
- GCP hosted Compute Engine Instance. The instance is automatically started and stopped using Cloud Scheduler & Cloud Functions.
- The server instance is running Debian Linux. Once the server starts, the Trader application is automatically triggered by the
System V initsystem. - LiuAlgoTrader comes pre-installed w/ StackDriver, sending logging to GCP central logging service. Performance tracing Metrics, if enabled, are transmitted using OpenTelemetry (also pre-installed) to GCP Trace. GCP Monitoring can be used for Observability.
- I use my laptop for backtesting strategies, and for long-running backtesting, I fire up an additional Compute Engine instance on GCP.
- Using GCP keys and running a local DB proxy, I can access the Database from my laptop.
It sounds a lot more complex than it is. In this guide, I will walk you step-by-step through the setup of each of these components.
AWS, Azure, Alibaba, Oracle, and other cloud providers all have equivalents to the above components. It is also possible to run everything on a single on-premise server or even your laptop. To do that, I would refer you back to an earlier article.
In the rest of this article, I will explain how to set the Database, configure the local environment to use the remote Database and logging, and run a backtesting session.
In the following article, we will set up the instance on GCP and configure it as an automated trading instance.
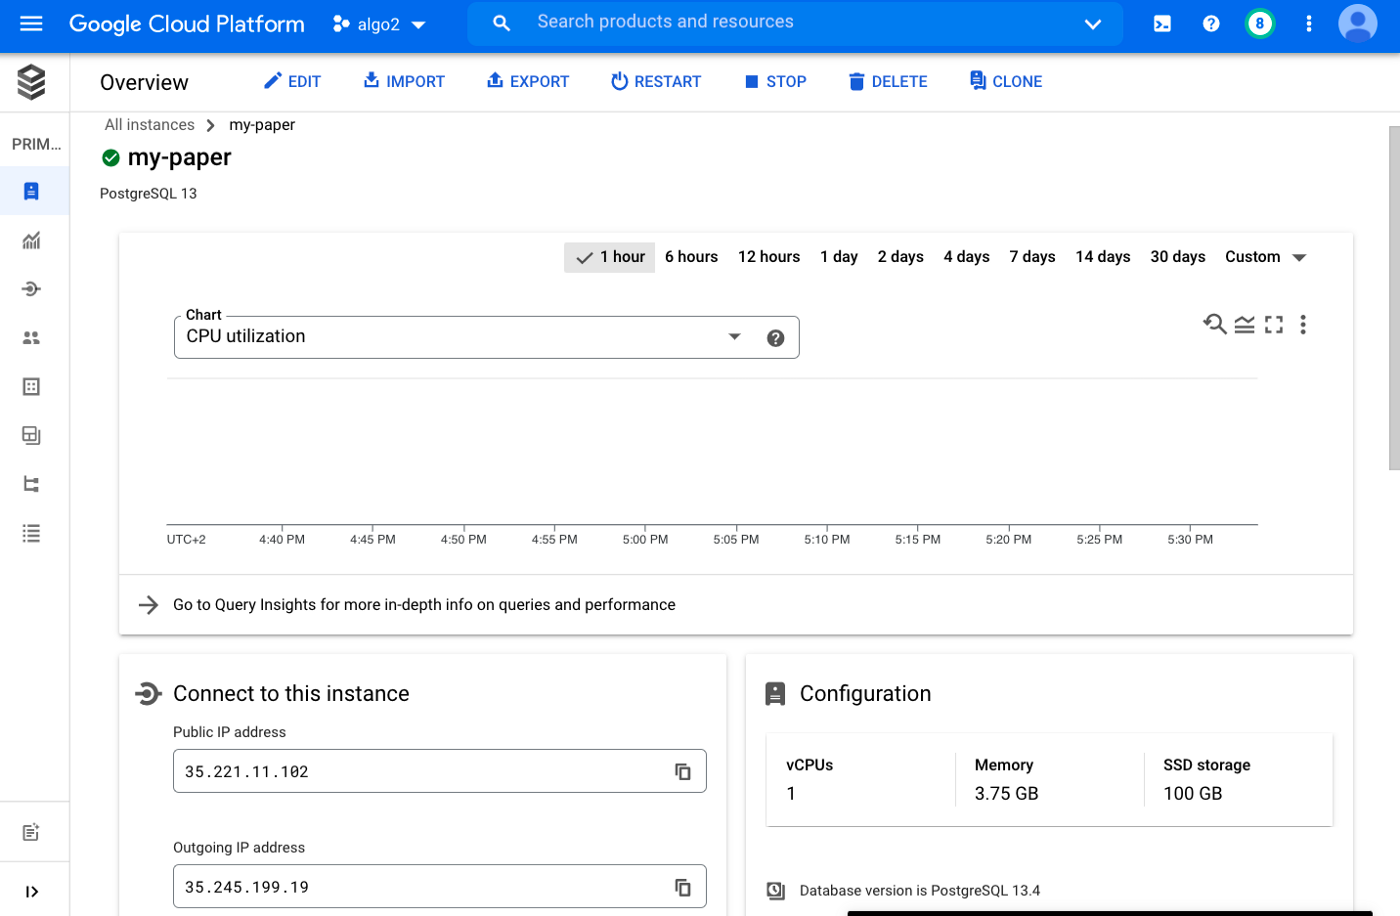
Step #1: Setting up the Database instance. This two-minute video shows the steps to create a new Database on GCP. As you can see in the video, for our purposes and to keep costs at bay, we select a minimal configuration that uses a single availability zone with minimal capabilities and set it up with automatic backups.
Figure 3 shows the Database dashboard post-installation:
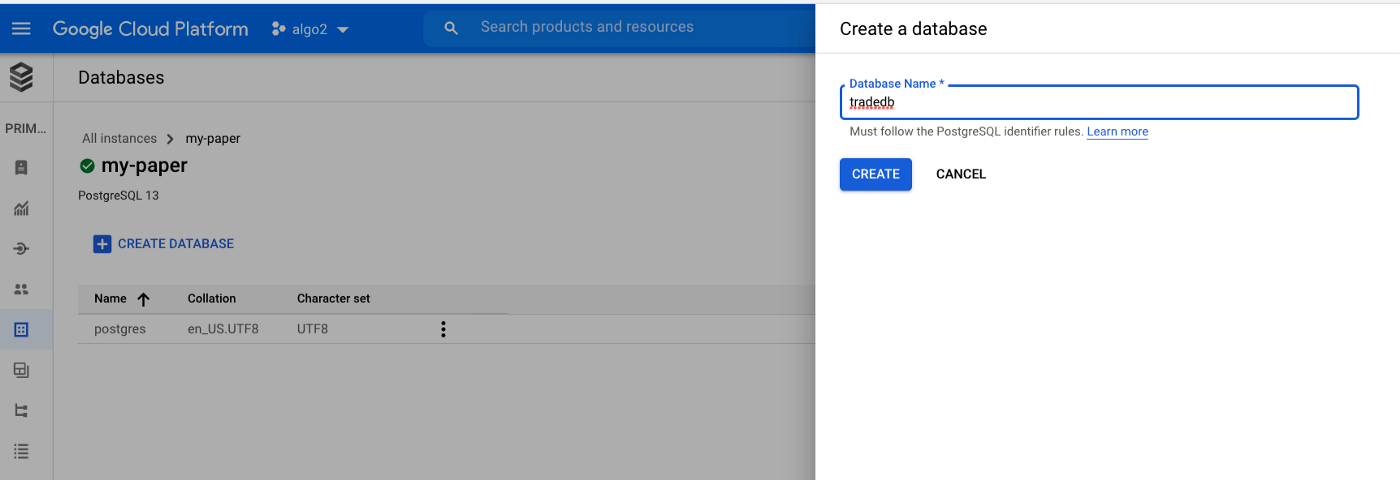
It is now time to create the tradedb database that will host LiuAlgoTrader schema & data:
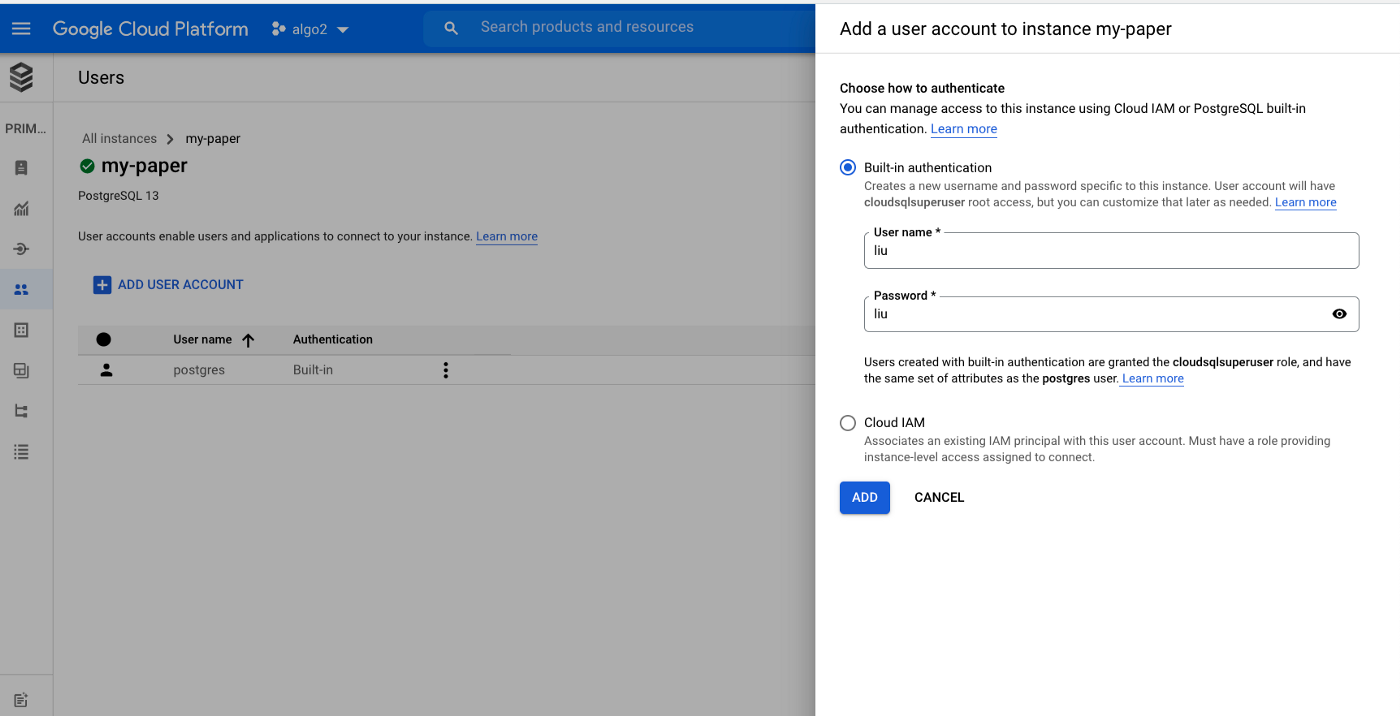
Lastly, we need to create the database application user:
Step #2: Connect the local environment to GCP. This step is a bit convoluted, but it only needs to be set up once. First, install the GCP CLI gcloud . Second, we need to install and configure a proxy service to GCP SQL. The proxy creates a tunnel from your local machine to our database instance on GCP. Once the tunnel runs, we can connect to the Database to connect to a local PostgreSQL instance. You can find detail on the proxy and download information here.
Before we can run the proxy, we need to know the Database connection string:
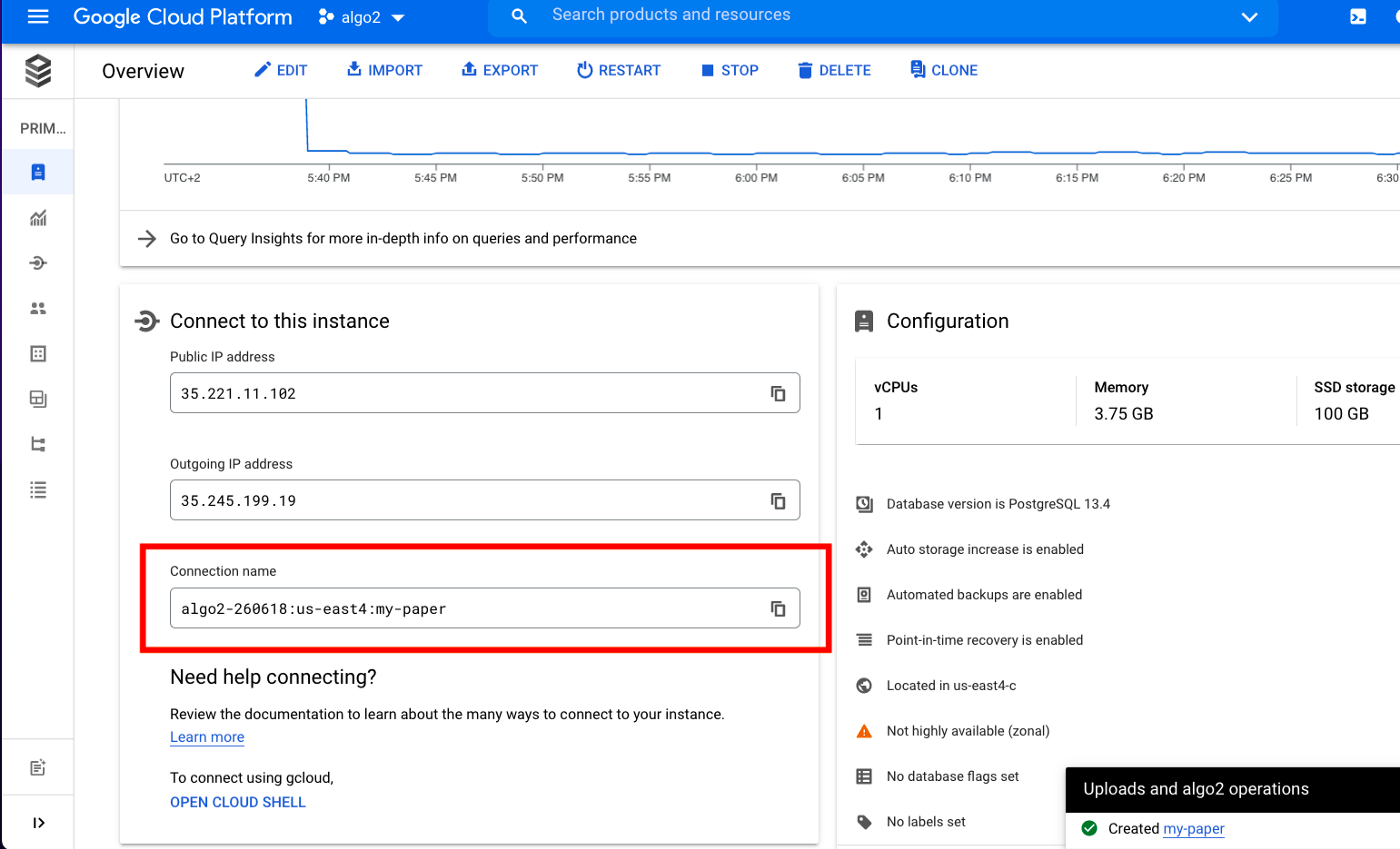
To run the proxy type:
cloud_sql_proxy -instances=algo2–260618:us-east4:my-paper=tcp:5432
The output should look like this:

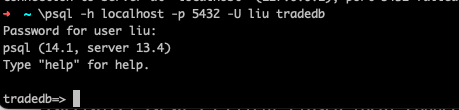
Finally, to connect to the database type:
\psql -h localhost -p 5432 -U liu tradedb
Once you enter the password, the output should look like this:
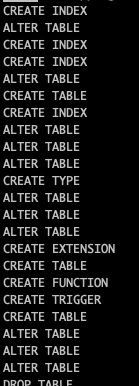
Step #3 Create the database schema. LiuAlgoTrader Database schema is downloadable from here. All you need to do is copy and paste the schema psql and hit the RETURN key. You should see a list similar to the below progressing:
Once completed, you should type:
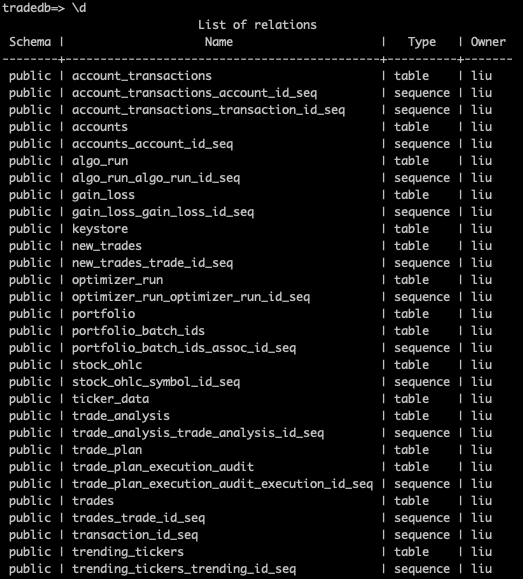
\d
This command lists the table; the list should be somewhat similar to:
Take a deep breath. You are almost there!
Step #4 Running backtesting. This step assumes that you have LiuAlgoTrader already installed, your environment variables for Alpaca and LiuAlgoTrader set. We are ready to go!
You can download the BTCUSD scanner and the Crypto strategy that we will be using here (reminder: make sure you have TA-LIB installed, you checkout my readme).
Create a portfolio for backtesting:
portfolio create 5000 500 CRYPTO
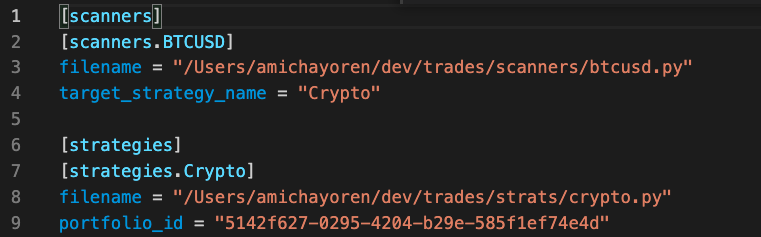
The tradeplan.toml would be something like this:
To run the backtester type:
backtester from 2021–01–01 — scanners=BTCUSD — strats=Crypto — asset=crypto — scale=day
You should see output similar to:

Depending on your hardware setup and network connectivity, the year-long backtest session should run for a few minutes.
Step #5 Watch the performance. You've done it! You created a cloud-based setup for your trading, you connected your local environment to your cloud setup, you configured a scanner and strategy for crypto trading, and you ran a full year backtesting session. Thank you for getting thus far!
Now l see how it all comes together. First, let us go back to GCP. This time we'll be looking for the logs:
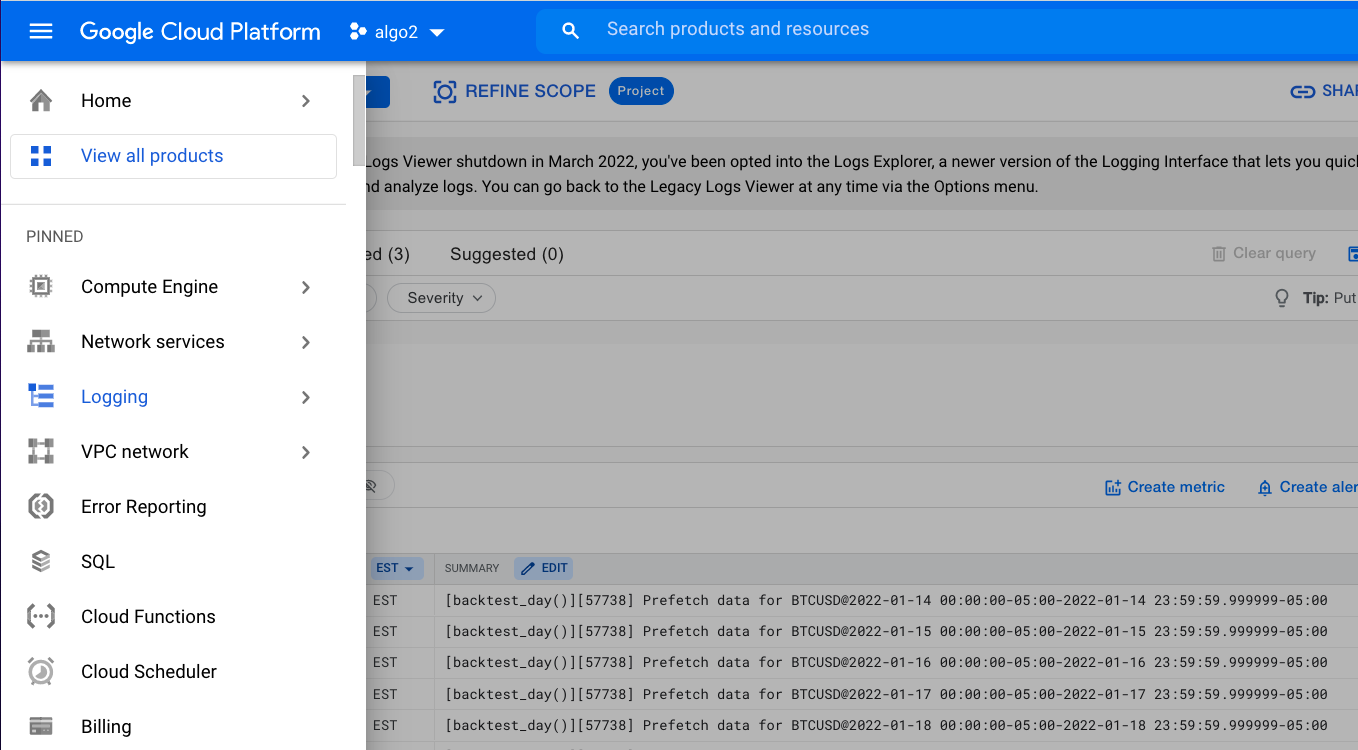
LiuAlgoTrader and the strategies I write use the platform tlog module to write records. The tlog The module uses StackDriver, and aside from writing to the standard output, logs are sent to GCP for later viewing. It is super helpful when your autonomous algo trading platform is doing its own thing, and you want to view the execution logs (as well as Tracing) at some point.
It is now time to view the results. We will be using the platform Jupyter Notebooks to check out our performance. Type:
jupyter notebook
Browse to "analysis/notebooks" as shown in Figure 14, and select portfolio_analysis.ipynb .
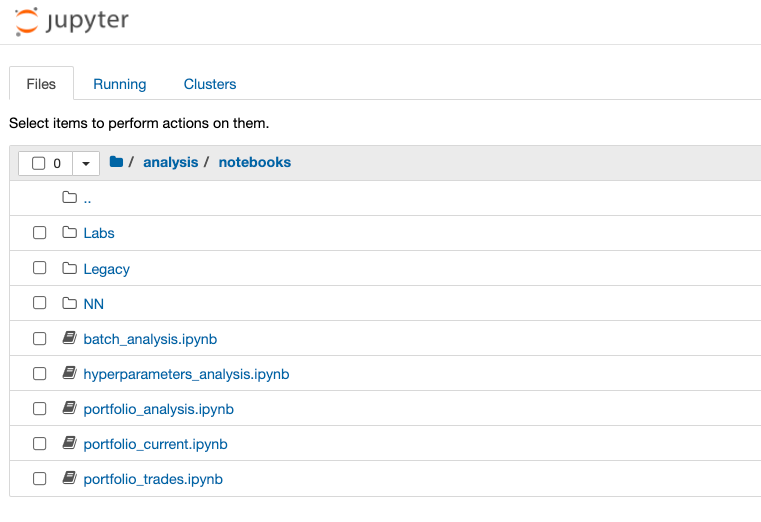
Once the notebook comes up, select the portfolio-id you created previously (you can find it in the tradeplan.toml file):

Let it run. It will be several minutes for the trading details to be loaded and compared with the S&P 500 since early 2021. Once completed, you can scroll down the see the final results:
Alpaca does not prepare, edit, or endorse Third Party Content. Alpaca does not guarantee the accuracy, timeliness, completeness or usefulness of Third Party Content, and is not responsible or liable for any content, advertising, products, or other materials on or available from third party sites.
All investments involve risk and the past performance of a security, or financial product does not guarantee future results or returns. Keep in mind that while diversification may help spread risk it does not assure a profit, or protect against loss, in a down market. There is always the potential of losing money when you invest in securities, or other financial products. Investors should consider their investment objectives and risks carefully before investing.
Cryptocurrency is highly speculative in nature, involves a high degree of risks, such as volatile market price swings, market manipulation, flash crashes, and cybersecurity risks. Cryptocurrency is not regulated or is lightly regulated in most countries. Cryptocurrency trading can lead to large, immediate and permanent loss of financial value. You should have appropriate knowledge and experience before engaging in cryptocurrency trading. For additional information please click here.
Securities brokerage services are provided by Alpaca Securities LLC ("Alpaca Securities"), member FINRA/SIPC, a wholly-owned subsidiary of AlpacaDB, Inc. Technology and services are offered by AlpacaDB, Inc.
Cryptocurrency services are provided by Alpaca Crypto LLC ("Alpaca Crypto"), a wholly-owned subsidiary of AlpacaDB, Inc. Alpaca Crypto is not a member of SIPC or FINRA. Cryptocurrencies are not stocks and your cryptocurrency investments are not protected by either FDIC or SIPC.
This is not an offer, solicitation of an offer, or advice to buy or sell securities or cryptocurrencies, or open a brokerage account or cryptocurrency account in any jurisdiction where Alpaca Securities or Alpaca Crypto respectively, are not registered.


