Please note that this article is for educational and informational purposes only. All screenshots are for illustrative purposes only. The views and opinions expressed are those of the author and do not reflect or represent the views and opinions of Alpaca. Alpaca does not recommend any specific securities or investment strategies.
This article first appeared on Medium, written by Akash Kaul
Agenda
- Introduction
- Why Use Alpaca?
- Setting up the Alpaca API
- Calling the API using Python
Introduction
This is the first part of a blog series on algorithmic trading in Python using Alpaca. This series will cover the development of a fully automatic algorithmic trading program implementing a simple trading strategy. This blog will cover the Alpaca platform, set up the Alpaca API, and a few sample API calls in Python. This will give us a basic understanding of how to interface Alpaca with Python and will serve as the foundation for developing our trading program, which we will create in the next blog (part 2) of the series.
I will be uploading all code into a single repository, which will get updated with each blog. The repository can be found here.
Why Use Alpaca?
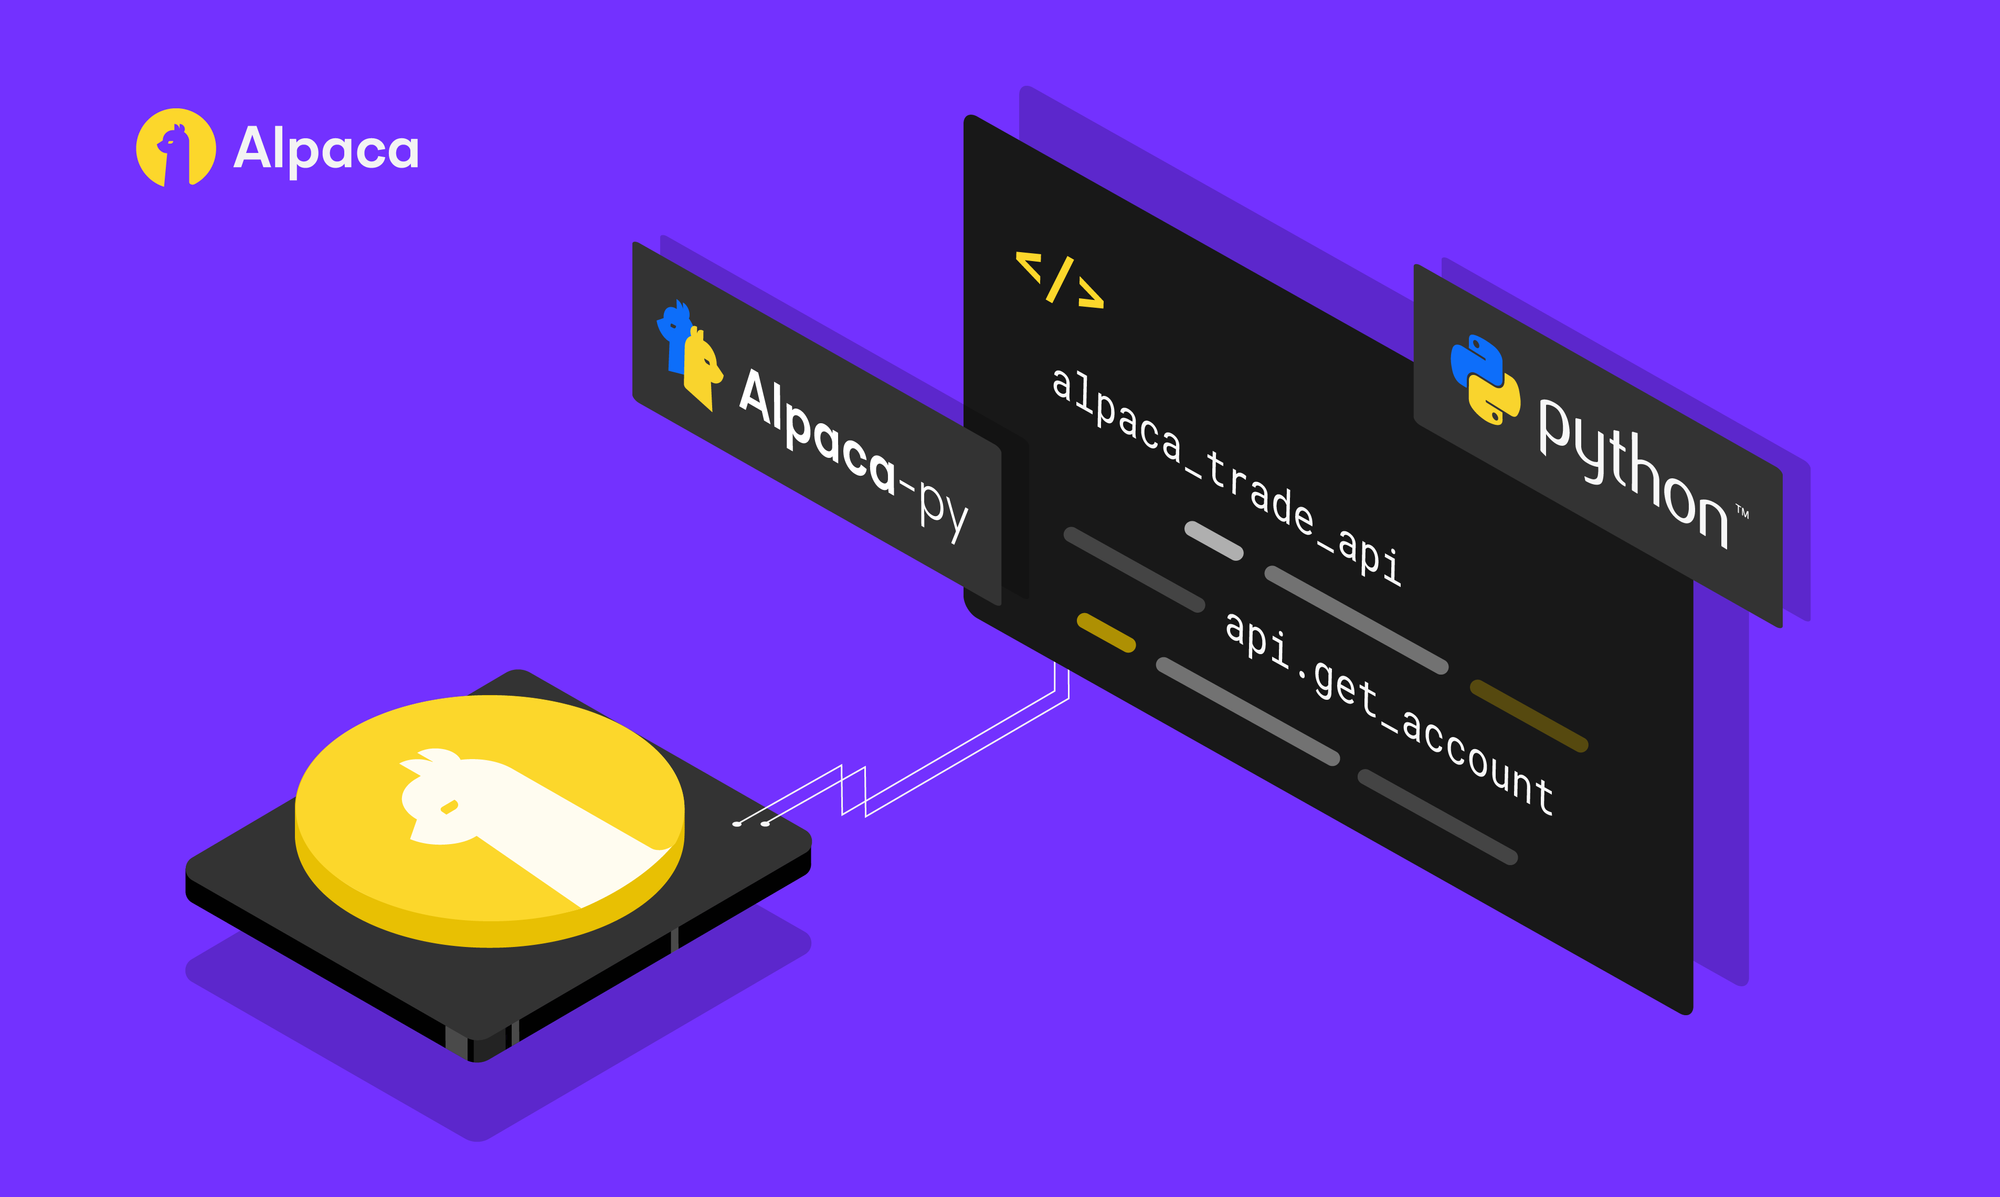
Alpaca is an online brokerage, similar to Investment Bankers or TD Ameritrade, with commission-free stock trading. Beyond this, Alpaca is unique as it operates through an API. Using the endpoints exposed by this API, you can get market data, place stock orders, check your portfolio, and do any other tasks you would normally do with a GUI. Alpaca provides SDKs for interfacing with their API in Python, Go, C#, and several other languages.
Alpaca does offer an online dashboard GUI for manual trading as well.
The other advantage of Alpaca is its free sandbox paper-trading environment. Here you can test any algorithms you implement on a virtual portfolio before implementing it live. The sandbox operates exactly as a real portfolio would.
We will be using this testing environment for the entire series.
Setting up the Alpaca API
The first step to getting started is creating an Alpaca account. You can do so by visiting the link here and clicking Sign Up. Since we are only using the paper-trading portfolio, we do not need to input any private information or deposit any money into our account. Once you are signed up, you can view your paper account by clicking the dropdown in the top left, as shown in the picture below.
Agenda
- Introduction
- Why Use Alpaca?
- Setting up the Alpaca API
- Calling the API using Python
Introduction
This is the first part of a blog series on algorithmic trading in Python using Alpaca. This series will cover the development of a fully automatic algorithmic trading program implementing a simple trading strategy. This blog will cover the Alpaca platform, set up the Alpaca API, and a few sample API calls in Python. This will give us a basic understanding of how to interface Alpaca with Python and will serve as the foundation for developing our trading program, which we will create in the next blog (part 2) of the series.
I will be uploading all code into a single repository, which will get updated with each blog. The repository can be found here.
Why Use Alpaca?
Alpaca is an online brokerage, similar to Investment Bankers or TD Ameritrade, with commission-free stock trading. Beyond this, Alpaca is unique as it operates through an API. Using the endpoints exposed by this API, you can get market data, place stock orders, check your portfolio, and do any other tasks you would normally do with a GUI. Alpaca provides SDKs for interfacing with their API in Python, Go, C#, and several other languages.
Alpaca does offer an online dashboard GUI for manual trading as well.
The other advantage of Alpaca is its free sandbox paper-trading environment. Here you can test any algorithms you implement on a virtual portfolio before implementing it live. The sandbox operates exactly as a real portfolio would.
We will be using this testing environment for the entire series.
Setting up the Alpaca API
The first step to getting started is creating an Alpaca account. You can do so by visiting the link here and clicking Sign Up. Since we are only using the paper-trading portfolio, we do not need to input any private information or deposit any money into our account. Once you are signed up, you can view your paper account by clicking the dropdown in the top left, as shown in the picture below.
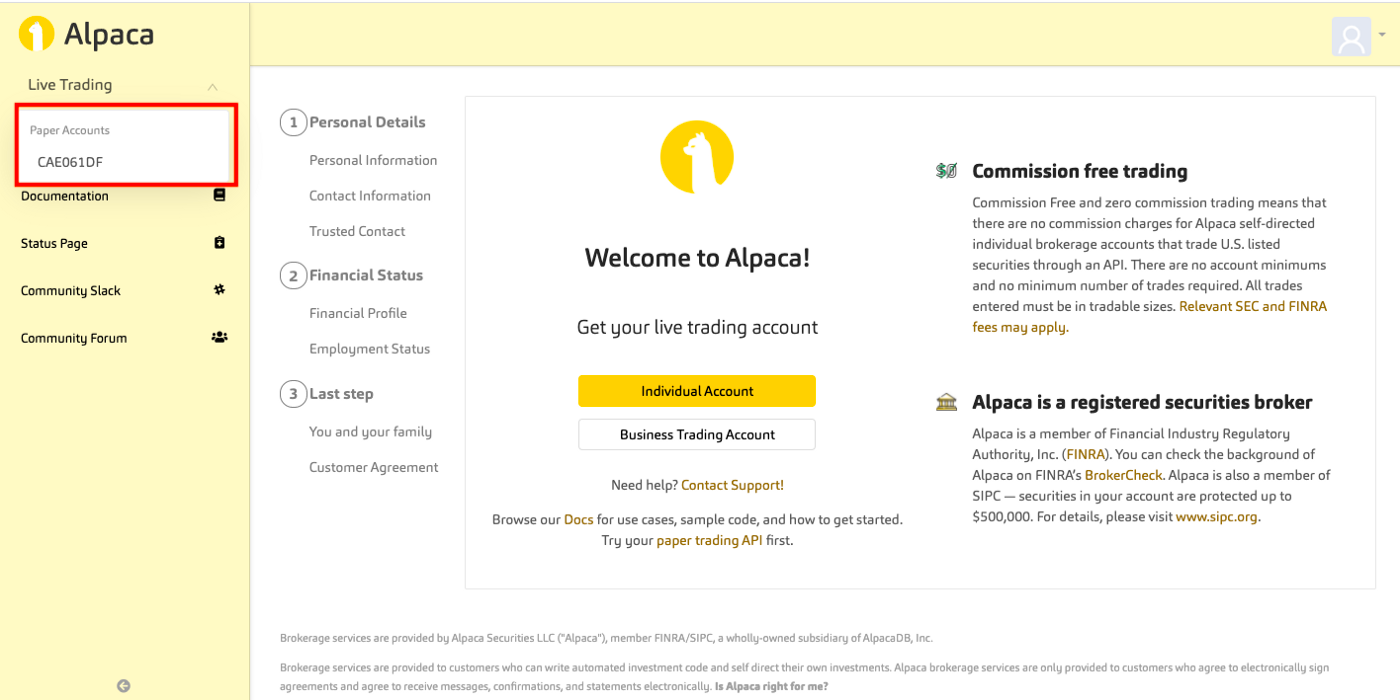
You will now be brought to a landing page that looks like this:
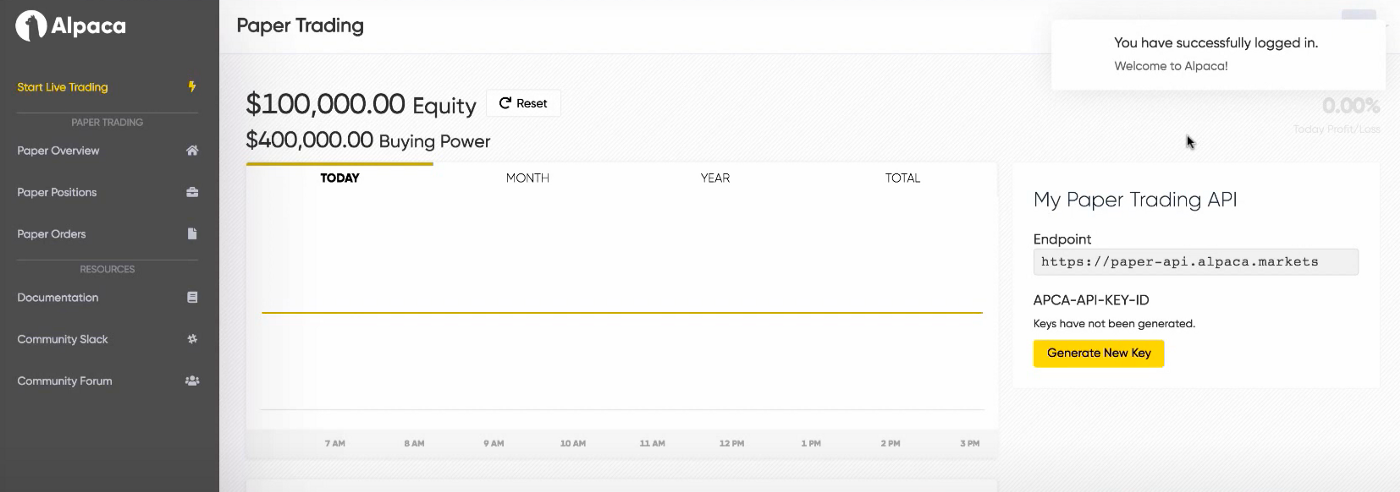
Here you can generate an API Key by clicking on the Generate New Key button. This will generate an API Key and Secret Key. You will need to store both of these keys. They will be used to perform API calls from our Python script.
With that, our Alpaca account is all set up. We can now move on to connecting Alpaca to Python.
Calling the API using Python
We will now go over how to set up your Python environment to send requests to the Alpaca API, as well as a few examples of API calls.
All of these examples are taken from the Alpaca documentation page.
Python Setup
Thankfully, the Alpaca team created a Python library for communicating with the API. The package is called alpaca-trade-api and can be installed using pip as shown here:
pip install alpaca-trade-api
I would recommend creating a virtual environment before installing the package.
With the package installed, we can simply import it into our Python scripts:
import alpaca-trade-api as tradeapi
Once the package is imported, the first step is always to instantiate a connection to the Alpaca REST API. This can be done with the following code.
import alpaca_trade_api as tradeapi

# API Info for fetching data, portfolio, etc. from Alpaca
BASE_URL = "https://paper-api.alpaca.markets"
ALPACA_API_KEY = "<YOUR ALPACA API KEY>"
ALPACA_SECRET_KEY = "<YOUR ALPACA SECRET KEY>"

# Instantiate REST API Connection
api = tradeapi.REST(key_id=ALPACA_API_KEY, secret_key=ALPACA_SECRET_KEY,
                    base_url=BASE_URL, api_version='v2')
Base code for creating a connection to Alpaca API
That’s it! Almost all of the functionality we need is within the api object. Now, we can dive into some of the features this Python package has to offer.
Viewing Account Details
With the api object, we can access account details using the get_account() function as shown below. This code simply accesses your Alpaca account and prints the id, equity value, and status.
# Fetch Accountaccount = api.get_account()# Print Account Detailsprint(account.id, account.equity, account.status)
The Account object contains much more information like buying power and portfolio value, which can all be accessed similar to shown above. You can find all parameters available within the Account object here.
Fetching Market Data
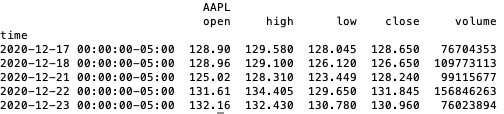
Using the same api object, we can pull daily historical market data using the get_barset() function. This function takes several parameters, and the full list can be found here. At a minimum, we need the symbol of the stock we are interested in, the limit for the number of data points to return, and the aggregation timeframe (ie. minute, hour, day). Here’s an example of requesting daily data of Apple Stock for the last 100 days.
# Fetch Apple data from last 100 daysAPPLE_DATA = api.get_barset('AAPL', 'day', limit=100)# Preview Dataprint(APPLE_DATA.df.head())
The data returned is quite standard and is sorted in ascending order by date.
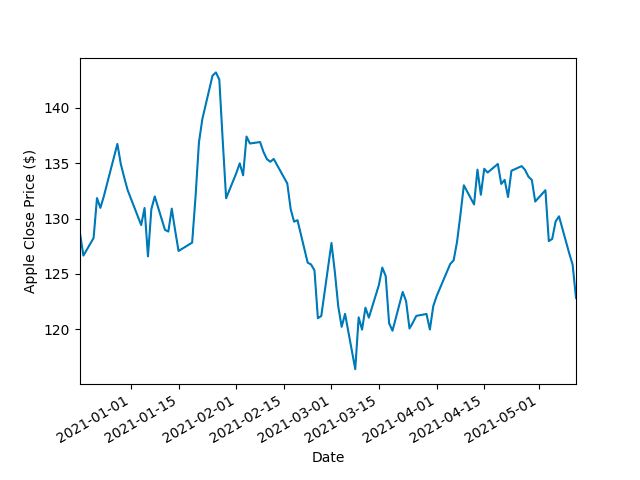
Lucky for us, the get_barset() method also returns a Pandas DataFrame. This means we can do all of the data analysis we want without too much effort. For example, we can easily create a line chart of the historical close prices using Pandas and Matplotlib. The code looks like this.
import matplotlib.pyplot as plt

# Fetch Apple data from last 100 days
APPLE_DATA = api.get_barset('AAPL', 'day', limit=100).df

# Reformat data (drop multiindex, rename columns, reset index)
APPLE_DATA.columns = APPLE_DATA.columns.to_flat_index()
APPLE_DATA.columns = [x[1] for x in APPLE_DATA.columns]
APPLE_DATA.reset_index(inplace=True)
print(APPLE_DATA.head())

# Plot stock price data
plot = APPLE_DATA.plot(x="time", y="close", legend=False)
plot.set_xlabel("Date")
plot.set_ylabel("Apple Close Price ($)")
plt.show()
The resulting line chart looks like this.
Notes on Fetching Data:
- The example shown only works for historical data. To fetch real-time data, you need to use a WebSocket. You can see examples of how to configure this in the Alpaca GitHub. I plan to cover this more in future blogs.
- Since we are using a free sandbox trading environment, we have access to the default Alpaca Data API. This limits the number of markets we can collect data from, the time delay between data calls, and the number of calls per minute. Alpaca also offers an unlimited plan for $50/mo which provides more data with unlimited calls and a 1-minute delay for historical data. You can learn more about the different pricing plans here.
Submitting Orders
Submitting orders is just as easy as the other functions we’ve seen. You can submit orders using the submit_order() function. Here’s a basic example of how to call this function.
api.submit_order(symbol='AAPL', qty=1, side='buy', type='market', time_in_force='day')
To sell stocks, you simply specify sell instead of buy under the side parameter. The code looks almost identical. The sell parameter is also used to submit short orders for securities you do not already have. For example, without owning any Tesla, I could “sell” 1 stock of Tesla. This action would look like this.
api.submit_order('TSLA', 1, 'sell', 'market', 'day')Short order for one stock of Tesla
You can also use more advanced orders like stop-loss and trailing orders, which are placed when certain conditions in the market are met. To see all of the parameters you can use for this endpoint, check here. To see examples of more complex orders, check the documentation page.
When you submit an order, you will see live updates on your portfolio homepage. Here’s what my dashboard looks like after submitting the buy order for Apple and a short-order for Tesla.
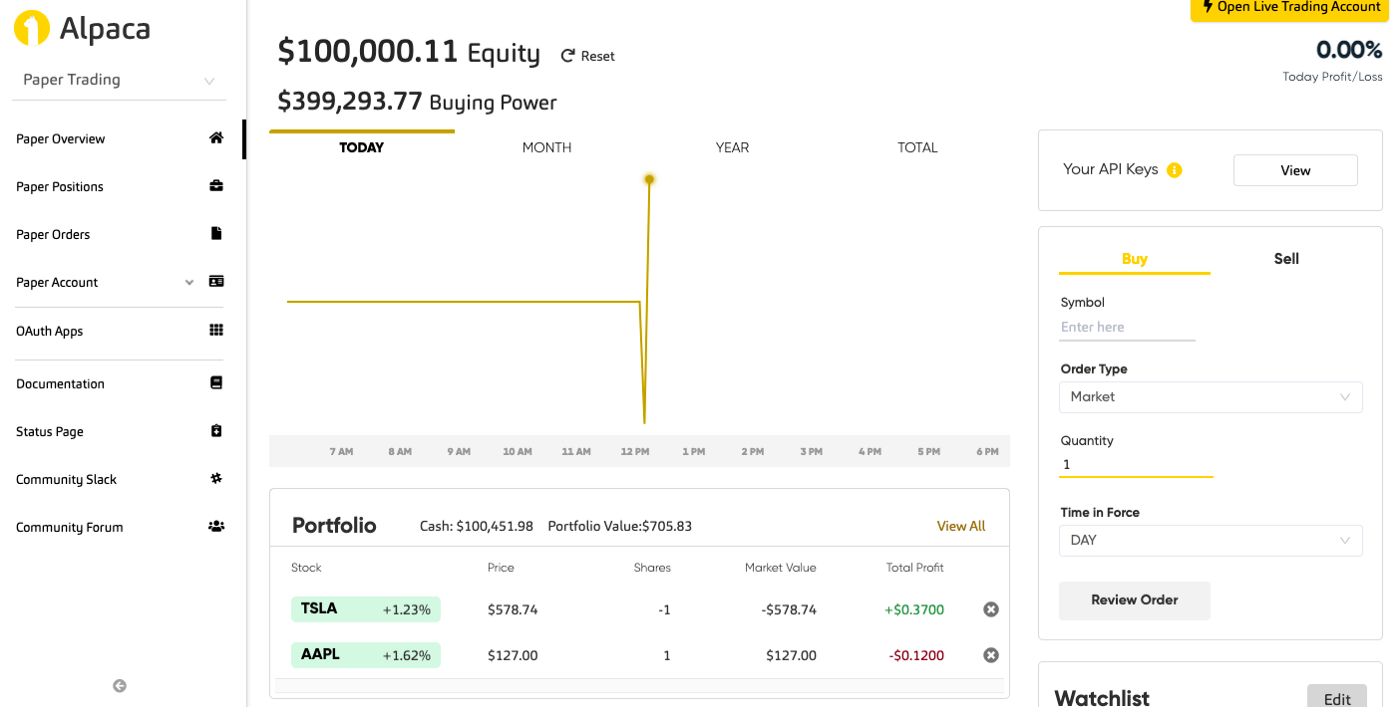
Your orders can sometimes take a while. You can check your queue by clicking the Paper Orders tab on the left. Any orders you submit outside of normal operating hours will be entered with the status Open and will be filled once markets open again. Orders follow a series of status changes, starting from Open until they are filled and added to your portfolio. You can view the entire lifecycle here.
Once you have orders filled and added to your portfolio, you can also use the API to look at the status of your portfolio. Using the get_position() function, you can get data above a specific ticker that you hold. Here’s an example.
# Get stock position for Apple

aapl_position = api.get_position('AAPL')

print(aapl_position)
Here is what the output looks like.
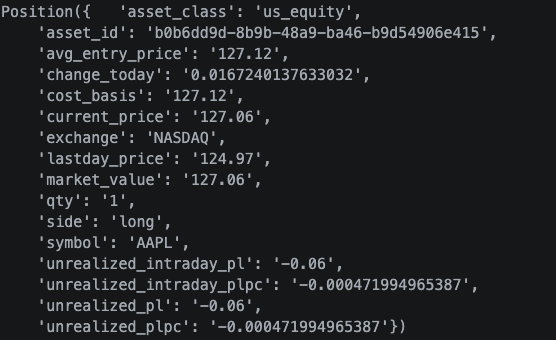
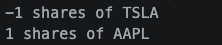
The returned object contains lots of useful data that can be used for analysis or live trading algorithms. You can also return a list of all positions in your portfolio using something similar to the following code.
# Get a list of all of our positions.
portfolio = api.list_positions()

# Print the quantity of shares for each position.
for position in portfolio:
    print("{} shares of {}".format(position.qty, position.symbol))
This results in the following output.
Those are just a few examples of working with the Alpaca API in Python. For more examples, check the Documentation page and Python package repository.
Conclusion and Next Steps
We’ve now covered the basics of Alpaca. We looked at how to set up Alpaca for trading and how to communicate to its API using Python. Based on these examples, you should be able to perform some of the basic tasks needed to trade exclusively using code. This will serve as a foundation for designing a trading program, which will be the focus of part 2 in this series.
Thanks for reading! If you have any questions or concerns, please let me know with a comment.
References
All investments involve risk and the past performance of a security, or financial product does not guarantee future results or returns. Keep in mind that while diversification may help spread risk it does not assure a profit, or protect against loss.. There is always the potential of losing money when you invest in securities, or other financial products. Investors should consider their investment objectives and risks carefully before investing.
Alpaca does not prepare, edit, or endorse Third Party Content. Alpaca does not guarantee the accuracy, timeliness, completeness or usefulness of Third Party Content, and is not responsible or liable for any content, advertising, products, or other materials on or available from third party sites.
Brokerage services are provided by Alpaca Securities LLC ("Alpaca"), member FINRA/SIPC, a wholly-owned subsidiary of AlpacaDB, Inc. Technology and services are offered by AlpacaDB, Inc.
This is not an offer, solicitation of an offer, or advice to buy or sell securities, or open a brokerage account in any jurisdiction where Alpaca is not registered (Alpaca is registered only in the United States).