Setting up AWS with Python with Alpaca Trade API
It is always challenging for a new quant trader to get an algorithm up and running live in the cloud.
This is a code for a simple trading algorithm that we use for this post.

This walkthrough focuses on the basics of setting up AWS with Python, the Alpaca Trade API, and running a basic algorithm. In my last post, I wrote an instruction for using PythonAnywhere.


AWS may seem daunting at first, but is well worth the time to get comfortable with. The benefits of AWS include billing by usage and a free tier of cloud services, meaning you can get up and running with zero upfront cost!
Let’s jump in with a fresh account.
Step 1.) Sign up for AWS.
AWS will ask you for a credit card and phone number to verify your account, but you do not need to spend a dime to get started.
Go to the console sign-in.
Step 2.) Launch EC2 instance.
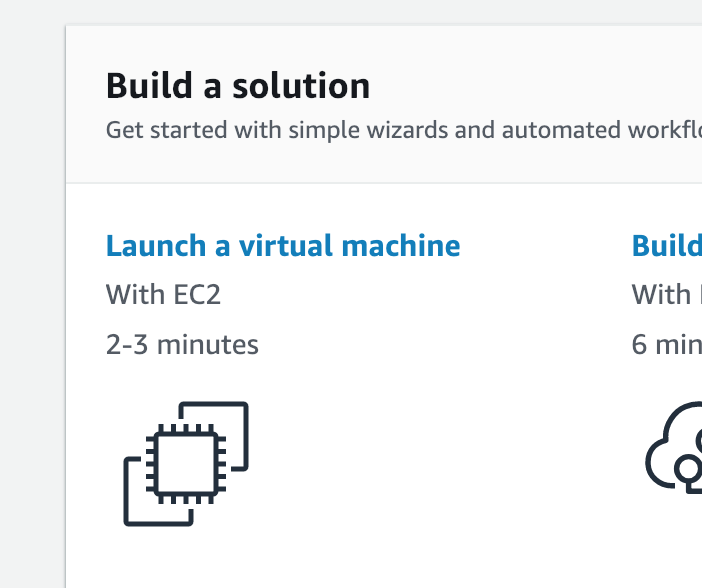
When you sign in, “Launch a virtual machine” with EC2 on your front page. Click that.
(Or, search “EC2” and click the “Launch Instance” button.)
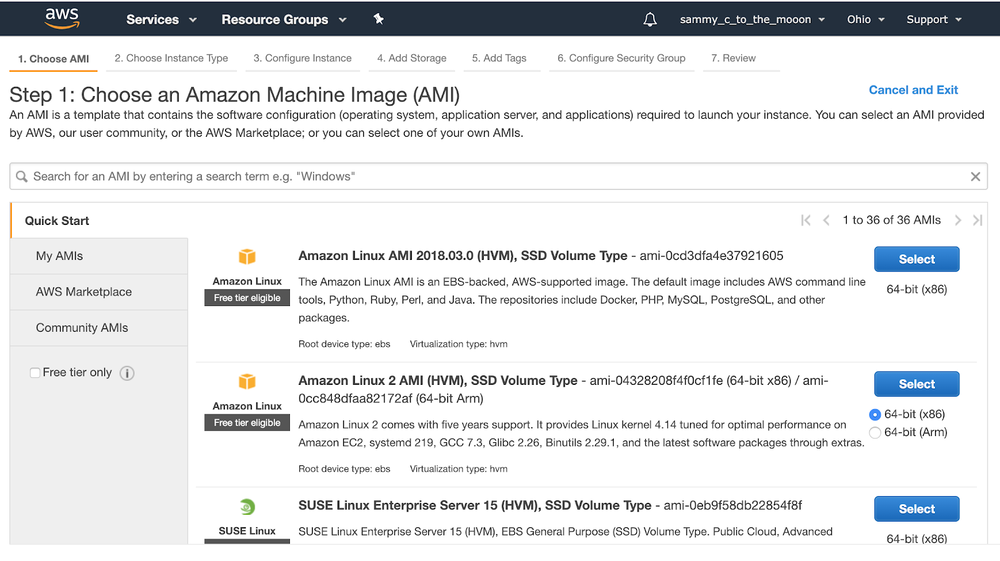
Click the “Amazon Linux 2 AMI” free tier eligible option.
Use the t2.micro free tier eligible and click “Review and Launch”.
You’ll get notified to set a security group if this is your first time create a new key pair and download the .pem file. You’ll need the path to this file later.
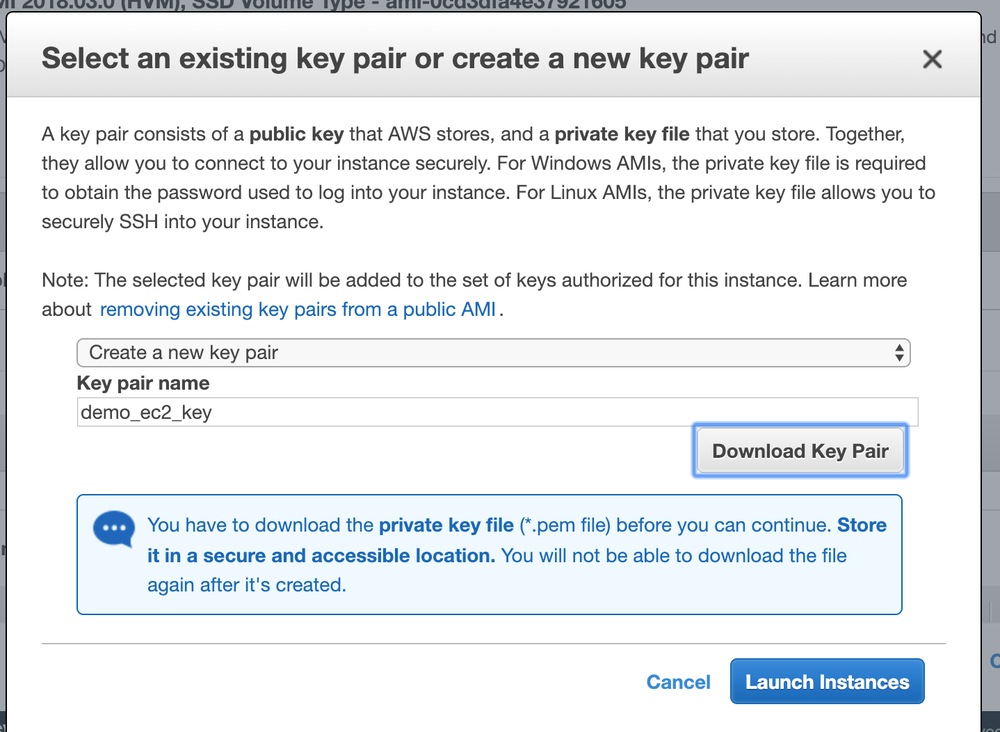
Click “Launch Instances”. Click the instance id link on the following page to go to your EC2 instances.
Step 3.) SSH to instance from local computer.
Your instance will take a bit to initialize, while it’s doing that, copy your public DNS.
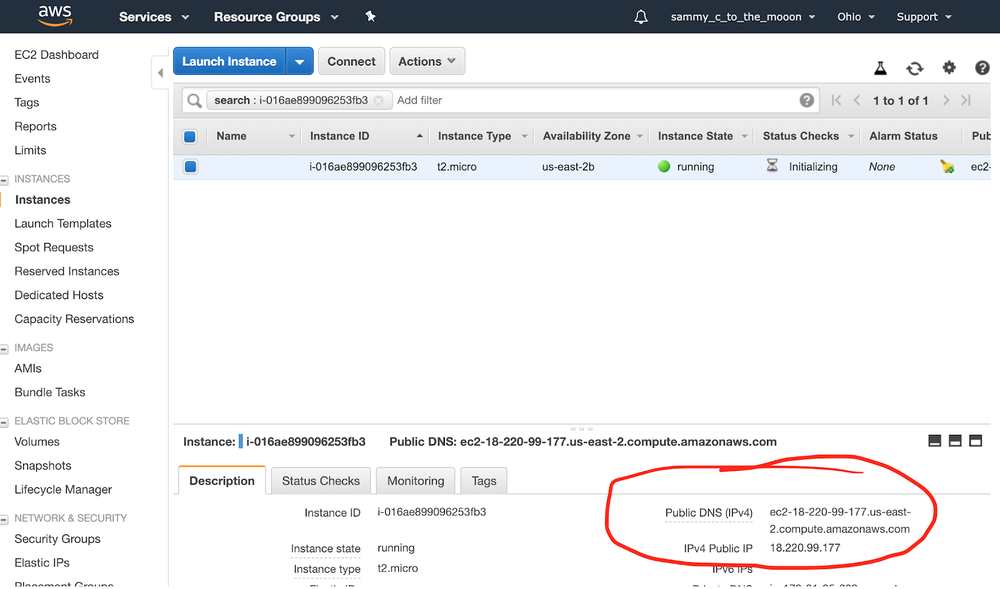
Open a terminal window (I’m doing this from Mac OSX) and type the following:
ssh -i [path to your key here] ec2-user@[your public DNS here]
My example:
ssh -i demo_ec2_key.pem ec2-user@ec2–18–220–99–177.us-east-2.compute.amazonaws.com(If you ever use a different image, your log-in may be ubuntu@[yourDNShere])
*Some troubleshooting may be required. In this case, my connection was timing out, so I searched “EC2 timeout” and found the solution. In my security group, I had to specify port 22 as inbound traffic. This was because I originally skipped the security group step above, by default your security group should include port 22 for inbound traffic.
How to fix your key permissions
The first time you try to connect, you’ll probably get “bad permissions” as a result:
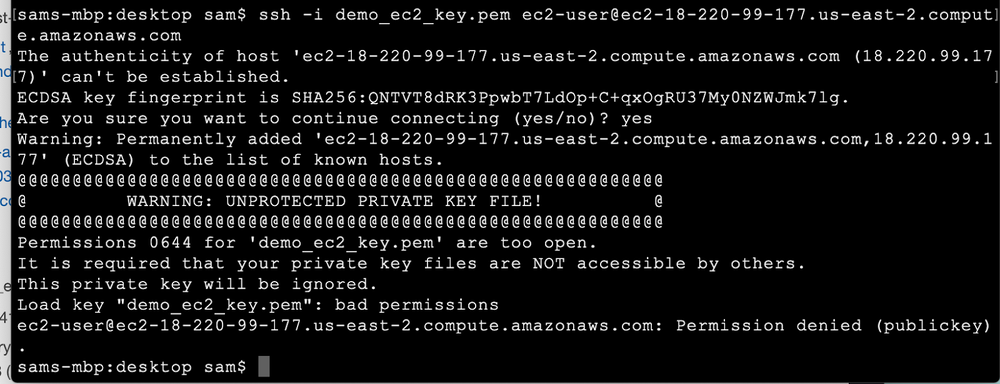
All you have to do fix this is run:
sudo chmod 600 [path to your key]Now run the command again. This screen means you did everything correctly:

Step 4.) Set up Alpaca Trade API.
Step 4A.) Install Python 3
Enter python -V to see what version of python you’re running. By default, I get 2.7. Run the following to install Python3.7:
sudo yum install python37Step 4B.) Install Alpaca Trade API
pip3 install --user alpaca-trade-api
Now your EC2 instance should be good to go! Keep this window up for later.
Step 5.) Copy your algo over to EC2.
For this tutorial, we’ll be running the following sample algorithm. The strategy is a simple EMA crossover, checking a list of stocks every 1 minute.
import alpaca_trade_api as tradeapi
import time
import datetime
from datetime import timedelta
from pytz import timezone
tz = timezone('EST')

import numpy as np
import pandas as pd

api = tradeapi.REST('your api key here',
                    'your api secret code here',
                    'https://paper-api.alpaca.markets')

import logging
logging.basicConfig(filename='./apca_algo.log', format='%(name)s - %(levelname)s - %(message)s')
logging.warning('{} logging started'.format(datetime.datetime.now().strftime("%x %X")))

def get_data_bars(symbols, rate, slow, fast):

    data = api.get_barset(symbols, rate, limit=20).df

    for x in symbols:
        data.loc[:, (x, 'fast_ema')] = data[x]['close'].rolling(window=fast).mean()
        data.loc[:, (x, 'slow_ema')] = data[x]['close'].rolling(window=slow).mean()
    return data

def get_signal_bars(symbol_list, rate, ema_slow, ema_fast):
    data = get_data_bars(symbol_list, rate, ema_slow, ema_fast)
    signals = {}
    for x in symbol_list:
        if data[x].iloc[-1]['fast_ema'] > data[x].iloc[-1]['slow_ema']: signal = 1
        else: signal = 0
        signals[x] = signal
    return signals

def time_to_open(current_time):
    if current_time.weekday() <= 4:
        d = (current_time + timedelta(days=1)).date()
    else:
        days_to_mon = 0 - current_time.weekday() + 7
        d = (current_time + timedelta(days=days_to_mon)).date()
    next_day = datetime.datetime.combine(d, datetime.time(9, 30, tzinfo=tz))
    seconds = (next_day - current_time).total_seconds()
    return seconds

def run_checker(stocklist):
    print('run_checker started')
    while True:
        # Check if Monday-Friday
        if datetime.datetime.now(tz).weekday() >= 0 and datetime.datetime.now(tz).weekday() <= 4:
            # Checks market is open
            print('Trading day')
            if datetime.datetime.now(tz).time() > datetime.time(9, 30) and datetime.datetime.now(tz).time() <= datetime.time(15, 30):
                signals = get_signal_bars(stocklist, '5Min', 20, 5)
                for signal in signals:
                    if signals[signal] == 1:
                        if signal not in [x.symbol for x in api.list_positions()]:
                            logging.warning('{} {} - {}'.format(datetime.datetime.now(tz).strftime("%x %X"), signal, signals[signal]))
                            api.submit_order(signal, 1, 'buy', 'market', 'day')
                            # print(datetime.datetime.now(tz).strftime("%x %X"), 'buying', signals[signal], signal)
                    else:
                        try:
                            api.submit_order(signal, 1, 'sell', 'market', 'day')
                            logging.warning('{} {} - {}'.format(datetime.datetime.now(tz).strftime("%x %X"), signal, signals[signal]))
                        except Exception as e:
                            # print('No sell', signal, e)
                            pass

                time.sleep(60)
            else:
                # Get time amount until open, sleep that amount
                print('Market closed ({})'.format(datetime.datetime.now(tz)))
                print('Sleeping', round(time_to_open(datetime.datetime.now(tz))/60/60, 2), 'hours')
                time.sleep(time_to_open(datetime.datetime.now(tz)))
        else:
            # If not trading day, find out how much until open, sleep that amount
            print('Market closed ({})'.format(datetime.datetime.now(tz)))
            print('Sleeping', round(time_to_open(datetime.datetime.now(tz))/60/60, 2), 'hours')
            time.sleep(time_to_open(datetime.datetime.now(tz)))

stocks = ['AA','AAL','AAPL','AIG','AMAT','AMC','AMD',
          'AMGN','AMZN','APA','BA','BABA','BAC','BBY',
          'BIDU','BP','C','CAT','CMG','COP','COST',
          'CSCO','CVX','DAL','DIA','DIS','EBAY',]

print('test:')
print(get_data_bars(['AA'], '5Min', 20, 5).head())

run_checker(stocks)
Open a new terminal window, and run the following:
scp -i [path to your key] [path to your algo] ec2-user@[your public DNS]:/~My example:
scp -i demo_ec2_key.pem apca_5min_ema.py ec2-user@ec2–18–220–99–177.us-east-2.compute.amazonaws.com:~/Go over to your original EC2 window, and run ls to check if the upload worked.
You should see your algorithm listed in the directory. Test it by running python3 apca_5min_ema.py.
Step 7.) Closing your terminal without quitting your algo.
Start a new instance of screen
In order to keep our algo running without quitting when we disconnect, we can use a handy Linux command, screen. Go ahead and run it.
This will pop up a new, blank terminal. It’s actually another window of your terminal. Now run python3 apca_algo.py.
Hit CTRL + A + D to detach the screen and return to your normal terminal.
Now you can type screen -ls to see your process is still running.
Typing tail apca_log.log confirms this as well, seeing the results in our log file.
Hit CTRL + D to logout of EC2 altogether.
Log into your Alpaca account, and confirm your orders are being placed.
Reconnecting to your screen
To get back to your algo, log into EC2 with SSH.
Run screen -ls to see what screens are running. You should see something like:
There is a screen on:
     3634.pts-0.ip-172–31–34–247 (Detached)
1 Socket in /var/run/screen/S-ec2-user.
That long screen id is what you’ll type in next to reconnect:
screen -r 3634.pts-0.ip-172–31–34–247Alternatively, if you just want to quit the screen you can use ps aux | grep apca_5min_algo.py to see the process ID:
ec2-user 3658 0.1 6.4 427400 65388 pts/1 S+ 22:14 0:00 python3 apca_5min_ema.py
ec2-user 3726 0.0 0.1 119468 1040 pts/0 S+ 22:20 0:00 grep — color=auto apca_5min_ema.py
Then, you can use screen-XS [process id] quit to quit the screen immediately. My example:
screen -SX 3658 quitFinally, confirm if you’ve quit your algo with screen -ls .
There you have it! This should give you a good starting point for spinning up new EC2 instances, navigating AWS, and managing your algorithms.
References:


Technology and services are offered by AlpacaDB, Inc. Brokerage services are provided by Alpaca Securities LLC (alpaca.markets), member FINRA/SIPC. Alpaca Securities LLC is a wholly-owned subsidiary of AlpacaDB, Inc.


