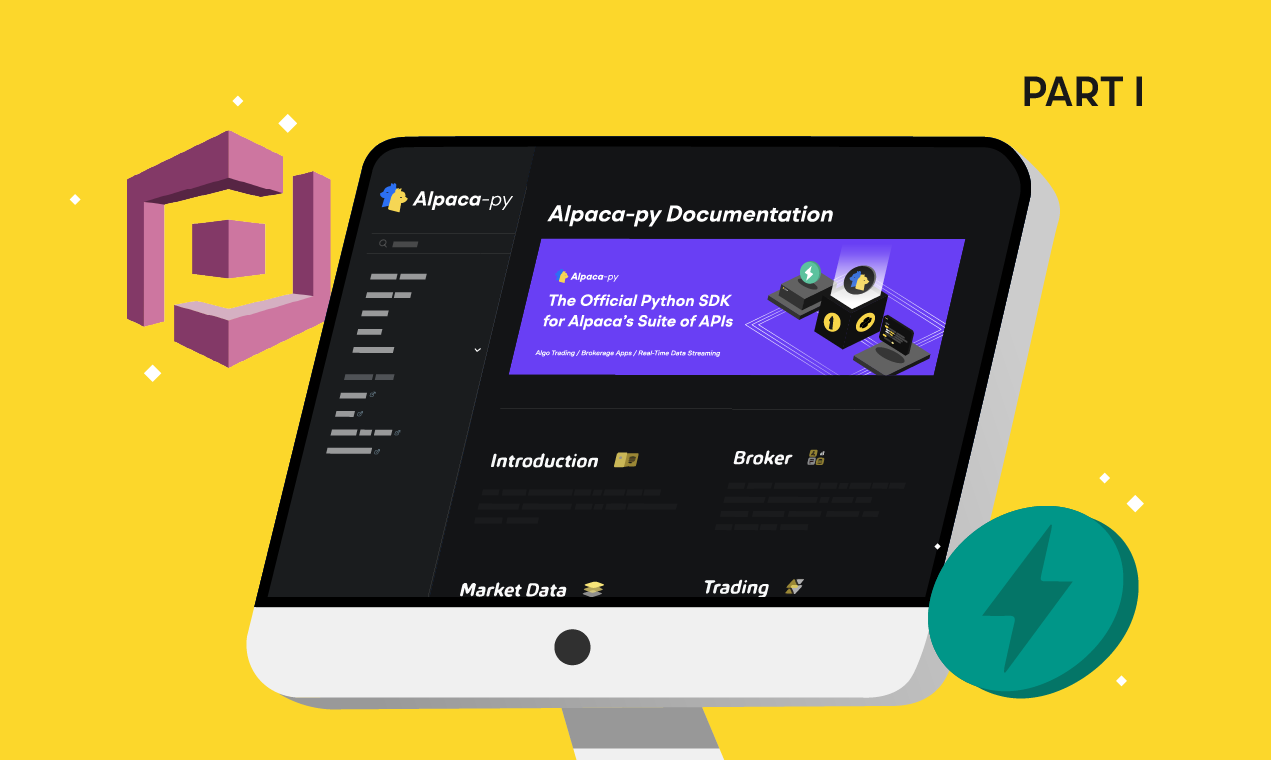
Alpaca has just released Alpaca-py, our official Python SDK for our suite of APIs. Alpaca-py includes many improvements and additions over the previous SDK, alpaca-trade-api. We’ll be using Alpaca-py to create our own brokerage using Broker API.
Broker API helps empower developers to build investment services. Some common examples would be a trading/investing app (non-financial institution), broker-dealer (fully-disclosed, non-disclosed, omnibus), and registered investment advisor (RIA).
Let’s apply the tools in Alpaca-py to create a backend for brokerage services. The implementation of this backend will be split up into a series of learn articles, this being part one. The current version of the backend can be found on GitHub. This article will lay the foundations for our backend, setting up our brokerage platform’s login and signup endpoints using FastAPI (a modern, high-performance web framework for building APIs) and user management system using Amazon Cognito.
Creating the Application and File Structure
First, install Alpaca-py. Open your terminal and enter the command:
pip install alpaca-pyCreate a new folder for this project. Inside, you’ll want to create the following file structure:
.
├── .env
├── app
│   ├── __init__.py
│   ├── config
│   │   └── database.py
│   ├── main.py
│   ├── models
│   │   └── models.py
│   ├── routers
│   │   └── routes.py
│   ├── schemas
│   │   └── schemas.py
│   ├── services
│   │   └── crud.py
│   └── utils
│       └── utils.py
└── tests
This structure enforces a separation of concerns and keeps things organized for the future. With the file structure out of the way, let’s start writing some code.
Getting Started with FastAPI and Creating Routes
To start using FastAPI, follow the official installation guide. Navigate inside your app folder and start editing main.py. Start off by importing FastAPI and instantiating the class.
from fastapi import FastAPI

app = FastAPI()
Inside of main, we could start writing our endpoints right now. But, in the interest of keeping things organized, we’ll be integrating FastAPI’s APIRouter class. This class allows us to write all of our routes inside of the routers folder instead of in the main file. Inside of routes.py, import the API router class (along with some others for the future) and instantiate an instance of it. From here we can start creating routes. Create the root endpoint with any message you want:
from fastapi import APIRouter, Request, Depends

router = APIRouter()

@router.get("/")
async def root():
    return {"message": "Server is running"}
With our router and first route set up, go back into main to integrate them. Import the routes module and use FastAPI’s method to include this router.
from fastapi import FastAPI

from .routers import routes

app = FastAPI()
app.include_router(routes.router)
This is all that’s needed for the initial setup with FastAPI. Test that your application runs by using uvicorn and hitting your root endpoint. From your project folder, the server can be started with
uvicorn app.main:app --reloadand you should be able to receive a response from your shiny new server:
{
    "message": "Server is running"
}
Everything is coming together nicely! Let’s continue by setting up our user management service, Amazon Cognito.
Setting up Amazon Cognito and Authentication
Cognito Setup and Configuration
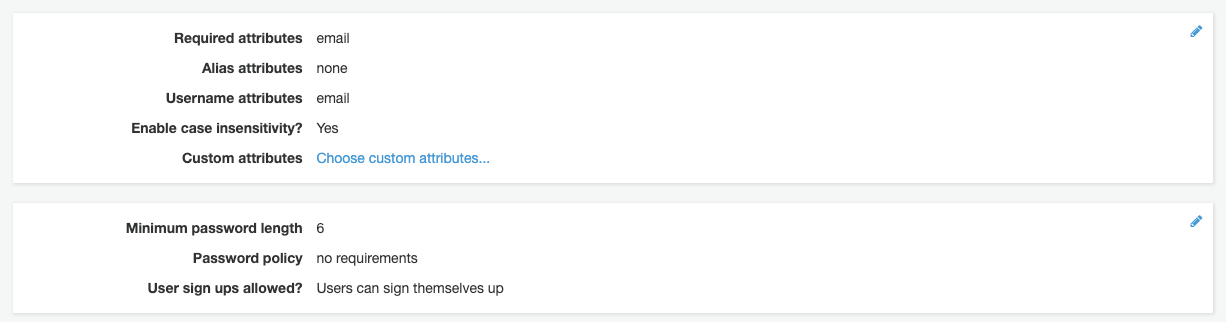
Amazon Cognito lets you add user sign-up, sign-in, and access control to your web and mobile apps quickly and easily. Sign up for an account and create a user pool. This example uses only email and password attributes in its user pool for simplicity. Note that in the following screenshots, I’m using the legacy interface for Cognito, not the new one.
Now that our user pool is set up, let’s configure the environment variables that come along with Cognito. The variables you’ll need to track down are:
COGNITO_USER_CLIENT_ID=
COGNITO_REGION_NAME=
USER_POOL_ID=
COGNITO_JWKS_PATH=
AWS_ACCESS_KEY_ID=
AWS_SECRET_ACCESS_KEY=
Navigate to the general settings of your user pool. In the middle of the page, you’ll see your user pool ID. Also attached to the user ID is your region, so add both to your app.

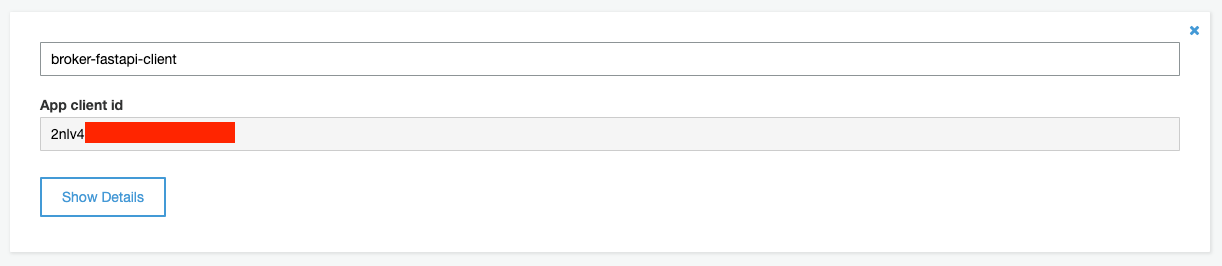
Click on your pool’s “App clients” settings and mark down the client ID here.
The path for your JWKs follows this formula:
https://cognito-idp.{region}.amazonaws.com/{userPoolId}/.well-known/jwks.jsonInsert your region and pool ID to get the correct path. Lastly, to find your AWS access key ID and secret, follow Amazon’s official guide.
Acquiring the Tools for Authentication
Authenticating users will be done through verification of a JSON Web Token (JWT). Amazon has supplied a developer’s guide for this process and how it works with Cognito. To simplify this process, we’ll be using a library called cognitojwt. Follow the instructions found on its Github page to install it and you’ll be set.
To enable easy interaction with AWS we’ll be using their official Python SDK, Boto3. Download it by following the instructions on Boto3’s official documentation.
Performing Authentication
There are two functions we need to create here: signing up a user new to our brokerage and logging in an existing user. In both cases, due to the configuration of this example’s user pool, we only need the username (email) and password. Open up your crud.py file and start off with the relevant imports.
import os
from dotenv import load_dotenv
load_dotenv()

import boto3
from fastapi import HTTPException

from ..utils import utils
Let’s start off by writing a small class to neatly return responses from Cognito. The important data we’d like to return are the access token, refresh token, and Cognito user ID. Create this class inside your utils folder.
class CognitoResponse(object):
    def __init__(self, access_token, refresh_token, cognito_user_id=None):
        self.access_token = access_token
        self.refresh_token = refresh_token
        self.cognito_user_id = cognito_user_id
Next, let’s start writing our signup function.
def cognito_signup(username: str, password: str):

    return signup_result
To start communicating with Cognito, first instantiate the SDK. Then, initiate the signup process by calling the client’s method, sign_up. A foreseeable problem here is that someone would try to sign up with the same email twice, forgetting they’ve already signed up. Therefore, put the signup call in a try block with an except to catch this error.
# In order to get the ID and authenticate, use AWS Cognito
client = boto3.client('cognito-idp', region_name=os.environ.get('COGNITO_REGION_NAME'))
try:
    response = client.sign_up(
        ClientId=os.environ.get('COGNITO_USER_CLIENT_ID'),
        Username=username,
        Password=password
    )
except Exception as e: # Generally, will trigger upon non-unique email
    raise HTTPException(status_code=400, detail=f"{e}")

user_sub = response['UserSub']
We’ll store the user sub for a future use-case. For the sake of this example, we’ll skip email confirmation for users signing up by manually confirming their account so we can go straight to authentication. Use the client’s method, admin_confirm_sign_up, and then initiate authentication with initiate_auth. The return object contains the access and refresh tokens, so make sure to store the response. Finally, put the user sub and tokens into the Cognito response class and return it.
# This will confirm user registration as an admin without a confirmation code
client.admin_confirm_sign_up(
    UserPoolId=os.environ.get('USER_POOL_ID'),
    Username=username,
)

# Now authenticate the user and return the tokens
auth_response = client.initiate_auth(
    ClientId=os.environ.get('COGNITO_USER_CLIENT_ID'),
    AuthFlow='USER_PASSWORD_AUTH',
    AuthParameters={
        'USERNAME': username,
        'PASSWORD': password
    }
)
access_token = auth_response['AuthenticationResult']['AccessToken']
refresh_token = auth_response['AuthenticationResult']['RefreshToken']

signup_result = utils.CognitoResponse(
    access_token=access_token,
    refresh_token=refresh_token,
    cognito_user_id=user_sub
)
return signup_result
Signup is now complete! Let’s write the login function.
def cognito_login(username: str, password: str):

    return login_result
This one is simpler because we skip right to initiating authentication from the user’s email and password. Instantiate the Boto3 client and call initiate_auth. Surround this in a try-block so that we can catch the error in case of a user putting in the wrong authentication details (very common!).
client = boto3.client('cognito-idp', region_name=os.environ.get('COGNITO_REGION_NAME'))
# Authenticate the user and return the tokens
try:
    auth_response = client.initiate_auth(
        ClientId=os.environ.get('COGNITO_USER_CLIENT_ID'),
        AuthFlow='USER_PASSWORD_AUTH',
        AuthParameters={
            'USERNAME': username,
            'PASSWORD': password
        }
    )
except Exception as e: # Generally, will trigger upon wrong email/password
    raise HTTPException(status_code=400, detail=f"{e}")
Finally, save the token information from the response of the authentication and return it.
access_token = auth_response['AuthenticationResult']['AccessToken']
refresh_token = auth_response['AuthenticationResult']['RefreshToken']
login_result = utils.CognitoResponse(
    access_token=access_token,
    refresh_token=refresh_token
)
return login_result
That’s our platform’s login and signup taken care of! Let’s finish off the coding by putting these functions inside our routes.
Putting FastAPI and Cognito Together
Our platform signup and login endpoints will take user email and password as parameters. In taking these query parameters, use Pydantic to validate the inputs. Inside schemas.py import the BaseModel class from Pydantic. Create a User schema that has an email and password, ensuring these are both of type str.
from pydantic import BaseModel

# For use with Cognito
class User(BaseModel):
    email: str
    password: str
Import this schema back into routes for validation. While you’re at it, import the CRUD functions for signup and login too.
from ..schemas import schemas
from ..services import crud
Starting off with platform signup, define your path operation decorator how you see fit, but make sure it’s a POST request. The path operation function will be creating a user and will take a User as input. Pass the inputted email and password into the Cognito signup function from earlier and return the result to complete this endpoint.
# User signs up for the platform
@router.post("/platform/signup")
async def create_user(user: schemas.User):
    username = user.email
    password = user.password
    signup_result = crud.cognito_signup(username, password)
    return signup_result
Start the login endpoint the same, making sure to change the path appropriately. Pass the inputted username and password into your Cognito login function and return the result to complete this endpoint.
# User logs into the platform
@router.post("/platform/login")
async def login_user(user: schemas.User):
    username = user.email
    password = user.password
    login_result = crud.cognito_login(username, password)
    return login_result
We’re all done now! Use uvicorn to launch your server and test it out by making some requests.
Example request:
POST /platform/signup

{
  "email": "[email protected]",
  "password": "password"
}
Response:
{
  "access_token": "[OMITTED]",
  "refresh_token": "[OMITTED]",
  "cognito_user_id": "[OMITTED]"
}
Conclusion
In this article we’ve laid the foundation for Alpaca-py’s Broker API to come alive. The management system for our brokerage platform has been created using FastAPI and Boto3. The next article is when we’ll really see Alpaca-py’s utility, so stay tuned!
Please note that this article is for general informational purposes only. All screenshots are for illustrative purposes only.
Alpaca does not prepare, edit, or endorse Third Party Content. Alpaca does not guarantee the accuracy, timeliness, completeness or usefulness of Third Party Content, and is not responsible or liable for any content, advertising, products, or other materials on or available from third party sites.
Securities brokerage services are provided by Alpaca Securities LLC ("Alpaca Securities"), member FINRA/SIPC, a wholly-owned subsidiary of AlpacaDB, Inc. Technology and services are offered by AlpacaDB, Inc.
Cryptocurrency services are made available by Alpaca Crypto LLC ("Alpaca Crypto"), a FinCEN registered money services business (NMLS # 2160858), and a wholly-owned subsidiary of AlpacaDB, Inc. Alpaca Crypto is not a member of SIPC or FINRA. Cryptocurrencies are not stocks and your cryptocurrency investments are not protected by either FDIC or SIPC. Please see the Disclosure Library for more information.
This is not an offer, solicitation of an offer, or advice to buy or sell cryptocurrencies, or open a cryptocurrency account in any jurisdiction where Alpaca Crypto is not registered or licensed, as applicable.