In part one of this series, we built out our brokerage platform’s signup and login functionality. In this article, we’ll build out the endpoints for brokerage account signup and querying for a brokerage account by ID. The current version of the backend can be found on the AlpacaHQ GitHub.
To get access to Alpaca Broker API, you need a broker account (different from an Alpaca Trading API account). If you don’t have one yet, sign up for free today.
Setting up the Database (DB) and Object Relational Mapper (ORM)
A database is a crucial part of any backend, used for storing, maintaining, and accessing any sort of data. Some relevant use cases are storing account information, reward programs, and assets. An ORM equips developers with the ability to interact with the database using their chosen language (in this case, Python). Our ORM has the tools to convert (“map”) between objects in code and database tables (“relations”). The objects we create will be an instance of a class (model) each representing a row, and each attribute representing a column of that table. Let’s start by setting up the database.
The database chosen for this backend is PostgreSQL (Postgres), an open source, process-based, relational database. Follow the instructions to install Postgres on the official website. You may also want to install pgAdmin, which is a GUI tool used to interact with Postgres database sessions. After installing the database, start the database server.
With the database up and running, let’s integrate it into the backend. Open your database.py file within the config folder. Follow the official FastAPI guide on setting up a database with SQLAlchemy up to, but not including, where the guide starts creating database models. Your database file should look similar to
import os
from dotenv import load_dotenv
load_dotenv()

from sqlalchemy import create_engine
from sqlalchemy.ext.declarative import declarative_base
from sqlalchemy.orm import sessionmaker

db_username = os.environ.get('DB_USERNAME')
db_password = os.environ.get('DB_PASSWORD')
SQLALCHEMY_DATABASE_URL = f"postgresql://{db_username}:{db_password}@localhost/broker-db"

engine = create_engine(SQLALCHEMY_DATABASE_URL, echo=True)

SessionLocal = sessionmaker(autocommit=False, autoflush=False, bind=engine)

Base = declarative_base()
There are a few minor changes we’ve made to the guide’s code. The above code stores the database username and password as environment variables and then uses an f-string to create the database URL. In the database session, we’ve also passed in optional parameters to create_engine so that SQL statements are printed to the console. There are two more functions to create in the database file. One for yielding and closing the DB, and one for creating your tables.
def get_db():
    db = SessionLocal()
    try:
        yield db
    finally:
        db.close()


def create_tables():
    Base.metadata.create_all(bind=engine)
This completes the database setup. Before moving on to creating models, we’ll do some imports inside of routes.py. These imports are for the creation and passing of the database session into our CRUD functions. Additionally, you’ll want to call the create_tables function.
from fastapi import APIRouter, Request, Depends
from sqlalchemy.orm import Session
from uuid import UUID

from ..schemas import schemas
from ..services import crud
from ..config import database

database.create_tables()

router = APIRouter()
Creating the Account Model and Schema
The Account Model
As mentioned before, models help us interact with our database. The account attributes we’ll choose to store in the database will follow the attributes shown on the Broker API dashboard, plus a password.

Open your models.py file and start by importing the relevant types and classes used.
from sqlalchemy import Boolean, Column, String, Float, DateTime
from sqlalchemy.dialects.postgresql import UUID
from uuid import uuid4

from ..config.database import Base
Now write the Account model according to the attribute types we can intuit from the screenshot. Ensure that your class inherits from the declarative_base class and has a private variable for the table’s name.
class Account(Base):
    __tablename__ = "accounts"

    id = Column(UUID(as_uuid=True), primary_key=True, index=True, default=uuid4)
    name = Column(String, index=True)
    email = Column(String, index=True)
    equity = Column(Float, default=float(0))
    is_active = Column(Boolean, default=True)
    created_at = Column(DateTime)
    hashed_password = Column(String)
The Account Schema
A schema (confusingly, also called a model) is a class used to validate the incoming data to a route. The validation and parsing are done by a library called pydantic. Pydantic ensures that we’re always passing around data in the structure and types that we expect to be. The account schema should ultimately have nearly identical properties as our account model.
In creating the schema for our accounts, you’ll want to ensure that you’re taking in an account's password to store inside the database for login purposes, but never returning it upon querying for that account. Therefore we’ll create 3 classes, one base class, one class for account creation, and one class for returning information about an account. Both the account creation and account information classes should inherit from the base class. Inside schemas.py, start by adding to your imports.
from datetime import datetime
from uuid import UUID

from pydantic import BaseModel
For our purposes, a user will enter a name, email, and password for account creation. Therefore, the base class should enforce a name and email, and the account creation class should enforce a password.
class AccountBase(BaseModel):
    name: str
    email: str


class AccountCreate(AccountBase):
    password: str
Lastly, the final account class should include the rest of the attributes that are defined earlier inside the model. It is crucial that this class sets its Config property orm_mode to True so that the class supports mapping to ORM objects.
class Account(AccountBase):
    id: UUID
    equity: float
    is_active: bool
    created_at: datetime

    class Config:
        orm_mode = True
Creating the Brokerage Account Endpoints
If you don’t yet have a Broker API account, sign up for a free account now. Follow the steps to generate your API keys and securely save them for later.
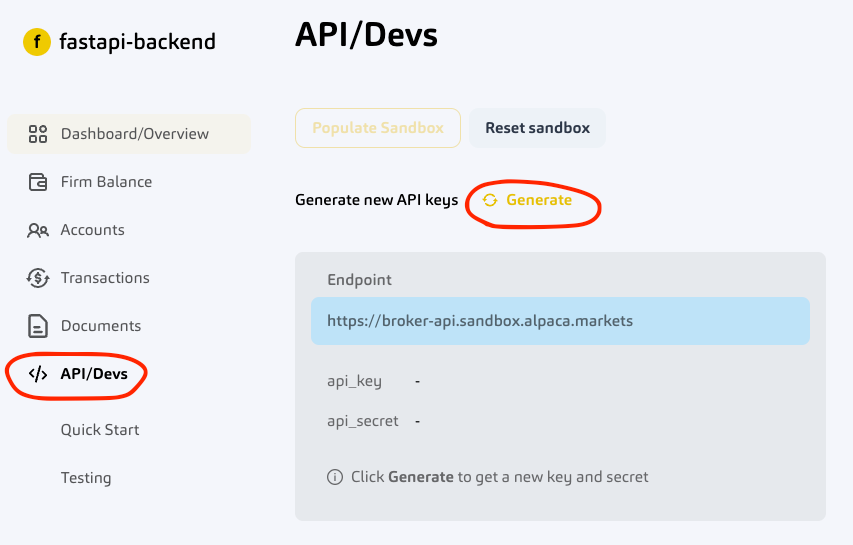
You can also run through the quick start guide to get a good introduction to some of the Broker API features. If you already have an account but forgot to save your API keys, click on “API/Devs” and then “Generate” to generate a new set of API keys.
Once you have your API keys, save them as environment variables so that you can safely access them within the project.
APCA_BROKER_API_KEY={Your-API-Key-Here}
APCA_BROKER_API_SECRET={Your-API-Secret-Here}
Create a New Brokerage Account (Signup)
The flow of the brokerage account signup process should roughly follow these steps:
- Verify the access token (obtained through either platform login or signup)
- Check if the signup email has already registered
- Create the brokerage account using Alpaca-py
- Create an account object modeling a row in the accounts database
- Commit that object to the database
- Return the account model as a response
Defining the Route
Inside the routes module, define the appropriate path operation and path function. These can be called what you like, but ensure the HTTP method is POST. Pass into the function the account creation schema, request class, and database session. Inside the function make a call to your create account function (which we haven’t written yet) and return the new account as a response.
# Sign up for brokerage account
@router.post("/accounts/signup")
async def create_brokerage_account(account: schemas.AccountCreate, request: Request, db: Session = Depends(database.get_db)):
    account = crud.create_account(db=db, account=account, request=request)
    return account
Let’s define the rest of this endpoint’s functionality by following the flow discussed earlier.
Writing a Function for JSON Web Token (JWT) Verification
As mentioned before, authenticating users will be done through verification of a JWT. Amazon’s developer guide explains the process of this JWT verification. Our backend makes use of cognitojwt to simplify this process. In particular, you’ll want to download the synchronous mode of cognitojwt. If you haven’t installed it yet, follow the instructions on its Github page.
Go to utils.py and start with the relevant imports.
import os
from dotenv import load_dotenv
load_dotenv()
import cognitojwt

from fastapi import HTTPException
Define your authentication function and start it off by instantiating the Cognito variables necessary for your pool: region, user pool ID, and user client ID. Use the decode function from cognitojwt on your access token and optionally save the response. Inside this response, you can access useful user properties like the user’s Cognito user sub. Cognitojwt’s decode function will throw an exception in the case that the token is not valid, so wrap decode inside a try-except.
def authenticate_token(access_token: str):
    REGION = os.environ.get('COGNITO_REGION_NAME')
    USERPOOL_ID = os.environ.get('USER_POOL_ID')
    APP_CLIENT_ID = os.environ.get('COGNITO_USER_CLIENT_ID')
    # Attempt to decode the access token
    try:
        # Can get user properties from these claims
        verified_claims: dict = cognitojwt.decode(
            access_token,
            REGION,
            USERPOOL_ID,
            app_client_id=APP_CLIENT_ID
        )
    except:
        raise HTTPException(
            status_code=401,
            detail="User is not authorized to get this resource"
        )
Checking the Database for Duplicate Signup Email
This function will be reading the database and hence defined inside crud.py. Start off with all the imports used. In addition, import the modules and functions necessary for the proceeding CRUD functions as well.
import os
from dotenv import load_dotenv
load_dotenv()

import boto3
from datetime import datetime
from faker import Faker
from sqlalchemy.orm import Session
from fastapi import HTTPException, Request
from uuid import UUID

from alpaca.broker.client import BrokerClient
from alpaca.broker.models import (
                        Contact,
                        Identity,
                        Disclosures,
                        Agreement
                    )
from alpaca.broker.requests import CreateAccountRequest
from alpaca.broker.enums import TaxIdType, FundingSource, AgreementType

from ..schemas import schemas
from ..models import models
from ..utils import utils
Checking for a duplicate email is as simple as querying for this email within the database. In addition to taking an email as a parameter, take the request object and database so you can access both of them. Authenticate the access token, query the database, and return the queried account to complete this function.
def get_account_by_email(db: Session, email: str, request: Request):
    # Authenticate token before querying DB
    access_token = request.headers.get('access-token')
    utils.authenticate_token(access_token)

    account = db.query(models.Account).filter(models.Account.email == email).first()
    return account
It’s important to note that, if the database has no matches, account will be None.
Creating a Brokerage Account with Alpaca-py
Make sure you’ve imported everything from the previous step before defining your account creation functions. This section details 3 steps of the signup flow, creating a brokerage account, committing it to the database, and returning the resulting model.
Alpaca-py makes using Broker API very intuitive. Brokerage account creation is outlined in the official docs, so this example will skim over the lower-level details. Creating a brokerage account requires many details (address, names, disclosures, etc.), so for the purposes of this backend example, we’ll simplify it down to just an email and first name. For the other details, use Faker to generate fake information.
Start your function by instantiating Faker. Next, instantiate the Broker API client as in the docs using your API keys. Use Faker to generate contact and identity data, and then define the disclosure, agreement, and account data as in the docs example. Submit your account request using the broker client and return that response to finish this function.
def create_broker_account(email: str, first_name: str):
    fake = Faker()

    BROKER_API_KEY = os.environ.get("APCA_BROKER_API_KEY")
    BROKER_SECRET_KEY = os.environ.get("APCA_BROKER_API_SECRET")

    broker_client = BrokerClient(
                    api_key=BROKER_API_KEY,
                    secret_key=BROKER_SECRET_KEY,
                    sandbox=True,
                    )

    contact_data = Contact(
            email_address=email,
            phone_number=fake.phone_number(),
            street_address=[fake.street_address()],
            city=fake.city(),
            state=fake.state_abbr(),
            postal_code=fake.postcode(),
            country=fake.country()
            )
    # Identity
    identity_data = Identity(
            given_name=first_name,
            middle_name=fake.first_name(),
            family_name=fake.last_name(),
            date_of_birth=str(fake.date_of_birth(minimum_age=21, maximum_age=81)),
            tax_id=fake.ssn(),
            tax_id_type=TaxIdType.USA_SSN,
            country_of_citizenship="USA",
            country_of_birth="USA",
            country_of_tax_residence="USA",
            funding_source=[FundingSource.EMPLOYMENT_INCOME]
            )

    # Disclosures
    disclosure_data = Disclosures(
            is_control_person=False,
            is_affiliated_exchange_or_finra=False,
            is_politically_exposed=False,
            immediate_family_exposed=False,
            )

    # Agreements
    agreement_data = [
        Agreement(
        agreement=AgreementType.MARGIN,
        signed_at="2020-09-11T18:09:33Z",
        ip_address="185.13.21.99",
        ),
        Agreement(
        agreement=AgreementType.ACCOUNT,
        signed_at="2020-09-11T18:13:44Z",
        ip_address="185.13.21.99",
        ),
        Agreement(
        agreement=AgreementType.CUSTOMER,
        signed_at="2020-09-11T18:13:44Z",
        ip_address="185.13.21.99",
        ),
        Agreement(
        agreement=AgreementType.CRYPTO,
        signed_at="2020-09-11T18:13:44Z",
        ip_address="185.13.21.99",
        )
    ]

    # ## CreateAccountRequest ## #
    account_data = CreateAccountRequest(
                            contact=contact_data,
                            identity=identity_data,
                            disclosures=disclosure_data,
                            agreements=agreement_data
                            )

    # Make a request to create a new brokerage account
    account = broker_client.create_account(account_data)
    return account
This function will be called from our other account creation function, crud.create_account. In the definition, pass in the database, account object, and request object. Start by checking the database for duplicate emails. Make sure to raise an exception here if the email exists already.
def create_account(db: Session, account: schemas.AccountCreate, request: Request):
    # Check if email already exists in the DB
    db_account = get_account_by_email(db, email=account.email, request=request)
    if db_account:
        raise HTTPException(status_code=400, detail="Email already registered")
Pull the relevant account information from the account object and pass it into your brokerage account creation function. In this step, you will want to store passwords safely but for the sake of example, we won’t be. The new account should use two properties returned from the call to Broker API, id and created_at.
    name = account.name
    email = account.email
    password = account.password
    hashed_password = password + "notreallyhashed"

    # Use Alpaca-py to create broker account
    broker_account = create_broker_account(email=email, first_name=name)
    id = broker_account.id # Is type UUID
    created_at = broker_account.created_at
    DATE_FORMAT = "%Y-%m-%dT%H:%M:%S.%fZ"
    created_at = datetime.strptime(created_at, DATE_FORMAT)
Create a model for this new account and commit this new user to the database. Return the model.
    # After getting ID and authenticating, create model and store it in DB
    db_account = models.Account(
        id=id,
        name=name,
        email=email,
        created_at=created_at,
        hashed_password=hashed_password
    )
    db.add(db_account)
    db.commit()
    db.refresh(db_account)
    return db_account
Get Brokerage Account by ID
The flow of getting a brokerage account by ID should roughly follow this process:
- Verify the access token (obtained through either platform login or signup)
- Query the database for an account with the input ID
- Return the account if it exists
Defining the Route
As with the last endpoint, define the appropriate path operation and path function inside routes. This endpoint differs from the last in that the path should include the account ID as a path parameter and the HTTP method should be GET. Pass the database, account ID, and request into crud.get_account, (not defined yet) and return the resulting account.
# Get brokerage account
@router.get("/accounts/{account_id}", response_model=schemas.Account)
async def get_brokerage_account(account_id: UUID, request: Request, db: Session = Depends(database.get_db)):
    db_account = crud.get_account(db, account_id=account_id, request=request)
    return db_account
All that’s left is to define is get_account.
Querying the Database by Account ID
After defining your function within crud.py, verify the access token to ensure the user has logged in. Then simply query the accounts table for accounts matching the given ID and return the first account. Since ID is unique, the number of rows returned by this query will always be less than or equal to one. If no user is found, throw an exception.
def get_account(db: Session, account_id: UUID, request: Request):
    # Authenticate token before querying DB
    access_token = request.headers.get('access-token')
    utils.authenticate_token(access_token)

    db_user = db.query(models.Account).filter(models.Account.id == account_id).first()
    if db_user is None:
        raise HTTPException(status_code=404, detail="User not found")
    return db_user
Both endpoints are now complete!
Conclusion
Our backend has added two new endpoints that allow users on the platform to create a brokerage account and filter brokerage accounts by ID. We covered how you can start using Alpaca-py’s Broker API, how to validate data with pydantic, and how to set up and interact with a PostgreSQL database using SQLAlchemy. This series is just getting juicer so keep watching for the next part! In the meantime, check out how you can start algotrading bitcoin with Bollinger bands and RSI.
Please note that this article is for general informational purposes only. All screenshots are for illustrative purposes only.
Alpaca does not prepare, edit, or endorse Third Party Content. Alpaca does not guarantee the accuracy, timeliness, completeness or usefulness of Third Party Content, and is not responsible or liable for any content, advertising, products, or other materials on or available from third party sites.
Securities brokerage services are provided by Alpaca Securities LLC ("Alpaca Securities"), member FINRA/SIPC, a wholly-owned subsidiary of AlpacaDB, Inc. Technology and services are offered by AlpacaDB, Inc.
Cryptocurrency services are made available by Alpaca Crypto LLC ("Alpaca Crypto"), a FinCEN registered money services business (NMLS # 2160858), and a wholly-owned subsidiary of AlpacaDB, Inc. Alpaca Crypto is not a member of SIPC or FINRA. Cryptocurrencies are not stocks and your cryptocurrency investments are not protected by either FDIC or SIPC. Depending on your location, cryptocurrency services may be provided by West Realm Shires Services, Inc., d/b/a FTX US (NMLS #1957771). Please see the Disclosure Library for more information.
This is not an offer, solicitation of an offer, or advice to buy or sell securities or cryptocurrencies, or open a brokerage account or cryptocurrency account in any jurisdiction where Alpaca Securities, Alpaca Crypto, or FTX US respectively, are not registered or licensed, as applicable.